
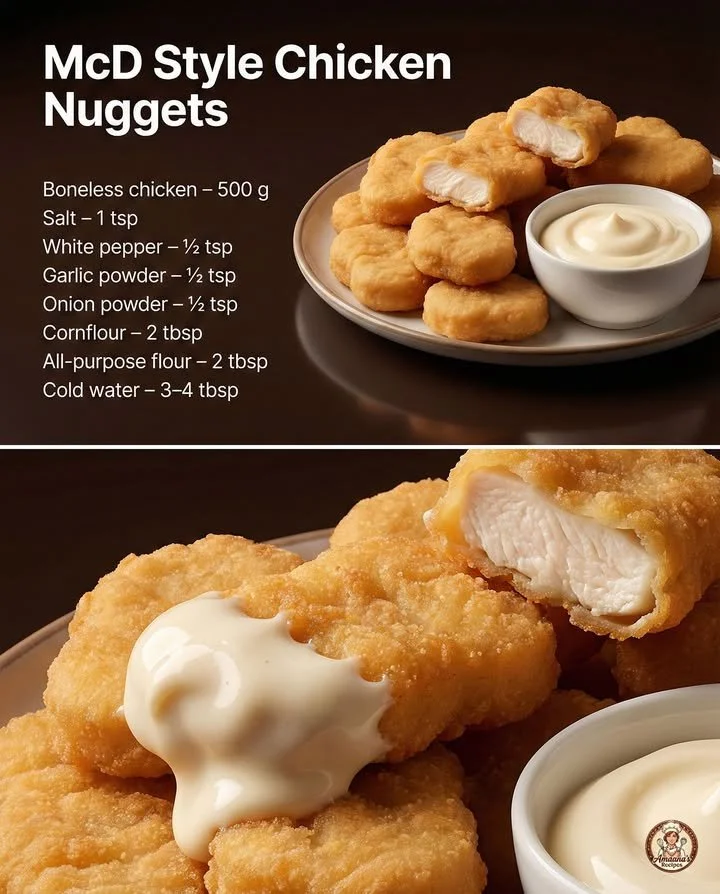
Welcome to my kitchen! Today, I’m excited to share a recipe that brings a little fast-food magic right to my home: McD Style Chicken Nuggets. There’s something so comforting about biting into a golden, crispy nugget, especially when you can whip them up yourself. I’ve been experimenting with this recipe for a while now, and I can’t wait for you to try it!
Why You’ll Love This Recipe
What’s not to love about chicken nuggets? They are crispy on the outside, tender on the inside, and perfect for dipping in your favorite sauces. Making them at home not only lets you control the ingredients but also brings fun to my kitchen while satisfying those late-night cravings. Plus, they’re great for meal prep, parties, or just a cozy night in. Trust me; once you make them, you’ll be hooked! (See the ingredients in the next page below…)
Ingredients
- 1 pound of boneless, skinless chicken breast
- 1 cup of all-purpose flour
- 1 teaspoon baking powder
- 1 teaspoon salt
- 1/2 teaspoon black pepper
- 1 cup of buttermilk
- 2 teaspoons garlic powder
- 1 teaspoon onion powder
- 1 teaspoon paprika
- 1/2 teaspoon cayenne pepper (optional for heat)
- Oil for frying
Equipment Needed
- Large mixing bowl
- Knife and cutting board
- Whisk
- Deep frying pan or deep fryer
- Cooking thermometer
- Slotted spoon or tongs
- Paper towels for draining
Step-by-Step Instructions
Let’s get started! First, I like to chop the chicken breasts into small, bite-sized pieces. This helps them fry up evenly and gives that perfect nugget shape. It’s also a good idea to let the chicken marinate in buttermilk for at least 30 minutes. This step not only tenderizes the meat but infuses a lovely flavor that you just can’t skip! After that, I mix all the dry ingredients – flour, baking powder, salt, and spices – in a large bowl. It’s amazing how just a few ingredients can enhance the taste of the nuggets! (See the next page below to continue steps…)
Next, I heat up the oil in my frying pan—good quality oil makes a huge difference. Once it’s hot (around 350°F), I take the marinated chicken pieces out, letting the excess buttermilk drip off, and then dredge them in the flour mixture. It’s important to coat them well to achieve that crispy, crunchy exterior. I gently place the nuggets in the hot oil, being careful not to overcrowd the pan. Fry them for about 4-5 minutes on each side or until golden brown. The sizzle of the nuggets hitting the oil is music to my ears!
Once they’re perfectly golden, I use a slotted spoon to remove the nuggets and place them on a plate lined with paper towels to absorb any excess oil. My kitchen smells heavenly at this point! I always give them a final sprinkle of salt while they’re still hot for extra flavor.
Pro Tips for Best Results
I tested this recipe three ways: frying, baking, and air-frying. While the fried version is undeniably delicious, the air-fried nuggets were surprisingly tasty and much healthier! If you opt for the air fryer, spray them with a little cooking oil to get that desired crispiness without deep frying.
Another tip I can give you is to let the nuggets rest for a minute or two after frying. This helps the crust set and keeps your nuggets deliciously crunchy. I found that a resting period allows the steam to escape, avoiding sogginess.
Finally, you can play around with the spices. I love adding a bit of smoked paprika or even some Italian herbs for a different flavor twist. Experimenting is part of the fun, and you might just discover your new favorite combo!
Common Mistakes to Avoid
One common mistake I made when starting out was not letting the oil reach the right temperature. If the oil is too cold, the nuggets soak up oil and become greasy instead of crispy. A cooking thermometer is my best friend here; it helps keep me on track.
Another thing to watch out for is overcrowding the frying pan. I learned this the hard way! When you add too many nuggets at once, they steam instead of fry, resulting in a disappointing texture. It’s so worth it to fry them in batches to ensure everyone gets that perfect crunch.
Also, be careful with the flour mixture; I found that it helps to use a good quality all-purpose flour for the best texture. Lower quality flour can lead to a gummy coating that sticks together rather than crisps up nicely.
Lastly, make sure to adjust the seasoning according to your taste. Some might like a bit more heat, while others prefer a mild flavor. It’s always good to taste and adjust before frying. (See the next page below to continue…)
Serving Suggestions
Serving these chicken nuggets is almost as fun as making them! I love to present them with an array of dipping sauces: honey mustard, barbecue sauce, and a classic ketchup—talk about a crowd-pleaser! For a fun twist, I often make a spicy dipping sauce using mayonnaise mixed with a bit of Sriracha. It’s a hit!
For those cozy nights in, I enjoy pairing the nuggets with some homemade fries and a crisp green salad. The contrast between the crispy nuggets and fresh salad leaves adds a nice balance to the meal.
If I’m feeling a bit extra, I’ll even whip up a batch of cheesy pasta to go alongside. It makes for a hearty dinner that satisfies those comfort food cravings.
Variations & Customizations
You can easily customize these nuggets to your liking. If you’re looking for something a bit more sophisticated, try adding some grated Parmesan cheese to the flour mixture for an extra punch of flavor.
If you want to keep it plant-based, there are so many great alternatives available now! Try using a plant-based chicken substitute and follow the same preparation steps. They turn out just as crispy and delicious!
And let’s not forget about making them into chicken nugget sliders. Just pop them in a small bun with some lettuce and your choice of sauce for a fun party appetizer or a casual meal.
How to Store, Freeze & Reheat
If you have any leftovers (which, let’s be honest, doesn’t happen often in my house!), you can store them in an airtight container in the refrigerator for up to three days. Just make sure they cool completely before sealing to avoid condensation.
Freezing is a great option if you want to meal prep! I like to lay the cooked nuggets on a baking sheet to freeze individually before transferring them to a freezer-safe bag. They can last there for about three months. Just remember to label them so you don’t forget when you made them!
When it’s time to reheat, I recommend using the air fryer or oven to retain that crispy texture. Preheat the air fryer to 375°F and heat for 5-7 minutes. If you’re using an oven, preheat to 400°F and bake for about 10-12 minutes. Avoid the microwave if possible, as it can make them soggy!
Conclusion
And there you have it! McD Style Chicken Nuggets made right in your kitchen. I hope you enjoy making and devouring these delightful nuggets as much as I do. It’s all about sharing good food with the ones we love, and there’s nothing quite like the smell of freshly fried chicken nuggets filling the house. Happy cooking!