
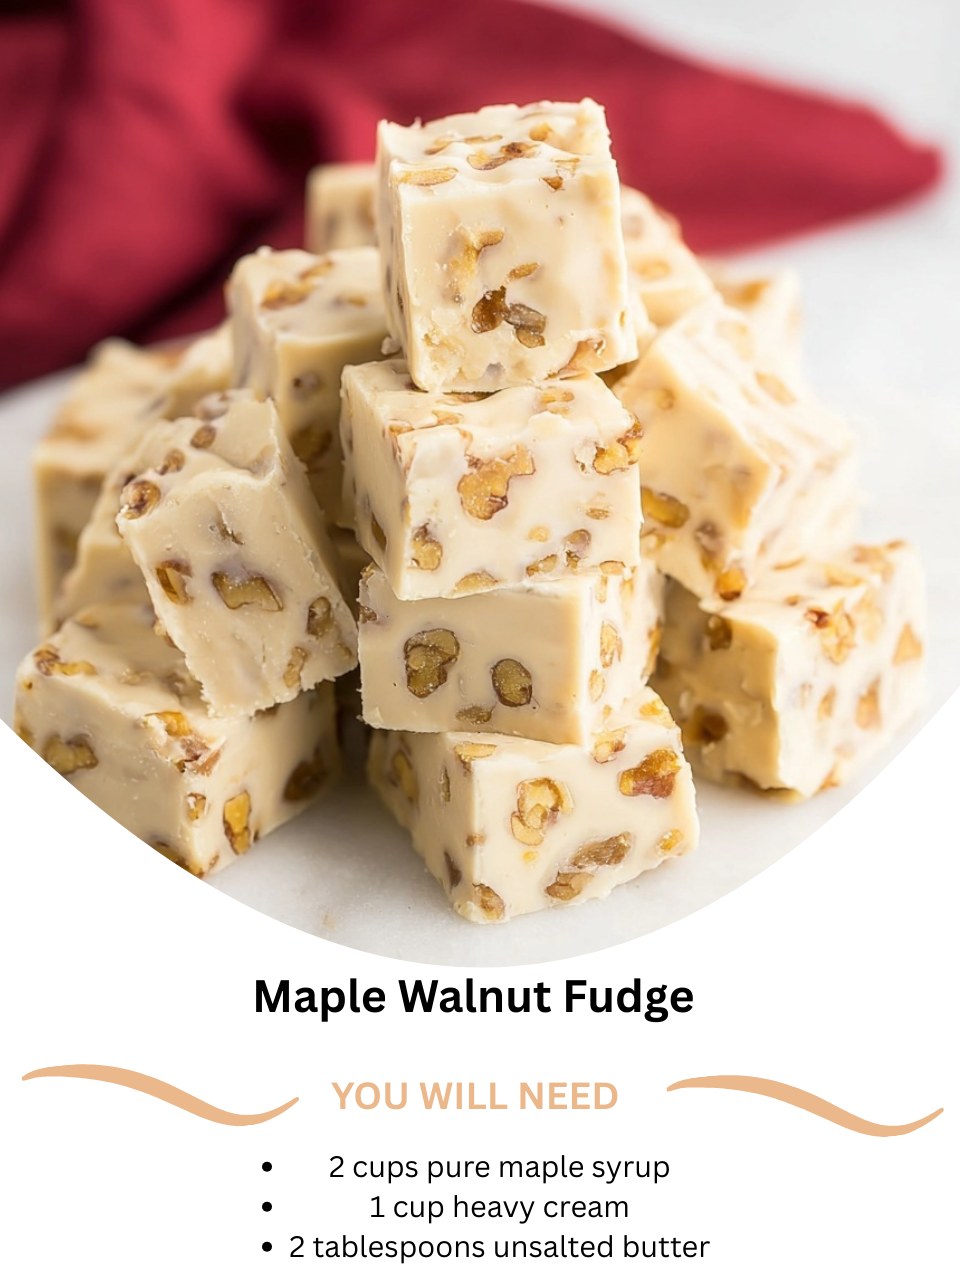
I discovered this traditional Maple Walnut Fudge while visiting a sugar shack in Vermont, mesmerized by the process of turning sap into liquid gold. I wanted to capture that deep, smoky-sweet, pure maple flavor in a rich, creamy confection I could make at home. As the maple syrup and heavy cream bubbled together in my saucepan, my kitchen filled with the most incredible, warm, and woodsy aroma—it smelled like an autumn forest and a cozy cabin all at once. Stirring in the toasted walnuts felt like adding the final, perfect crunch of fallen leaves. The result was a fudge so authentic and sophisticated, it instantly became my proudest homemade gift and the taste of fall in every bite.
Why You’ll Love This Recipe
You are going to adore this recipe because it’s the real deal—a traditional, cooked-sugar fudge that delivers an intense, pure maple flavor you simply can’t get from shortcuts. It’s rich, creamy, and has that classic, slightly crumbly yet melt-in-your-mouth fudge texture that feels like a true labor of love. From my experience, this is the treat that impresses seasoned bakers and candy makers. It’s a beautiful, from-scratch project that rewards your patience with a flavor that’s complex, not cloying, and utterly unforgettable.
Ingredients
- 2 cups pure maple syrup (Grade A Dark or Grade B for robust flavor)
- 1 cup heavy cream (36% milkfat)
- 2 tablespoons unsalted butter
- 1 teaspoon pure vanilla extract
- A generous pinch of fine sea salt
- 2 cups walnuts, toasted and roughly chopped
(See the next page below to continue…)
Equipment Needed
- An 8×8 inch baking pan
- Parchment paper
- Large, heavy-bottomed saucepan (at least 3-quart capacity)
- Candy thermometer
- Wooden spoon or heatproof spatula
- Pastry brush and small bowl of water
- Baking sheet (for toasting walnuts)
Step-by-Step Instructions
First, let’s prepare our components. I spread the walnuts on a baking sheet and toast them in a preheated 350°F oven for 7-10 minutes, stirring halfway, until they’re fragrant and golden. This step is non-negotiable—it unlocks their oils and nutty depth. I let them cool, then chop them roughly. Now, I line my 8×8 inch pan with parchment paper, leaving overhangs. Then, I get my most important tool ready: the candy thermometer. I attach it to the side of my large, heavy-bottomed saucepan, making sure the tip doesn’t touch the bottom.
Now, we begin the magical transformation. In the saucepan, I combine the maple syrup and heavy cream. I stir it over medium heat until it just begins to simmer. Here’s a pro-tip I learned the hard way: before stirring, I use a pastry brush dipped in water to wash down any sugar crystals from the sides of the pan. This prevents premature crystallization and ensures a smooth fudge. Once simmering, I reduce the heat to medium-low to maintain a steady, gentle bubble. I insert the candy thermometer and let the mixture cook, without stirring, until it reaches 238°F, the soft-ball stage. This takes about 25-40 minutes. The kitchen fills with the most amazing, caramelized maple scent.
When the thermometer hits 238°F, I immediately remove the pan from the heat. I carefully take out the thermometer. Without stirring, I add the butter, vanilla, and salt right on top. Then, I let the mixture cool undisturbed until it reaches about 110°F—this feels just warm to the touch, not hot. I learned this timing mistake on my first batch: if you stir too soon, the fudge will be grainy. This cooling period is crucial for the sugars to form the right crystals. I test it by touching the side of the pan.(See the next page below to continue…)
Once properly cooled, it’s time for the workout! I beat the mixture vigorously with my wooden spoon. You’ll see it transform before your eyes: it will go from glossy and thin to thick, opaque, and lighter in color, and it will start to lose its gloss. This is the sign. I then quickly fold in the toasted walnuts until they’re evenly distributed. The mixture will be very thick. I immediately pour and press it into the prepared pan, smoothing the top. It sets up fast. I let it cool completely at room temperature before slicing—no refrigeration needed at this stage.
Pro Tips for Best Results
I tested the maple syrup grade three different ways: with Grade A Amber, Grade A Dark, and Grade B. For a fudge with deep, complex, almost smoky maple flavor, Grade A Dark or Grade B is the winner. The lighter Amber grade is lovely but produces a milder, sweeter fudge that lacks the robust character I was after. Don’t use pancake syrup—it must be 100% pure maple syrup. Trust me, it makes a huge difference.
Here’s what I learned the hard way about temperature and stirring: precision and patience are everything. My first batch, I stirred during cooking and poured it at 235°F, thinking “close enough.” The result was a soft, sticky mess that never set. You must not stir during cooking, and you must hit exactly 238°F. Then, you must not stir during cooling until it reaches 110°F. Rushing either of these steps is the most common reason for failure. I’ve tried this step both ways, and trust me, this one works better.
For the smoothest texture, the beating stage is critical. Beat by hand with a strong wooden spoon until the fudge truly loses its gloss and thickens significantly. If you stop too soon, it will be soft. If you beat too long, it can become crumbly and hard to press into the pan. The moment it thickens, becomes matte, and holds its shape on the spoon, stop beating and fold in the nuts. This visual cue is more reliable than timing.
Common Mistakes to Avoid
The biggest mistake is stirring the mixture while it’s cooking or during the initial cool-down. This encourages sugar crystals to form too early, leading to a grainy, crumbly texture. I made this mistake the first time—don’t do what I did! Once it’s simmering, put the spoon down until it has cooled to 110°F. Let the thermometer and time do the work for you.(See the next page below to continue…)
Don’t guess the temperature. “Soft-ball stage” is a specific chemical state. Without an accurate candy thermometer, you’re almost guaranteed to fail. A few degrees under and it won’t set; a few degrees over and it will be hard and crumbly. Invest in a good digital or analog candy thermometer and test it in boiling water (it should read 212°F) to ensure it’s accurate before you start.
Another error is not washing down the sides of the pan with water at the beginning. Any stray sugar crystals on the side can act as seeds, causing the entire batch to crystallize prematurely. Taking 30 seconds to brush the sides with a wet pastry brush is a simple step that prevents a sugary, gritty fudge.
Finally, don’t add the nuts while the fudge is too hot or during the beating stage. Fold them in at the very end, after the fudge has been beaten to the proper consistency. Adding them earlier can deflate the fudge and interfere with the crystallization process, affecting the final texture.
Serving Suggestions
I love serving this fudge at room temperature, which allows the full, nuanced maple flavor to shine. I arrange the rustic squares on a wooden cutting board or a simple white platter. Its rich color and studded walnuts look elegantly homemade. A light sprinkle of flaky sea salt on each piece just before serving can create a wonderful sweet-salty contrast.
For a perfect autumnal pairing, I like to serve it with a strong cup of black coffee or a dark tea like Earl Grey. The bitterness balances the rich sweetness. It’s also sublime with a glass of cold apple cider or, for an adult gathering, a small sip of bourbon or a smooth Canadian whiskey, which complements the maple notes beautifully.
When gifting, I wrap individual squares in small squares of parchment paper and place them in a small cardboard box or tin. I always include a note that says “Pure Maple Walnut Fudge” because the quality of the ingredient is something to be proud of. It’s a gift that feels incredibly thoughtful, artisanal, and perfect for the food lover in your life.
Variations & Customizations
For a “Maple Bourbon” fudge, add one tablespoon of good bourbon along with the vanilla and butter after removing the pan from the heat. Let the mixture cool slightly before adding to allow some of the alcohol to cook off, leaving just the warm, oaky flavor that pairs divinely with the maple.
You can create a “Maple Sea Salt” fudge by being generous with the salt. Use ½ teaspoon of flaky sea salt in the mixture and press a few extra flakes onto the top of the fudge after pressing it into the pan. The pronounced salty bite makes the maple taste even richer and more sophisticated.
For a creamier, “Maple Cream” style fudge, you can substitute ½ cup of the heavy cream with full-fat sour cream. Add it at the beginning with the other liquids. This adds a very subtle tang that cuts the sweetness and creates an even smoother, denser texture reminiscent of old-fashioned maple cream candy.
How to Store, Freeze & Reheat
For storing, I keep the fudge in an airtight container at cool room temperature, layered with parchment paper. It stays perfectly fresh for about 1 week. Avoid refrigeration, as it can cause the fudge to sweat and become sticky. A cool pantry or cupboard is ideal.
This fudge freezes very well. Wrap the whole block or individual squares tightly in plastic wrap, then seal in a heavy-duty freezer bag. It will keep for up to 3 months. The texture remains excellent after thawing, making it a fantastic make-ahead gift for the holidays.
To thaw, transfer the wrapped fudge from the freezer to the counter and let it thaw slowly at room temperature for several hours or overnight. Do not microwave or try to speed the process, as this can cause sugar bloom (a grainy, white surface). Once thawed, it’s ready to serve.
Conclusion
This Maple Walnut Fudge is more than just candy to me; it’s a celebration of a sublime, natural ingredient and the satisfying, timeless art of candy making. The process is a lesson in patience that yields a reward of unparalleled flavor and texture. I hope this recipe encourages you to embrace the magic of from-scratch confections and brings the warm, comforting taste of a sugar shack right into your own kitchen. Now, check your thermometer—your own batch of rich, crystalline, maple perfection is waiting.