
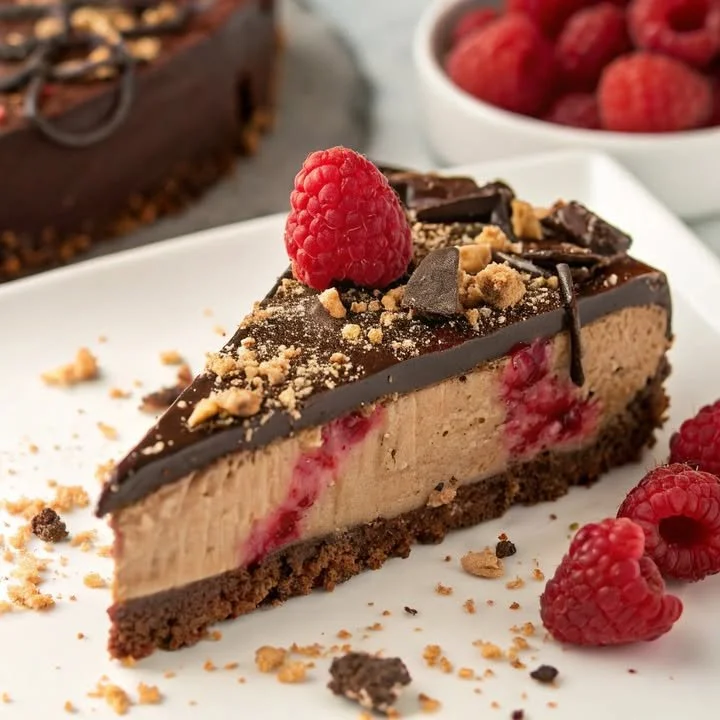
As someone who loves to bake, I am always on the lookout for delightful dessert recipes that leave a lasting impression. One such recipe that has become a firm favorite in my kitchen is Luscious Chocolate Raspberry Cheesecake. This dessert is a decadent combination of rich chocolate, tangy raspberries, and a creamy cheesecake filling that is sure to delight any crowd. Whether I’m making it for a birthday celebration or simply to treat myself, this cheesecake never disappoints!
Why You’ll Love This Recipe
The beauty of this Luscious Chocolate Raspberry Cheesecake lies not only in its incredible taste but also in its elegance. The contrast between the velvety chocolate and the vibrant raspberries creates a stunning visual and flavor experience. Plus, it’s a no-bake dessert, which means less time in the kitchen and more time savoring each delicious bite! Every time I serve this cheesecake, I get compliments and requests for the recipe. It’s truly a showstopper! (See the ingredients in the next page below…)
Ingredients
– 1 ½ cups chocolate cookie crumbs (like Oreos)
– ½ cup unsalted butter, melted
– 16 oz cream cheese, softened
– 1 cup powdered sugar
– 1 cup heavy whipping cream
– 1 cup semi-sweet chocolate, melted
– 1 cup fresh raspberries
– 1 teaspoon vanilla extract
– 1/4 cup raspberry sauce (store-bought or homemade)
– Extra raspberries and chocolate shavings for garnish (optional)
Equipment Needed
– 9-inch springform pan
– Mixing bowls
– Electric mixer or whisk
– Rubber spatula
– Measuring cups and spoons
– Double boiler or microwave-safe bowl for melting chocolate
– Parchment paper (optional for lining)
Step-by-Step Instructions
Creating this Luscious Chocolate Raspberry Cheesecake is an adventure in flavor and texture! First, I start by preparing the crust. In a mixing bowl, I combine the chocolate cookie crumbs and melted butter until it resembles wet sand. I then press this mixture firmly into the bottom of a 9-inch springform pan to form a solid base. It’s important to really pack it down because this crust is the foundation of our cheesecake. As I press, I can already smell the buttery chocolate aroma filling my kitchen. I pop this crust into the fridge to chill while I prepare the filling. (See the next page below to continue steps…)
Next, I whip up the luscious cheesecake filling. In another bowl, I beat the softened cream cheese until it’s silky smooth. I gradually mix in the powdered sugar, ensuring there are no lumps. The combination of these ingredients is pure magic! Once it’s smooth, I fold in the melted chocolate, heavy whipping cream, and vanilla. The mixture becomes rich and velvety, and I can hardly resist tasting it at this point.
Now, the fun part! I gently fold in the fresh raspberries, making sure they are evenly distributed throughout the cheesecake filling. I can’t help but marvel at the beautiful colors—the way the bright raspberries contrast with that luscious chocolate just makes my heart sing. I then pour this filling over the chilled crust, smoothing the top with a spatula for a clean finish. After a bit of a shake to eliminate air bubbles, I cover the cheesecake with plastic wrap and let it chill in the refrigerator for at least 4 hours, or overnight if I can wait that long!
When it’s time to serve, I carefully remove the sides of the springform pan, revealing a perfectly formed cheesecake. I drizzle raspberry sauce over the top and scatter some extra raspberries, along with chocolate shavings, for that extra flair. Honestly, just looking at it makes me excited to dig in!
Pro Tips for Best Results
One thing I learned through trial and error is that using room temperature cream cheese is vital. When it’s soft, it blends seamlessly into the mixture, giving that smooth texture we all crave. I once made the mistake of using cold cream cheese, and the texture was less than desirable!
Another tip is to use high-quality chocolate. I tested this cheesecake with both semi-sweet and dark chocolate, and each added its charm. However, the semi-sweet chocolate always struck the right balance for me, making the cheesecake rich but not overwhelming.
Lastly, I recommend letting the cheesecake chill fully before serving. The flavors intensify, and the texture becomes firmer, making every slice cleaner and more appealing. Patience can be hard, especially when the temptation is so great, but it’s worth it!
Common Mistakes to Avoid
One major mistake I made the first time I prepared this cheesecake was not allowing enough time for chilling. I was so excited to taste it that I sliced into it after just a couple of hours. The filling wasn’t fully set, which made for a messy presentation. Now, I always mark my calendar for a full night in the fridge—trust me, it’s a game changer! (See the next page below to continue…)
Another pitfall is not pressing the crust down firmly enough. If the crust is too loose, it won’t hold up when cutting into the cheesecake, leading to an unwanted crumbly mess. A little muscle and love go a long way here.
Also, be careful not to overmix the filling once you’ve added the whipped cream. It’s tempting to whisk vigorously, but a gentle folding motion retains that light, airy texture. Overmixing can lead to a denser cheesecake, which I know doesn’t give that luscious feeling we’re all after.
Serving Suggestions
This cheesecake is irresistibly delicious on its own, but I love serving it alongside a dollop of whipped cream or a scoop of vanilla ice cream for added indulgence. The contrast of temperatures and textures really enhances the experience.
Another serving idea is to pair it with extra raspberry sauce on the side. The bright acidity of the sauce complements the richness of the cheesecake beautifully. I’ve even drizzled some over the individual servings and watched as everyone dives in with enthusiasm!
If you’re feeling adventurous, you can even plate it with a sprig of fresh mint, giving a refreshing touch that not only looks great but adds a burst of flavor. Every little detail can elevate this decadent dessert!
Variations & Customizations
If I’m looking to switch things up, I sometimes replace the chocolate cookie crust with a graham cracker crust. The subtle flavor difference creates an entirely new taste experience. It’s amazing how just one change can transform a classic dessert!
For the chocolate filling, I’ve experimented with flavored chocolate, such as espresso or orange-infused chocolate. Both create a unique flavor profile, making the cheesecake take on a new character that catches everyone by surprise. It’s a happy little twist to an already delicious recipe!
If raspberries aren’t your thing, don’t worry! I have made this cheesecake with strawberries, blueberries, and even cherries. Each fruit brings its own sweetness and tang, making the cheesecake adaptable to whatever is in season for you.
How to Store, Freeze & Reheat
This cheesecake can be stored in the refrigerator for up to 5 days, which is perfect if you want to prepare it ahead of time for a gathering. I find that it usually tastes even better the next day as the flavors meld even more! Just make sure to cover it properly to avoid absorbing any odors from the fridge.
If you want to make this ahead of time, you can also freeze it! To do this, I recommend wrapping individual slices or entire cheesecake tightly in plastic wrap, then placing it in an airtight container. It will keep in the freezer for up to 2 months. When you’re ready to enjoy it again, just let it thaw in the refrigerator overnight to regain its original texture.
Reheating isn’t necessary, but if you enjoy a warm cheesecake, you can let it sit out for a bit before serving. Just remember that warm cheesecake will be softer and may not slice as cleanly. A bit of patience is key here!
Conclusion
I genuinely hope you enjoy whipping up this Luscious Chocolate Raspberry Cheesecake in your own kitchen. It’s a dessert that brings joy not just to the palette but also to the heart. Every time I make it, I’m reminded of how simple ingredients can create something so extraordinary. Here’s to sweet moments and delicious memories—happy baking!