
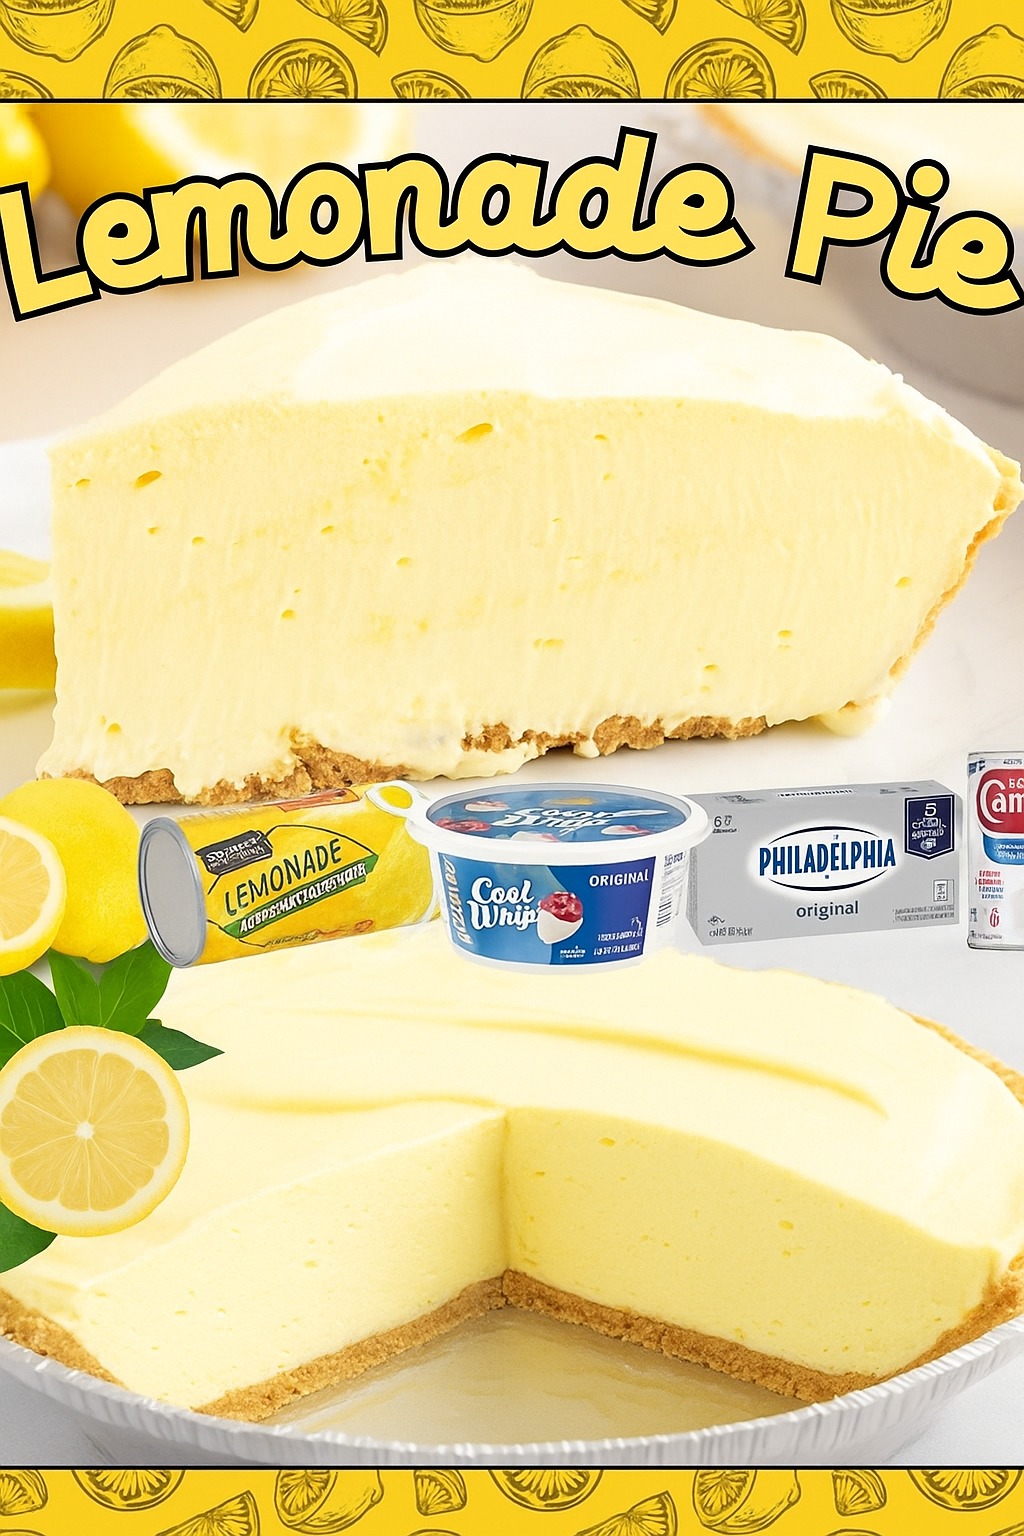
I discovered this Lemonade Pie recipe scribbled on an index card in my grandmother’s recipe box, a simple treasure promising a taste of pure sunshine. The first time I made it, the bright, tangy scent of lemon filling my kitchen felt like a burst of summer, even in the middle of February. When I finally took a bite of the chilled, silky-smooth pie with its crisp graham cracker crust, I was floored by its perfect balance of sweet and tart. It was instant nostalgia, a dessert so effortless and refreshing it instantly earned a permanent spot in my warm-weather rotation.
Why You’ll Love This Recipe
You will adore this recipe because it is the definition of easy elegance. With just a handful of no-bake ingredients and about 15 minutes of hands-on time, you can create a dessert that tastes like you spent hours. It’s the perfect answer for a hot day when you can’t bear to turn on the oven, and its vibrant, puckery-sweet lemon flavor is universally appealing. From my experience, it’s the pie that gets requested for every picnic, potluck, and backyard barbecue because it’s light, refreshing, and feels like a celebration in every cool, creamy slice.(See the ingredients in the next page below…)
Ingredients
- 1 (9-inch) prepared graham cracker pie crust (or make your own)
- 1 (8 ounce) block full-fat cream cheese, softened completely
- 1 (14 ounce) can sweetened condensed milk
- 1 (6 ounce) can frozen lemonade concentrate, thawed (do not dilute)
- 1 (8 ounce) container frozen whipped topping (like Cool Whip), thawed
- Optional for garnish: additional whipped topping, lemon slices, or lemon zest
Equipment Needed
- Electric hand mixer or stand mixer
- Large mixing bowl
- Rubber spatula
- Measuring cups
- Can opener
Step-by-Step Instructions
Everything hinges on your cream cheese being truly, utterly soft. I leave mine on the counter for a solid two hours before I start. I learned this the hard way when I tried to beat a chilly block; I ended up with a lumpy filling no matter how long I mixed. So, trust me, plan ahead for this. Once it’s soft, I place it in my large mixing bowl and beat it with my electric mixer on medium speed for a full minute until it’s completely smooth and creamy, scraping down the sides of the bowl. This step alone ensures a flawlessly silky texture in the final pie.
Next, I pour in the entire can of sweetened condensed milk. I continue to beat on medium-low speed until the two are completely combined into a thick, pale, and luscious base. This is when the magic really starts. Now, for the star of the show: the frozen lemonade concentrate. I make sure it’s thawed but still cold, and I add it straight from the can, without diluting it with water. This is the most critical instruction in the entire recipe. The intense, puckery punch of the concentrate is what gives this pie its signature “lemonade” zing. I beat it in just until everything is smooth and beautifully yellow.(See the next page below to continue steps…)
At this point, you’ll have a lovely, tangy cream cheese mixture. Here’s where a lot of recipes tell you to fold in the whipped topping, but I’ve learned a little trick for maximum fluffiness. I take about one-third of the thawed whipped topping and beat it directly into the lemonade mixture with my mixer on low. This lightens the base. Then, I remove the bowl from the mixer, add the remaining two-thirds of the whipped topping, and use my rubber spatula to gently fold it in. I use a broad, sweeping motion, turning the bowl as I go, until no white streaks remain. This method keeps the filling airy and light.
Finally, I scrape every bit of this dreamy, cloud-like filling into my waiting graham cracker crust. I use my spatula to smooth the top into pretty, swooping peaks. Then, and this is non-negotiable, I cover the pie gently with plastic wrap and place it in the refrigerator to chill and set for at least 4 hours, but ideally overnight. The waiting is the hardest part, but it’s essential. This long chill allows the flavors to marry perfectly and the filling to firm up enough to slice cleanly. Rushing this step leads to a delicious but soupy mess.
Pro Tips for Best Results
First, let’s talk lemonade concentrate. I have tested this with every major brand and even a “light” version once. Stick with the regular, full-sugar frozen lemonade concentrate for the best flavor and texture. The light version made the filling too soft and the flavor was lackluster. Also, ensure it’s thawed. Trying to mix a rock-hard block into the cream cheese is a battle you won’t win. I move it from the freezer to the fridge the night before I plan to make the pie.
My second tip is about mixing. After you add the lemonade concentrate, mix just until combined. Do not overbeat the filling at this stage. Overmixing can cause the dairy to break down or become too thin. I stop the mixer as soon as I see a uniform, sunny yellow color. When you fold in the final addition of whipped topping, be gentle. You want to preserve as much of that airy volume as possible to create a mousse-like texture rather than a dense one.
Finally, the crust matters. A store-bought graham cracker crust works perfectly fine in a pinch, but if you have an extra 10 minutes, making your own is a game-changer. I mix 1.5 cups of fine graham cracker crumbs with 6 tablespoons of melted butter and 2 tablespoons of sugar, press it firmly into my pie plate, and bake at 350°F for 8 minutes. Let it cool completely before filling. The homemade version is sturdier, buttery, and provides a fantastic textural contrast to the creamy filling. It’s worth the small extra effort.(See the next page below to continue…)
Common Mistakes to Avoid
The cardinal sin is using cold cream cheese. I made this mistake the first time—don’t do what I did. I pulled the cream cheese from the fridge, figured a few minutes on the counter was enough, and proceeded. No matter how long I beat it, tiny lumps remained, and they never fully incorporated, leaving my pie with a slightly grainy texture. Truly softened cream cheese is the foundation of this entire recipe. If you forget to take it out, you can microwave it on a plate for 10-second intervals, but be very careful not to melt it.
Another common error is diluting the lemonade concentrate. The recipe on the can says to mix it with water, but for this pie, you must ignore that instruction completely. Adding water will throw off the delicate balance of the filling, making it too soft to set properly and diluting that fantastic tartness. You need the pure, concentrated flavor. Just let it thaw in its can in the refrigerator, and use it as-is. This ingredient is what makes the pie special, so don’t tamper with it.
Do not skip the long chilling time. In my eagerness, I once tried to slice the pie after only two hours in the fridge. The flavor was great, but the slice collapsed on the plate into a delicious puddle. The filling needs those full four hours, and ideally overnight, to firm up properly. The chilling time is what transforms the mixture from a fluffy cream into a sliceable pie. It’s an inactive step, but it’s just as important as the mixing.
Finally, avoid substituting the frozen whipped topping with freshly whipped cream if you want the classic texture and stability. I love fresh whipped cream, but when I’ve used it here, the pie was much softer and didn’t hold its shape as well after a day. The stabilizers in the frozen topping help the pie maintain its structure, especially if it’s traveling to a party or sitting out on a buffet. It’s one of the few times I’ll advocate for the packaged stuff over homemade.
Serving Suggestions
I love serving this pie directly from the fridge, keeping it chilled right up until the moment it’s cut. For the cleanest slices, I take a long, thin knife, run it under very hot water, wipe it dry, and make a swift cut. I repeat this between every slice. I garnish just before serving with a tiny dollop of extra whipped topping, a whisper of fresh lemon zest, or a thin twist of lemon slice. The fresh zest, in particular, adds an incredible pop of aromatic lemon oil that elevates the whole experience.
For a truly stunning presentation, I’ll sometimes serve individual portions in small dessert glasses. I crush some extra graham crackers for a base layer, spoon in the filling, and top with a lemon slice. This is perfect for a party where you don’t want to deal with slicing. It also looks gorgeous and lets you control the portions easily. A sprig of mint on top adds a lovely touch of green.
This pie is so bright and refreshing that it needs little accompaniment. However, I find it pairs beautifully with a simple, crisp prosecco or a glass of iced tea. Its lightness makes it the perfect finale to a heavy barbecue meal or a spicy dinner. I always keep it on a chilled plate or nestled in a bowl of ice if it’s going to be sitting out for a while during a gathering, to ensure it stays perfectly firm.
Variations & Customizations
This recipe is wonderfully adaptable. For a stunning “pink lemonade” pie, I simply swap the regular frozen lemonade concentrate for the pink variety. It turns the most beautiful blush color and has a slightly berry-tinged flavor that’s a huge hit, especially with kids. You can also add a drop or two of red food coloring to regular lemonade filling if you want a more vibrant pink.
You can play with the crust, too. A vanilla wafer or shortbread cookie crust is a delicious alternative to graham crackers. For a citrus twist, I’ve added a tablespoon of lemon zest to the graham cracker crumbs before pressing them into the pan. If you’re feeling decadent, a drizzle of white chocolate or a sprinkle of toasted coconut on top of the finished pie adds wonderful texture and flavor contrasts.
For other citrus lovers, the formula works with different concentrates. I’ve made a fantastic limeade pie using frozen limeade concentrate, and it’s like a key lime pie’s even easier cousin. A version with frozen orange juice concentrate is sweeter and mellower, perfect for those who find lemon too tart. Just remember to keep the ratios the same and use the concentrate straight from the can, undiluted.
How to Store, Freeze & Reheat
This pie stores beautifully in the refrigerator. Once set, I keep it covered tightly with plastic wrap or in a pie carrier. It will stay fresh and delicious for 3-4 days. The crust will gradually soften the longer it sits, but the flavor only seems to improve. I’ve never had a slice last longer than that, as it’s always eagerly finished!
You can absolutely freeze this pie for longer storage. I wrap the whole chilled pie tightly in a layer of plastic wrap and then a layer of heavy-duty aluminum foil. It freezes well for up to 2 months. To thaw, I move it to the refrigerator and let it defrost slowly overnight. The texture may be slightly less fluffy after freezing, but it’s still incredibly tasty and a fantastic make-ahead option.
There is no need to reheat this pie—it is meant to be served cold. In fact, you should avoid letting it sit at room temperature for extended periods, as the filling will soften too much. If you’ve frozen it, thaw it completely in the fridge and serve it directly from there. The cold temperature is key to its refreshing quality and perfect sliceable texture.
Conclusion
This Lemonade Pie is more than just a dessert; it’s a little jar of sunshine, a guaranteed crowd-pleaser, and a testament to the magic of simple, no-fuss recipes. It has carried me through countless summer gatherings and never fails to bring a smile. I hope my kitchen-tested tips help you create the perfect, puckery-sweet slice every single time. Now, go grab that lemonade concentrate and get ready for the easiest, most refreshing pie you’ll ever make.