
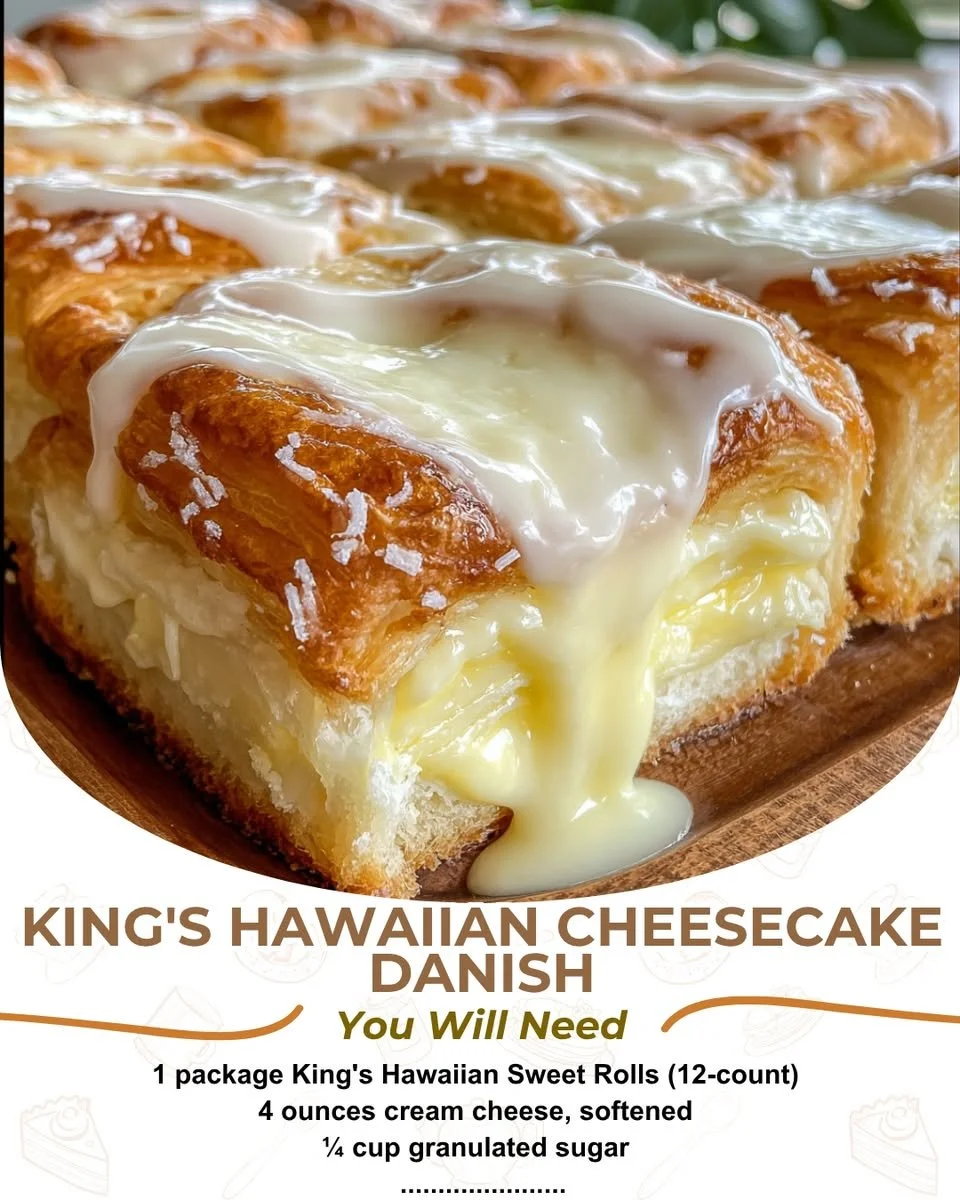
There’s something magical about the aroma of freshly baked goods wafting through my kitchen, especially when it’s something as delightful and comforting as a King’s Hawaiian Cheesecake Danish. This recipe combines the sweet, soft texture of King’s Hawaiian bread with a creamy cheesecake filling, creating a perfect treat for breakfast, brunch, or dessert. Let me take you through the process of bringing this deliciousness into your home.
Why You’ll Love This Recipe
This recipe is so comforting and delicious that it’ll make you feel like you’re sitting in a cozy café, sipping your favorite coffee. The combination of sweet bread and creamy filling will make your taste buds dance with joy. Plus, it’s a fantastic way to impress friends and family with a treat that looks as good as it tastes! You’ll love how easy it is to whip up. To top it off, the leftovers (if there are any!) keep well, so you can enjoy a little treat for days to come. (See the ingredients in the next page below…)
Ingredients
– 1 loaf of King’s Hawaiian Sweet Bread
– 8 oz cream cheese, softened
– 1/2 cup granulated sugar
– 1 tsp vanilla extract
– 2 large eggs
– 1/4 cup sour cream
– 1/2 tsp lemon juice
– Powdered sugar for dusting (optional)
Equipment Needed
– Baking dish or parchment-lined baking sheet
– Mixing bowl
– Hand mixer or stand mixer
– Measuring cups and spoons
– Rubber spatula
Step-by-Step Instructions
To start, preheat your oven to 350°F (175°C). While that’s heating up, I like to take a moment to prepare my baking dish. If you’re using a baking sheet, lining it with parchment paper makes cleanup a breeze. Now, grab your loaf of King’s Hawaiian bread, and cut it in half lengthwise to create two equal halves. Place the halves cut side up in your dish. They’ll act as the cozy base for your cheesecake filling. (See the next page below to continue steps…)
Next, in a mixing bowl, combine the softened cream cheese, granulated sugar, vanilla extract, and sour cream. Using a hand mixer, mix until the mixture is nice and creamy—make sure to scrape down the sides of the bowl for a uniform consistency. The batter should be smooth and luscious, enticing you with its sweet aroma. Once mixed, add in the eggs one at a time, beating well after each addition. Sprinkle in the lemon juice for a delightful zing that brightens up the cheesecake flavor.
Pour the creamy mixture evenly over the prepared Hawaiian bread halves. You can gently spread it with a spatula to ensure even coverage. Pop your masterpiece into the preheated oven and bake for about 30-35 minutes, or until the top turns a beautiful golden brown. The smell that fills my kitchen during this baking time is simply irresistible. When it’s done, let it cool for a few minutes before slicing. The texture should be creamy and perfectly set!
While it’s cooling, I enjoy the anticipation of slicing into this fluffy sweet bread and seeing that dreamy cheesecake filling. If you desire, dust with powdered sugar before serving for an extra touch of sweetness and a lovely presentation.
Pro Tips for Best Results
I tested this recipe a few ways to find the perfect balance of flavors and textures. First off, make sure your cream cheese is softened to room temperature. It just blends so much better and avoids any lumps, giving you that silky cheesecake filling I love. You could even leave it out for a bit before you start cooking!
Another tip I discovered is that letting the Danish cool for about 10 minutes before digging in really helps the flavors to meld together. Patience pays off; it gives that warm, gooey texture a moment to settle. Plus, it’s warm enough to still feel like a hug in food form.
Lastly, if you really want to take this dessert up a notch, consider adding some fruit toppings. Fresh berries or even a drizzle of caramel sauce can add a whole new depth to the flavors. I’ve played around with this, and the results are always a hit at gatherings!
Common Mistakes to Avoid
One common mistake I’ve made in the past is not fully beating the cream cheese mixture. If it’s lumpy, your filling won’t have that dreamy consistency. I always recommend a hand or stand mixer for this job to achieve that perfect smoothness. Trust me; it makes all the difference! (See the next page below to continue…)
Another thing to watch out for is the baking time. If you underbake it, the filling might not set properly, leading to a runny texture. Keep an eye on that golden brown color, and do a toothpick test if you’re unsure! If it comes out clean, you’re in the clear.
A third mistake I see is rushing the cooling process. It’s tempting to cut into it right away—I’ve been there! But cooling helps everything firm up nicely, making each slice a joy to behold. Plus, the settling flavors are worth the short wait!
Finally, don’t skip the powdered sugar on top! It may sound trivial, but this little touch adds elegance to your presentation and enhances the sweetness just enough. I often regret not dusting it on when serving guests!
Serving Suggestions
When it comes time to serve, I love pairing this Danish with a hot cup of coffee or a refreshing glass of iced tea. The sweetness of the dish perfectly complements the richness of a good brew; it creates a lovely balance that I look forward to each time.
You could also consider serving it with fresh fruit on the side. Strawberries, raspberries, or even some sliced peaches add a burst of freshness that complements the creamy filling nicely. A colorful platter elevates your breakfast or brunch table to a feast fit for royalty!
Lastly, if you’re feeling a bit indulgent (and who isn’t?), a scoop of whipped cream on top makes it even more special. It adds a fluffy texture and a hint of extra sweetness that you won’t want to resist!
Variations & Customizations
One of the beautiful things about the King’s Hawaiian Cheesecake Danish is how adaptable it is. You can easily swap out the cream cheese filling for a flavored version. Try adding some chocolate or caramel sauce to really crank up the sweetness. Trust me, this unexpected twist will have your friends asking for the recipe!
For a fruitier version, consider mixing in some chopped fresh fruit or even some homemade fruit compote into the cheesecake filling. Blueberries or cherries work wonders and give your Danish a beautiful pop of color that’s just irresistible.
If you’re feeling adventurous, you could even add a hint of spices like cinnamon or nutmeg. These warm flavors create a cozy feel that’s perfect for the autumn months. It’s all about making it your own and having fun in the kitchen!
How to Store, Freeze & Reheat
Storing your King’s Hawaiian Cheesecake Danish is simple. Once it has fully cooled, cover it tightly with plastic wrap or aluminum foil, and keep it in the fridge for up to 3 days. Each slice remains creamy and delightful, making it a great option for quick snacks or breakfasts!
If you want to save some for later, you can freeze individual slices. Just wrap them tightly in plastic wrap and then place them in a freezer-safe bag. They can last for up to 2 months in the freezer. When you’re ready to enjoy a piece, just transfer it to the fridge to thaw overnight.
Reheating is easy too! I prefer to pop a slice in the microwave for about 10-15 seconds to keep it warm and gooey. You can also reheat it in an oven at 350°F for about 10 minutes if you want that fresh-out-of-the-oven feel again. Just make sure to keep an eye on it so it doesn’t overcook!
Conclusion
I hope you enjoy making and indulging in this King’s Hawaiian Cheesecake Danish as much as I do! It’s a delightful treat that not only satisfies my sweet tooth but also brings joy to my kitchen. Whether you’re preparing it for a special occasion or just a cozy day in, this recipe is bound to make your home feel warm and inviting. Happy baking!