
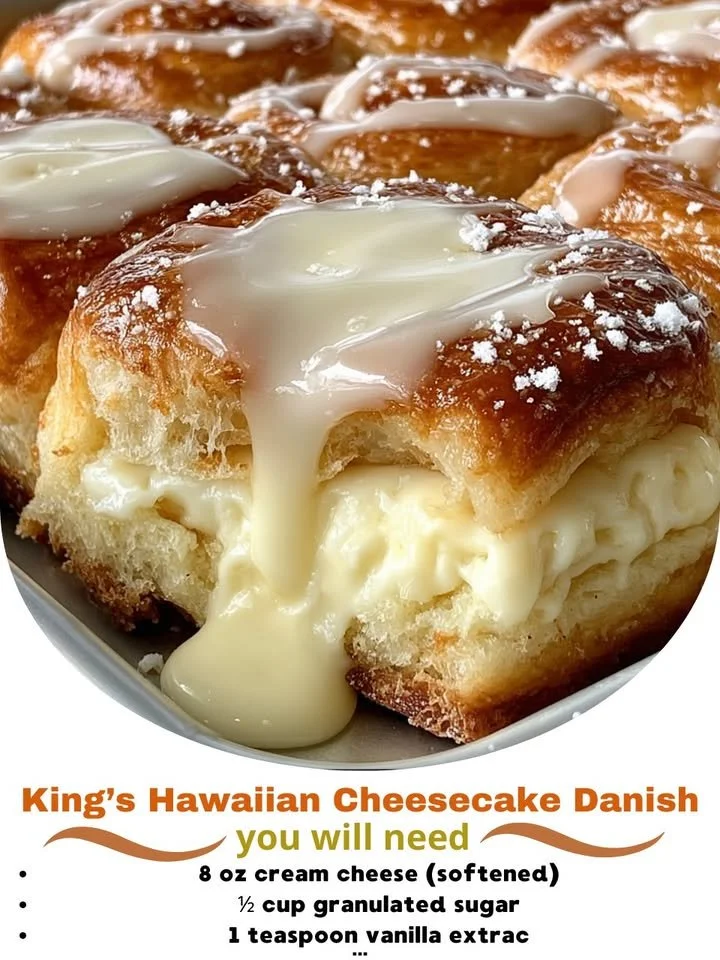
I’m excited to share my recipe for King’s Hawaiian Cheesecake Danish. This unique twist combines the rich creaminess of cheesecake with the sweet, tropical flavors of King’s Hawaiian rolls, creating a treat that’s perfect for breakfast, brunch, or an afternoon snack. As soon as you take your first bite, you’ll understand why this dessert has become a favorite in my kitchen!
Why You’ll Love This Recipe
The best part about this recipe is how easy it is to whip up, yet it tastes like you spent hours in the kitchen. The tender and fluffy Hawaiian rolls act as a perfect base for the creamy cheesecake filling, resulting in a treat that’s not only delicious but also visually stunning when plated. Also, the tropical sweetness and lightness make it a refreshing option to brighten up your day. You’ll be amazed at how quickly these disappear! (See the ingredients in the next page below…)
Ingredients
– 1 package of King’s Hawaiian Sweet Rolls
– 8 oz cream cheese, softened
– 1/2 cup granulated sugar
– 1 tsp vanilla extract
– 2 large eggs
– 1/4 cup sour cream
– 1 tsp lemon juice
– 1/4 cup powdered sugar (for dusting)
– Fresh fruit (optional, for topping)
Equipment Needed
– Mixing bowls
– Hand mixer or stand mixer
– Measuring cups and spoons
– Baking dish (9×13 inches)
– Spatula
– Cooling rack
Step-by-Step Instructions
First, I start by preheating my oven to 350°F (175°C). While that’s warming up, I take my package of King’s Hawaiian rolls and slice them in half to create a base for my cheesecake filling. The sweet aroma of these rolls fills my kitchen, and I can’t help but sneak a little bite! Next, I lay the bottom halves into a greased baking dish, making sure they fit snugly together. It looks like a beautiful, golden canvas for the creamy cheesecake to come! (See the next page below to continue steps…)
Next, in a mixing bowl, I combine the softened cream cheese, granulated sugar, and vanilla extract. Using my hand mixer, I whip it together until it’s smooth and creamy, letting the scent of vanilla waft through the air. Then, I add the eggs, one at a time, blending well after each addition. The texture becomes rich and glossy, and it’s magical! I finish by mixing in the sour cream and lemon juice, which brightens the flavor just perfectly.
Now for the fun part: pouring this delightful cheesecake filling over the sliced rolls. I spread it evenly with a spatula, ensuring every inch is covered. It’s so creamy that I can hardly resist licking the spatula! Once it’s all in place, I top it with the remaining tops of the rolls, creating a lovely sandwich of flavors.
Lastly, I pop the baking dish into the preheated oven and let it bake for about 30–35 minutes, until it’s set and lightly golden on top. My kitchen fills with sweet, buttery notes, making it almost unbearable to wait! Once it’s done, I let the cheesecake Danish cool slightly before dusting it with powdered sugar and adding fresh fruit on top to finish.
Pro Tips for Best Results
I found that letting the cream cheese sit out for a bit before using it creates a much smoother mixture. The last thing you want is big chunks of cream cheese ruining your lovely cheesecake filling! I also tested out different fruits as toppings, and fresh berries add that vibrant pop of color and tartness against the sweetness. It’s a crowd-pleaser for sure!
When I whip the eggs in, I always crack them into a separate cup first to avoid any shell mishaps. That way, I can also make sure they’re fresh! Finally, I love serving this Danish warm, as the filling is creamy and slightly melty. If for some reason you have leftovers, reheating it for a few seconds in the microwave brings back that lovely warm texture.
Common Mistakes to Avoid
One mistake I made on my first attempt was overmixing the cheesecake filling. It’s tempting to blend for perfection, but overmixing can incorporate too much air, leading to cracks as it cools. I learned to mix just until combined for that smooth, perfect finish! (See the next page below to continue…)
Another common mistake is not letting the cream cheese soften enough before mixing. Cold cream cheese won’t blend well, leading to lumps in your filling, which isn’t what we want! Trust me, waiting that extra 15 minutes is worth it!
Lastly, be mindful of the baking time. Every oven is different, and while I find that 30 to 35 minutes usually does the trick, I recommend checking on it at the 25-minute mark. You want the center to be just set and not jiggly, but also not overbaked, which can lead to dryness.
Serving Suggestions
I love serving this King’s Hawaiian Cheesecake Danish warm out of the oven, accompanied by a hot cup of coffee or tea. The sweetness pairs perfectly with a nice, robust brew! You can also serve it with a dollop of whipped cream for an extra indulgent touch.
For brunch gatherings, I like to pair it with a refreshing fruit salad on the side. The bright flavors of seasonal fruits such as strawberries, blueberries, and kiwi complement the richness of the cheesecake beautifully. It’s a simple yet stunning addition to any brunch spread!
If you’re feeling fancy, drizzling a bit of chocolate or caramel sauce over the top before serving adds a decadent flair. I promise, it takes this already delicious Danish to a whole new level!
Variations & Customizations
One of my favorite ways to mix things up is by adding chocolate chips to the cheesecake filling. It’s a fun surprise in every bite! You could also experiment by using flavored cream cheeses, like strawberry or chocolate, depending on your mood.
If you’re looking for a bit of a crunch, consider incorporating crushed nuts like pecans or walnuts into the topping after baking— it adds a lovely texture that contrasts beautifully with the creaminess of the filling.
Lastly, you can easily adapt this recipe for seasonal flavors, such as pumpkin in the fall or using lemon zest for a refreshing summer twist. The possibilities are endless, and I love how versatile this sweet treat can be!
How to Store, Freeze & Reheat
To store any leftovers, I usually cover the dish tightly with plastic wrap or foil and keep it in the refrigerator. It stays fresh for about 3-4 days, but trust me, it likely won’t last that long in my house!
If I want to prepare it in advance, I’ll make it up to the baking stage, cover it, and pop it in the fridge to bake later. Just remember, if it’s chilled, you might need to add a few extra minutes to the baking time.
As for reheating, I find the microwave is easiest. Just a quick 15-20 seconds warms it beautifully while keeping that creamy texture intact. Alternatively, you can place slices in a preheated oven at 350°F (175°C) for about 5-10 minutes for a soft, fluffy experience.
Conclusion
I hope you enjoy making and sharing this King’s Hawaiian Cheesecake Danish as much as I do! It’s easy, delightful, and sure to impress anyone who takes a bite. Whether it’s for a cozy breakfast at home or a festive gathering with friends, this treat brings a touch of sweetness and joy to every occasion. Happy baking!