
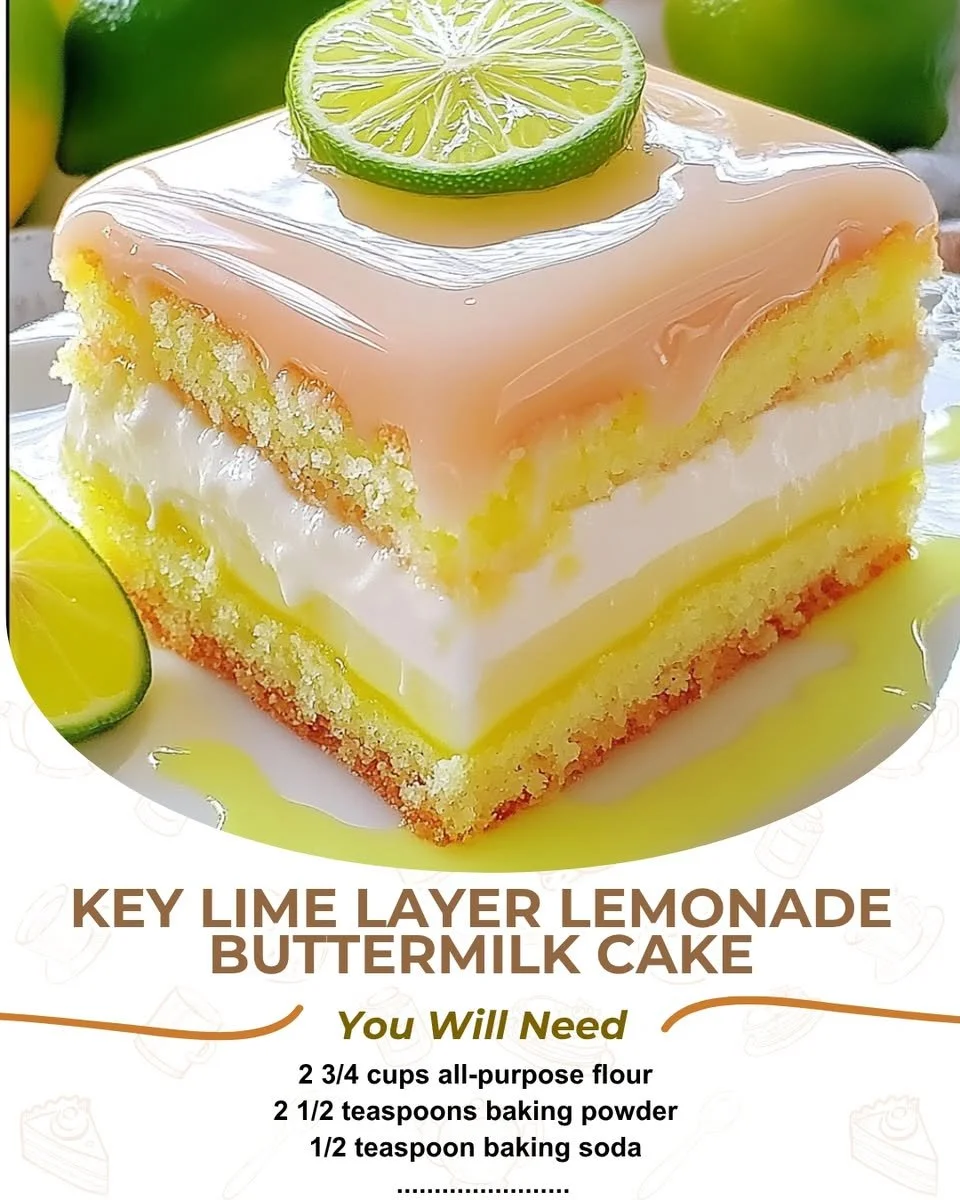
There’s something magical about baking, especially when the recipe involves bright, zesty flavors that immediately transport me to sun-soaked beaches. One of my all-time favorites is the Key Lime Layer Lemonade Buttermilk Cake. This delightful cake seamlessly combines the refreshing essence of key lime and lemonade with the richness of buttermilk, creating a dessert that’s both invigorating and comforting. Every bite is a reminder of warmer days, even if it’s freezing outside.
Why You’ll Love This Recipe
This cake is not just a treat for the taste buds; it’s also a feast for the eyes. Layered with a fluffy, tangy buttermilk cake and topped with a luscious lemonade frosting, it’s perfect for gatherings or just a cozy evening at home. The best part? It’s easy to whip up, and your family and friends will undoubtedly rave about it. I just know you’ll want to make it again! (See the ingredients in the next page below…)
Ingredients
– 2 cups all-purpose flour
– 1 ½ teaspoons baking powder
– 1 teaspoon baking soda
– ½ teaspoon salt
– 1 cup unsalted butter, softened
– 2 cups granulated sugar
– 4 large eggs
– 1 cup buttermilk
– ½ cup key lime juice
– Zest of 2 key limes
– 1 cup powdered sugar (for frosting)
– ½ cup lemonade (for frosting)
– Additional lime zest for garnish
Equipment Needed
– Mixing bowls
– Electric mixer
– Measuring cups and spoons
– 9-inch round cake pans
– Parchment paper
– Cooling rack
– Rubber spatula
Step-by-Step Instructions
To start off, preheat your oven to 350°F (175°C) and prepare your cake pans by lining the bottoms with parchment paper and greasing the sides. In a mixing bowl, whisk together the flour, baking powder, baking soda, and salt. In another large bowl, blend your softened butter and granulated sugar until it’s light and fluffy—this should take about 3 minutes. Then, add in the eggs one at a time, beating well after each addition. Don’t forget to mix in the buttermilk, key lime juice, and lime zest until everything is well combined. Your kitchen will soon fill with a beautiful, citrusy aroma! (See the next page below to continue steps…)
Next, gradually combine the wet and dry ingredients, mixing just until incorporated—be careful not to overmix! Divide the batter evenly between your prepared cake pans. Bake for about 25-30 minutes, or until a toothpick inserted into the center comes out clean. While your cakes are baking, you can whip up the delightful lemonade frosting. Simply mix the powdered sugar and lemonade until smooth, adjusting as necessary to reach your desired consistency.
Once the cakes have cooled completely on the cooling rack, carefully remove them from the pans. Place one layer of cake on your serving plate and spread a generous amount of frosting on top. Then, gently place the second layer over the frosted one and finish off with more frosting on top. I love to sprinkle some additional lime zest on top for that extra touch!
Pro Tips for Best Results
I’ve made this cake several times to get it just right, and here are a few tips I wish I had known from the get-go! Firstly, make sure your ingredients are at room temperature before you start. This helps create a better emulsion and a fluffier cake. Secondly, if you can, let your cake layers cool in the pan for about 10 minutes before transferring them to a cooling rack. This prevents them from breaking apart.
Also, when making the frosting, feel free to experiment with the liquid ratios. I found that adding a smidgen more lemonade gives the frosting a refreshing zing, while reducing it slightly makes for a thicker spread that’s perfect for frosting those layers. It’s all about finding what works for you!
Lastly, if you want to impress your guests even more (as if this cake isn’t impressive enough!), consider toasting some coconut and sprinkling it on top of your frosted cake. The combination of flavors is sublime!
Common Mistakes to Avoid
One common mistake I made the first time I baked this cake was not measuring my ingredients accurately. Baking is a science, and even a little deviation can yield different results. Make sure to use a kitchen scale if you have one, or properly measure your flour to avoid a dry cake. (See the next page below to continue…)
Another thing to watch out for is overmixing your batter. Once you combine your dry and wet ingredients, mix just until combined. Overmixing can lead to a tough cake, and nobody wants that! Keep the batter light and airy.
Also, don’t skip the cooling stage! It’s crucial to let your cake completely cool before frosting it. If you rush this step, the frosting may melt and slide right off—talk about a cake disaster!
Finally, be mindful of the frosting consistency. If it’s too runny, your cake won’t have that lovely, defined layer look; if it’s too thick, it won’t spread easily. Adjust it slowly until you find that perfect, creamy texture.
Serving Suggestions
This Key Lime Layer Lemonade Buttermilk Cake is delightful on its own, but there are so many fun ways to serve it! I love cutting generous slices and pairing it with a homemade whipped cream or a scoop of vanilla ice cream—talk about a refreshing combination! The creaminess balances the tang of the cake perfectly.
For those warmer days, I think this cake is absolutely perfect as a picnic dessert. Just wrap it up and head to the park with friends. A slice under the sun with a tall glass of iced tea or lemonade feels like pure bliss!
Finally, consider garnishing it with fresh berries or additional lime slices for an added pop of color and flavor. It makes the presentation really stand out, turning your cake into a showstopper at any gathering!
Variations & Customizations
I’ve had so much fun experimenting with this recipe over the years! If you’re a fan of coconut, why not swap out some of the milk for coconut milk? It adds a lovely tropical twist! You can even mix in some shredded coconut into the batter for added texture, which is simply divine.
If you’re looking for a less tangy cake, I’ve tried reducing the key lime juice and replacing it with a bit more buttermilk. The results are just as delicious, giving you a different version that still maintains that delightful refreshing note.
Lastly, for a fun and colorful version, consider adding layers of lemon curd between the cake layers. Not only does it enhance the flavors, but it also adds a beautiful yellowness that’s visually appealing.
How to Store, Freeze & Reheat
If you manage to have any leftovers (not likely!), you can store this cake in an airtight container at room temperature for up to three days. Just make sure to keep it away from direct sunlight to maintain its freshness.
If you’d like to freeze it, simply wrap the cooled, un-frosted cake layers tightly in plastic wrap and then in aluminum foil. They can be frozen for up to three months! When you’re ready to enjoy, let the layers thaw in the fridge overnight before frosting.
Reheating the cake isn’t necessary, but if you enjoy it warm, I recommend slicing individual pieces and microwaving for about 10-15 seconds. A quick zap makes the flavors pop even more, and you can pair it with a scoop of ice cream!
Conclusion
I hope you’re as excited to bake this Key Lime Layer Lemonade Buttermilk Cake as I am! With its bright flavors, fluffy texture, and easy preparation, it’s bound to become a favorite in your kitchen too. The joy it brings to gatherings and quiet evenings is just the cherry on top! Happy baking, and don’t forget to savor every delightful slice.