
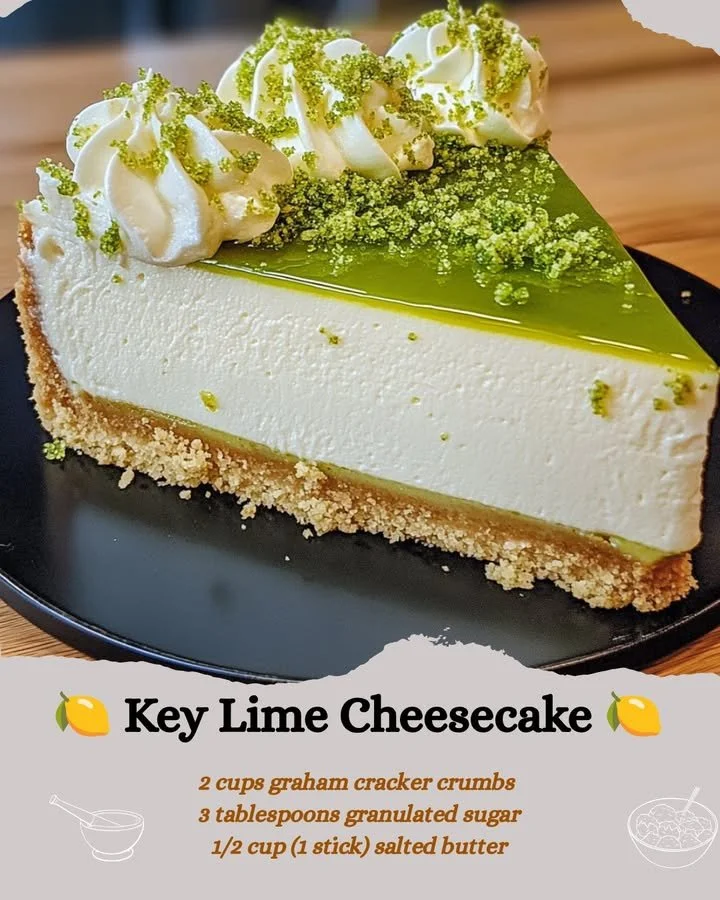
I’ve always had a soft spot for desserts that balance sweetness with a zesty punch, and Key Lime Cheesecake is at the top of that list. This delightful treat takes the classic cheesecake and infuses it with the bright, tart flavor of key limes. Whenever I prepare it, the kitchen fills with the refreshing aroma of citrus, and I can hardly wait for it to set before I dive in! It’s the perfect dessert to impress guests or to enjoy with my family during a cozy night in.
Why You’ll Love This Recipe
This Key Lime Cheesecake is incredibly easy to make and boasts a creamy texture with a tangy flavor that’s simply irresistible. Plus, it’s no-bake, which means you can whip it up quickly without heating up your kitchen. One of my favorite parts is the buttery graham cracker crust that complements the smooth filling perfectly. Trust me, once you try it, it will quickly become a staple in your dessert repertoire! (See the ingredients in the next page below…)
Ingredients
– 1 ½ cups graham cracker crumbs
– ½ cup unsalted butter, melted
– 2 tablespoons sugar
– 16 oz cream cheese, softened
– 1 cup powdered sugar
– 1 cup sour cream
– ½ cup fresh key lime juice (about 10-12 key limes)
– Zest of 2 limes
– 1 teaspoon vanilla extract
Equipment Needed
– 9-inch springform pan
– Mixing bowls
– Electric mixer or whisk
– Zester
– Measuring cups and spoons
– Plastic wrap
– Refrigerator
Step-by-Step Instructions
To start, I preheat my oven to 350°F (though this cheesecake is technically a no-bake version, I like to bake the crust for a few minutes to give it a deeper flavor). In a medium bowl, I combine the graham cracker crumbs, melted butter, and sugar. Once everything is well mixed, I press it firmly into the bottom of my springform pan. This creates a sturdy base for our creaminess to shine! After about 8-10 minutes in the oven, I let it cool completely. (See the next page below to continue steps…)
Next, I take my softened cream cheese and place it in a mixing bowl. With an electric mixer, I beat it until it’s nice and creamy, ensuring there are no lumps. Then, I mix in the powdered sugar gradually, followed by the sour cream, fresh key lime juice, lime zest, and vanilla extract. The mixture should become incredibly smooth and inviting, with that lovely tang of lime starting to come through.
Now, it’s time to pour this luscious filling over the cooled crust. I use a spatula to spread it evenly, making sure it’s nice and smooth on top. It looks so good at this stage that I often find myself wanting to sneak a taste! Once it’s poured, I cover the cheesecake with plastic wrap and pop it into the refrigerator for at least 4 hours, although I usually let it set overnight for the best flavor and texture.
When it’s finally time to serve, I carefully release the cheesecake from the springform pan. The moment I cut into the creamy filling, I can almost hear the cheers of my family in anticipation. I serve it chilled, often garnished with extra lime zest or whipped cream. It’s a simple yet sophisticated dessert perfect for any occasion!
Pro Tips for Best Results
I’ve tested this recipe multiple times, and one of the biggest tips I can offer is to make sure your cream cheese is truly softened. If it’s even slightly cold, you’ll end up with lumps in your filling. To speed up the process, I usually take it out of the fridge an hour before I start.
Another tip is to use fresh key lime juice instead of bottled. The flavor difference is astounding! The fresh juice gives the cheesecake a vibrant taste that really elevates it. I like to roll the limes on the counter before juicing to get the most juice out of them.
Besides, make sure to chill the cheesecake long enough. I know it’s hard to wait, but letting it sit overnight makes all the difference in depth of flavor and firmness. Trust me, your patience will be well rewarded when you take that first heavenly bite!
Common Mistakes to Avoid
One common mistake I’ve made in the past is not pressing the graham cracker crust firmly enough. If it’s loose, it may crumble when you slice into the cheesecake. Take the extra time to pack it down—it makes all the difference for a clean slice! (See the next page below to continue…)
Another pitfall is not measuring the key lime juice accurately. Too much liquid can make the filling overly soft, while not enough can lead to a bland flavor. I highly recommend using a measuring cup specifically marked for liquids so you can ensure precision.
Lastly, I’ve neglected to cover my cheesecake while it sets in the fridge. This can lead to a dry top texture. I now make it a practice to cover it tightly with plastic wrap to preserve its creamy smoothness. Proper storage makes such a difference in the overall taste when you finally serve it!
Serving Suggestions
When it comes to serving my Key Lime Cheesecake, I often like to add a dollop of fresh whipped cream on top. The lightness of the whipped cream complements the creamy texture of the cheesecake beautifully. Sometimes, I even sprinkle extra lime zest over it for that pop of color and flavor.
I love pairing this dessert with fresh seasonal fruits like strawberries or raspberries. Their sweet-tartness contrasts so well with the creamy cheesecake, and they add a lovely visual aspect to the plate. A few mint leaves as a garnish can also brighten up the presentation!
For a fun twist, I sometimes serve it with a drizzle of lime syrup or a fruity sauce made from blended berries. It adds a delightful touch and can cater to different flavor preferences if you have guests with varying tastes.
Variations & Customizations
If you want to mix things up, consider experimenting with different citrus flavors. I’ve made an orange or lemon version by simply substituting the lime juice and zest. They too come out delicious and offer a different but equally refreshing flavor!
Chocolate lovers might enjoy a chocolate crust instead of the traditional graham cracker. I’ve tried this by using chocolate wafer cookies, and it adds an indulgent twist to the cheesecake. Pairing it with an extra drizzle of chocolate sauce or ganache on top makes it even more decadent.
Last summer, I even made a tropical version with crushed pineapple added to the filling. It was a hit at our BBQ, and the bright, fruity notes combined with the lime made it the perfect refresher on a hot day!
How to Store, Freeze & Reheat
To store your leftover cheesecake (if there is any!), simply cover it tightly with plastic wrap and keep it in the refrigerator. It should last up to a week if properly covered. I often take it out a little before serving to allow it to soften slightly.
If you want to freeze it, you can do so before adding any toppings. Just make sure it’s wrapped tightly in both plastic wrap and aluminum foil, as this will help prevent freezer burn. It can last in the freezer for up to three months. When ready to enjoy, let it thaw in the refrigerator overnight.
Reheating isn’t necessary for this cheesecake, but if you prefer serving it at room temperature, just leave it out for about 30 minutes before serving. It retains its creamy texture perfectly this way and makes for an even more delightful experience!
Conclusion
I hope you give this Key Lime Cheesecake a try! It’s one of those recipes that brings joy not just due to its deliciousness but also because of the memories created around it. Whether it’s a summer gathering or just a regular weeknight treat, sharing this cheesecake always makes for a special occasion. Enjoy every slice, and happy baking!