
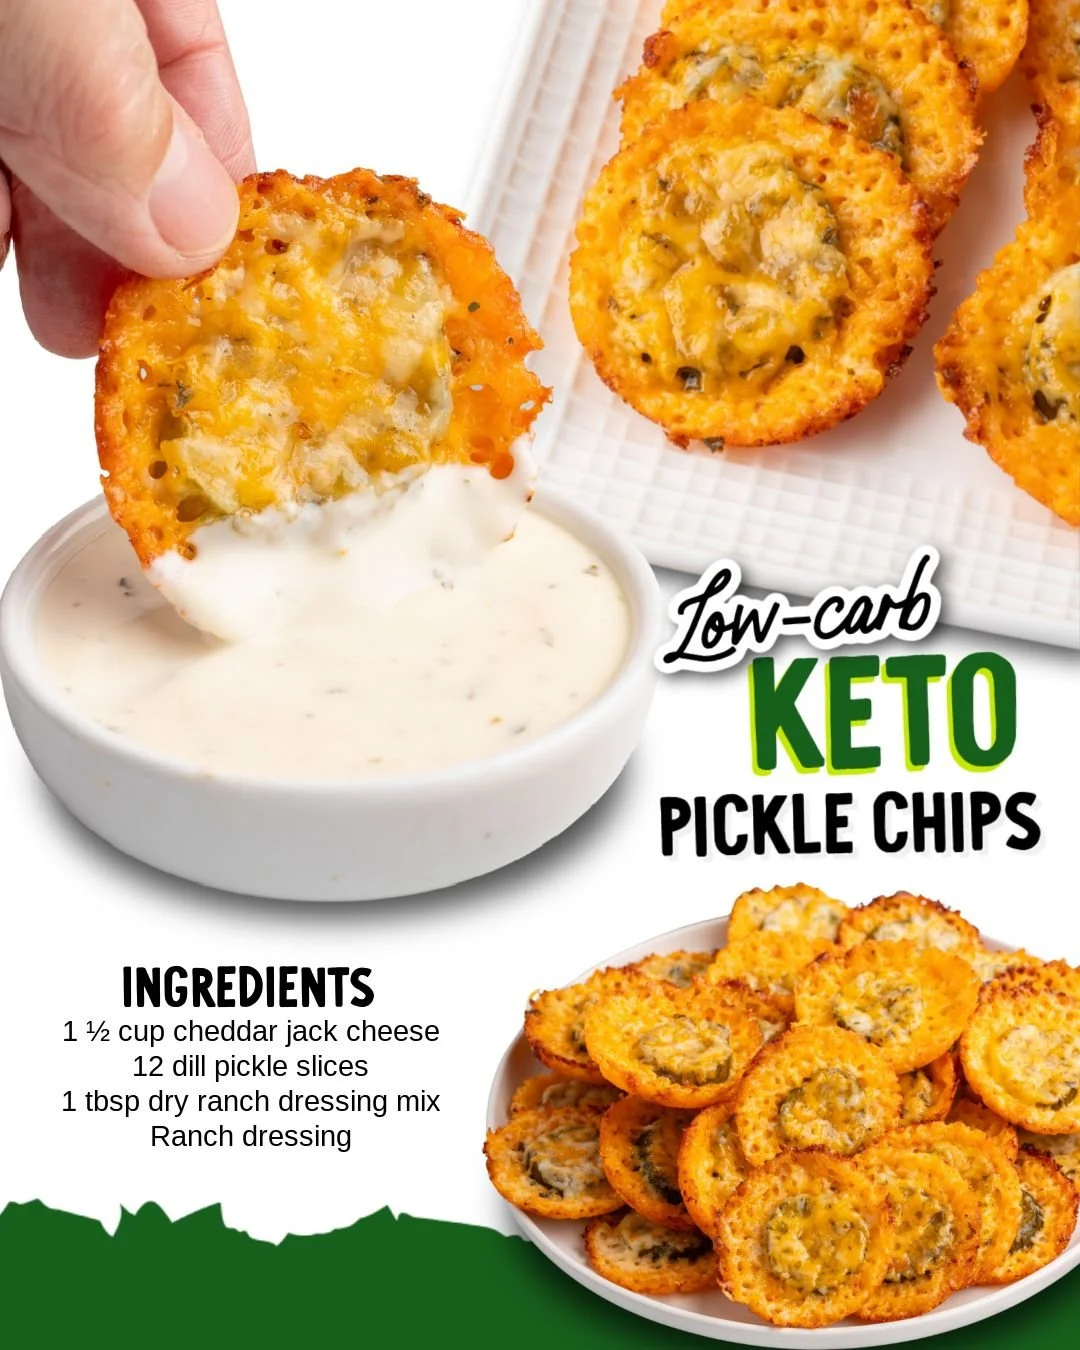
Welcome to my kitchen! Today I’m thrilled to share a delightful recipe that has been an absolute game-changer for me: Keto Pickle Chips. As someone who’s embraced the low-carb lifestyle, I know how challenging it can be to find snacks that satisfy those crunchy cravings without derailing my diet. These pickle chips are zesty, tangy, and oh-so-addictive, making them the perfect accompaniment to any meal or a delightful snack on their own.
Why You’ll Love This Recipe
There’s something about the crunch of a pickle that just hits the spot, doesn’t it? I love how quick and easy these chips are to whip up, plus they pack a serious punch of flavor. By making them at home, I can adjust the seasonings and ensure that only the best ingredients go into my snacks. They’re not only low in carbs, but they also make a perfect addition to burgers or a refreshing dip! And did I mention the smell? My kitchen fills with a delightful aroma that’s hard to resist. (See the ingredients in the next page below…)
Ingredients
– 2 cups of dill pickle slices
– 1 cup of almond flour
– 1/2 cup of grated parmesan cheese
– 1 tsp garlic powder
– 1 tsp onion powder
– 1 tsp paprika
– Salt and pepper to taste
– Olive oil spray
Equipment Needed
– Baking sheet
– Parchment paper
– Mixing bowl
– Shallow dish
– Cooling rack (optional)
Step-by-Step Instructions
To start, I preheat my oven to 400°F (200°C). This temperature is just right for getting that crispy texture I absolutely adore. Next, I place my dill pickle slices on a paper towel to soak up excess moisture. This step is crucial because too much moisture can result in soggy chips. The smell of the pickles always brings me back to summer barbecues! (See the next page below to continue steps…)
Once the pickles are nice and dry, I set up my assembly line. I mix the almond flour, parmesan cheese, garlic powder, onion powder, paprika, salt, and pepper in a shallow dish. In my mixing bowl, I take a few pickle slices at a time, coating them with the dry mixture, ensuring each slice is fully covered. It’s always rewarding to see them getting a flavorful makeover!
Next, I arrange the coated pickle slices on a baking sheet lined with parchment paper. This prevents sticking and makes cleanup a breeze. I spritz the top of the pickle chips with a little olive oil spray, which helps achieve that golden-brown color we all crave. I pop the baking sheet into the oven and let them bake for about 15-20 minutes, flipping halfway through. The enticing aroma wafts through my kitchen, making my mouth water in anticipation!
Pro Tips for Best Results
I tested this recipe three ways to get the perfect crunch. Once, I baked them without the parchment paper, and they stuck! So definitely use it. I also experimented with different seasoning combinations, and let me tell you, adding a pinch of cayenne pepper really takes things to the next level if you like a little heat.
When it comes to coating the pickles, I learned that the thicker the coating, the better the flavor. I like to take my time to make sure each slice is thoroughly covered. It adds a nice, crispy layer that contrasts perfectly with the juicy pickle inside.
Finally, serving them hot from the oven is the best way to enjoy these chips. Once they cool down, they can lose some of their crunch. So, if you can, enjoy them fresh out of the oven while the flavors are at their peak!
Common Mistakes to Avoid
One of the biggest mistakes I made the first time I tried this recipe was not patting the pickles dry enough. If the slices are still wet, they won’t crisp up properly. I suggest using a good amount of paper towels and pressing down a bit to eliminate moisture. (See the next page below to continue…)
Additionally, watch your timing in the oven! If you leave them in too long, they can burn easily. I check them at the 15-minute mark and then keep a close eye for the last couple of minutes. Trust me; burnt pickle chips are a heartbreaker!
Lastly, don’t skip the olive oil spray! I tried making them without it in one batch, thinking I could save calories. They ended up more like sad, dry pickle chips than the crispy delights I was aiming for. A little oil goes a long way in achieving that beautiful crust.
Serving Suggestions
These Keto Pickle Chips are fantastic on their own, but I love serving them with a side of homemade ranch dressing for dipping. It’s such a classic combo that never disappoints and makes for a satisfying snack. They are also great as a crunchy topping for casseroles or salads, adding that extra texture and flavor I adore.
For a fun twist, I like to pair them with your favorite protein-packed burger or sandwich. Instead of adding traditional bread or buns, these pickles lend that satisfying crunch without the carbs. I often have friends over for BBQs, and my keto pickle chips are always a hit, bringing everyone together!
Lastly, if you’re looking for a party snack, presenting them on a colorful plate with various dips and veggies is a guaranteed crowd-pleaser. They’re simple, yet they impress everyone with their flavor and crunchiness.
Variations & Customizations
If you want to mix things up, consider experimenting with different spices. I sometimes add a dash of chili powder or even a sprinkle of ranch seasoning to the almond flour mixture for a zestier taste. Play around!
For a cheesy variation, try adding some shredded cheddar cheese into the coating mix. It creates a different flavor profile that is simply delightful and adds an extra layer of richness to the chips.
Don’t feel limited to just dill pickles! I’ve also tried this recipe with fried green tomatoes, and they are just as delicious! You can make various crunchy snacks following the same process; it’s so versatile!
How to Store, Freeze & Reheat
These Keto Pickle Chips are best enjoyed fresh, but if you have leftovers, I recommend storing them in an airtight container at room temperature. They will stay crispy for a day or two but may start to lose their crunch, so be sure to enjoy them quickly!
If, by some miracle, you have extra chips, you can freeze them for later. I suggest laying them out on a baking sheet to flash freeze them first, then transferring them to a freezer bag. When you’re ready to enjoy them, pop them directly into the oven without thawing for a quick reheat.
To reheat, place them back in a preheated oven at about 400°F (200°C) for around 5-7 minutes, and they should crisp back up beautifully. Nothing beats that freshly baked flavor!
Conclusion
I hope you enjoyed my take on Keto Pickle Chips! They are one of those snacks that redefine what it means to enjoy food while sticking to a low-carb lifestyle. I love how simple they are to make, and I wouldn’t be surprised if they become a staple in your kitchen like they have in mine. Happy snacking!