
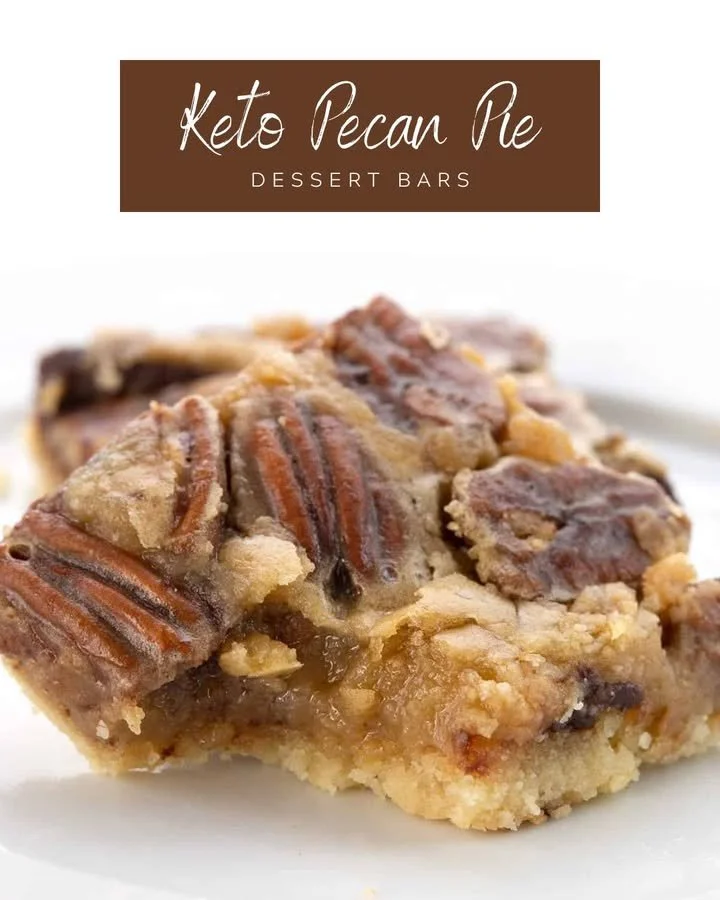
Welcome to my kitchen! Today, I’m eager to share a delightful recipe for Keto Pecan Pie Bars. These bars are an absolute game changer when it comes to satisfying your sweet tooth while sticking to a ketogenic lifestyle. With their rich, nutty flavor and the perfectly chewy texture, they truly capture the essence of traditional pecan pie but in a delightful, easy-to-eat bar form. Plus, they’re low in carbs, making them a guilt-free treat I love to indulge in!
Why You’ll Love This Recipe
You’ll be amazed at how easy and delicious these Keto Pecan Pie Bars turn out! They’re the perfect blend of sweet and nutty with a buttery crust that holds everything together beautifully. The best part? They’re packed with healthy fats and low in sugar, so you can enjoy them even on the strictest of low-carb diets. One bite, and I promise you’ll be hooked! (See the ingredients in the next page below…)
Ingredients
– 1 ½ cups almond flour
– ½ cup unsalted butter, melted
– ¼ cup Erythritol or your choice of low-carb sweetener
– 2 large eggs
– 1 cup pecans, chopped (plus extra for topping)
– 1 cup sugar-free maple syrup
– 1 tsp vanilla extract
– ½ tsp salt
– ½ tsp cinnamon
Equipment Needed
– Mixing bowls
– Measuring cups and spoons
– 8×8 inch baking dish
– Parchment paper
– Whisk
– Fork or pastry cutter for crust
Step-by-Step Instructions
To start, preheat your oven to 350°F (175°C). I always love the warmth that fills my kitchen as it heats up, bringing with it the promise of deliciousness. In a medium mixing bowl, combine the almond flour, melted butter, and Erythritol. Mix these ingredients until they form a nice crumbly texture. You can use a fork or even your hands—whatever works best for you! Pack this mixture into the bottom of your baking dish to form a crust. It should feel firm but crumbly, like a perfect pie crust. (See the next page below to continue steps…)
Next, bake the crust in the preheated oven for about 10-12 minutes until it’s lightly golden. This step is crucial—it helps set the base and makes it extra delicious! While that’s baking, let’s whip up the filling. In another mixing bowl, combine the eggs, sugar-free maple syrup, vanilla extract, salt, and cinnamon. Whisk until everything is nicely combined and slightly frothy. The smell of vanilla and cinnamon wafting through my kitchen is simply heavenly!
Once your crust is ready, pull it out of the oven and pour the filling mixture over the top. Now, sprinkle the chopped pecans evenly over the surface and press them down gently into the filling. I like to leave some peeking out for that beautiful, rustic look. Bake the bars for an additional 20-25 minutes or until the filling is set. Your kitchen will start to smell like a bakery, and trust me, you won’t be able to resist peeking in on those bubbly, golden bars!
Lastly, let the bars cool completely before slicing. I know, waiting can be tough, but it’s worth it! Once they’ve cooled, slice them into squares and enjoy. The crunchy, nutty topping on the rich filling makes every bite a small piece of heaven.
Pro Tips for Best Results
From my experience, letting the filling thicken slightly before you pour it over the crust makes a difference in texture. I usually let it sit for 5 minutes after mixing, and it turns out richer. Also, choosing high-quality maple syrup brings out the flavors beautifully, so don’t skimp! I learned the hard way, and it definitely made a noticeable difference in flavor.
If you want that extra crunch in your bars, consider toasting the pecans before incorporating them into the filling. Simply throw them in a dry pan over medium heat for a few minutes until they’re fragrant. The aromas that fill my kitchen are just divine and add a lovely depth of flavor!
Lastly, I find chilling the bars in the fridge for a bit helps them firm up even more, which means cleaner slices and a more satisfying texture. I usually let mine cool at room temperature and then chill them for at least 30 minutes—trust me; you’ll thank me later!
Common Mistakes to Avoid
One pitfall I’ve noticed people fall into is overbaking the crust. It should be golden, but if it turns dark brown, it can impart a bitter taste that’s just not pleasant. As soon as you see that light shade of gold, pull it out! (See the next page below to continue…)
Another mistake is not letting the filling cool completely before slicing. I know the temptation is real, but if you cut into them too soon, you’ll have a gooey mess instead of neat bars. Trust the process!
Regarding ingredients, make sure you use a sugar substitute that you’ve tried before. I once tried a new brand that didn’t behave well in baking, and the taste was, let’s just say, less than desirable! Stick to what you know works for you for best results.
Lastly, don’t skip the parchment paper when lining your baking dish. It makes removing the bars a breeze and cuts down on clean-up time. I’ve learned this the hard way more times than I care to admit!
Serving Suggestions
These Keto Pecan Pie Bars are fantastic on their own, but when I’m in the mood for a little extra indulgence, I love to serve them with a dollop of sugar-free whipped cream on top. It adds a creamy texture that complements the bars perfectly and makes them feel even more like a special dessert.
You could also serve them warmed slightly in the microwave (about 10-15 seconds) and pair them with a scoop of low-carb vanilla ice cream. The combination of warm bars and cold ice cream is an absolute win in my book!
For a beautiful presentation at gatherings, I like to plate them with fresh berries and a sprinkle of powdered Erythritol. It not only adds color but also a refreshing contrast to the rich pecan flavors. Your guests will love it!
Variations & Customizations
If you want to take your bars up a notch, why not play with the nut toppings? Add some chopped walnuts or even a mix of different nuts for an interesting twist. I’ve tried it both ways, and each variation brings a new dimension of flavor and texture that I find refreshing!
You can also swap out the sweetener for your favorite, keeping in mind that some may have a stronger flavor than others. Each time I experiment with a different sweetener, it brings a unique twist. Just remember to adjust the quantity according to the sweetness level!
Lastly, I love to throw in a few dark chocolate chips for an irresistible chocolate-pecan combo. It’s such a delightful surprise amid the nutty goodness, and it feels like a decadent treat while still being keto-friendly!
How to Store, Freeze & Reheat
These bars store beautifully! Just keep them in an airtight container in the fridge for up to a week. Honestly, they taste even better after a day or two as the flavors meld together. I find myself enjoying them even more as they sit!
If you want to keep them longer, these bars freeze wonderfully. Wrap them tightly in plastic wrap or store them in a freezer-safe container for up to three months. When I’m craving a quick treat, I just pull out a piece, let it thaw at room temperature, or pop it in the microwave for a few seconds.
Reheating is simple; just be sure not to overdo it! A quick zap in the microwave for about 10-15 seconds is perfect. It brings back that warm, gooey filling—absolutely delightful!
Conclusion
I hope this Keto Pecan Pie Bars recipe finds a cozy spot in your kitchen and your heart! They’re a delicious way to enjoy a low-carb dessert and are perfect for gatherings or just a simple snack at home. The journey of making these bars is as lovely as the taste, and I always find joy in sharing them with others. Happy baking, friends!