
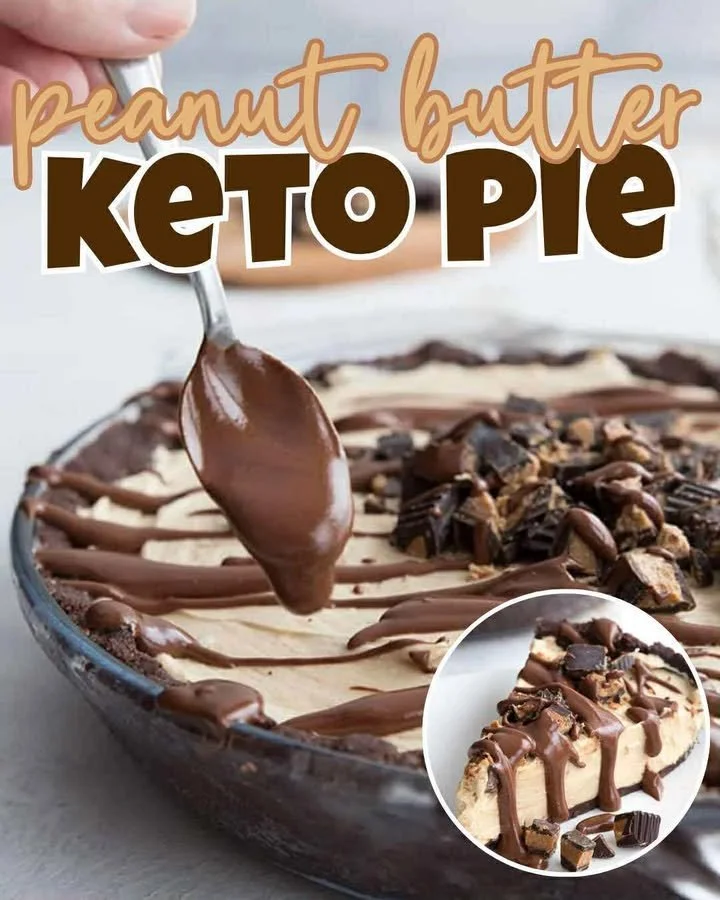
I have to say, there’s something so delightful about a creamy, no-bake pie that just makes my heart sing. Today, I’m excited to share with you my go-to recipe for Keto Peanut Butter Pie. This dessert is not only incredibly satisfying but also low in carbs, making it perfect for anyone on a keto diet. The rich flavor of peanut butter combined with the sweetness of a low-carb sweetener means I can enjoy it guilt-free.
Why You’ll Love This Recipe
This Keto Peanut Butter Pie is a dream come true for anyone with a sweet tooth who also wants to stick with their health goals. It’s indulgent, rich, and oh-so-creamy without the sugar crash that often follows traditional desserts. Plus, it’s simple to make and requires no baking at all, which means less fuss and more time to enjoy with loved ones. I promise, one slice will not be enough! I love making this pie for gatherings—it always gets rave reviews! (See the ingredients in the next page below…)
Ingredients
– 1 cup of almond flour
– 1/4 cup of unsweetened cocoa powder
– 1/3 cup of granulated erythritol (or your choice of sweetener)
– 1/4 cup of unsalted butter, melted
– 1 cup of creamy peanut butter (make sure it’s sugar-free)
– 8 oz of cream cheese, softened
– 1/2 cup of powdered erythritol
– 1 teaspoon of vanilla extract
– 1 cup of heavy whipping cream
Equipment Needed
– Mixing bowls
– Electric mixer or whisk
– 9-inch pie pan
– Spatula
– Measuring cups and spoons
Step-by-Step Instructions
To start, I mix the almond flour, cocoa powder, granulated erythritol, and melted butter in a mixing bowl until the mixture resembles wet sand. This forms the crust for the pie and gives it that lovely richness. I press the mixture into the bottom of a 9-inch pie pan, making sure to compact it well for stability. Once that’s done, I pop it into the fridge while I work on the filling. (See the next page below to continue steps…)
Next, I beat the softened cream cheese in a large bowl with my electric mixer until it’s nice and fluffy. This step is crucial because it creates a smooth filling. I gradually add the powdered erythritol and vanilla extract, continuing to mix until everything is well combined. Then comes the best part: I gently fold in the creamy peanut butter until the mixture is smooth and velvety.
Now, in a separate bowl, I whip the heavy cream until stiff peaks form. This adds a lightness to the pie that makes every bite just melt in your mouth! After that, I carefully fold the whipped cream into the peanut butter mixture. This is where the magic truly happens! Once combined, I pour this luscious filling into the cooled crust and smooth it out with a spatula.
To finish it off, I cover the pie and let it chill in the fridge for at least 4 hours, or overnight if I have the patience. The longer it sits, the better the flavors meld together, and I seriously can’t resist sneaking in a taste or two along the way!
Pro Tips for Best Results
When I first made this pie, I experimented with different peanut butters, and I quickly learned that the consistency really matters. I found that using a creamy, natural peanut butter yields the best results compared to processed varieties, which can sometimes be too sweet or sticky. If you prefer crunchy, go for it, but keep in mind that it might affect the smoothness of the filling.
I also love to tweak the level of sweetness in my pie. Depending on my mood, I’ll add a little more erythritol or even a splash of liquid stevia. Just remember to taste as you go; the beauty of cooking is making it your own!
Lastly, I always make sure to let my pie sit overnight whenever possible. This extra chill time is what makes the filling set perfectly, leading to the ideal slice when serving. Trust me; you want it to hold its shape when you dig in!
Common Mistakes to Avoid
I’ve certainly made my share of mistakes while perfecting this pie! One of the biggest ones was not cooling the crust long enough before pouring the filling in. It can cause the filling to melt slightly, which leads to a mess rather than an elegant presentation.
Another thing to keep an eye on is the mixing process. I once overmixed my cream cheese, and instead of a smooth filling, I ended up with a grainy texture. So, take it easy while mixing to achieve that luscious creaminess we’re aiming for!
Don’t forget to check for sugar content in the peanut butter you choose. Some brands sneak in sugars that can throw off the keto balance. I always go for varieties that are labeled as sugar-free. (See the next page below to continue…)
Lastly, avoid skimping on the chilling time. I know it’s tempting to dig right in, but the flavors truly develop with patience. You’ll be rewarding yourself with every delicious bite if you stick to the chilling time!
Serving Suggestions
Now that your Keto Peanut Butter Pie is ready, it’s time to serve it up! I love to garnish each slice with a dollop of homemade whipped cream for an extra rich experience. If I’m feeling fancy, I’ll even sprinkle some crushed unsweetened cocoa or chopped nuts on top for added texture.
This pie pairs beautifully with coffee or a glass of almond milk. I often enjoy it in the afternoon when I need a little pick-me-up or as a satisfying after-dinner treat.
If you’re hosting a gathering, consider slicing the pie into small portions. Each bite is rich, so smaller servings go a long way in ensuring everyone gets to enjoy this scrumptious dessert!
Variations & Customizations
There’s always room for creativity when it comes to this pie! For those who love chocolate, I’ve had success adding sugar-free chocolate chips to the filling. It adds an exciting chocolate swirl that feels indulgent without the guilt.
If you’re not a peanut butter fan, almond or cashew butter can also work wonders in this recipe. I’ve tested almond butter, and it adds a delightful nutty flavor that is equally enjoyable.
For a little burst of flavor, consider adding a swirl of low-carb raspberry or strawberry puree on top before chilling. The tartness from the berries complements the rich peanut butter perfectly!
How to Store, Freeze & Reheat
Storing your Keto Peanut Butter Pie is simple! Just cover the pie with plastic wrap or foil and keep it in the refrigerator for up to a week. I find it tastes even better after a couple of days as the flavors continue to meld!
If you want to prep ahead of time, this pie freezes beautifully. Just slice it into pieces and wrap each slice in plastic wrap before placing them into an airtight container. You can freeze it for up to three months—perfect for late-night cravings or surprise guests!
To enjoy your frozen pie, simply transfer it to the fridge to thaw for a few hours before serving. I usually let mine sit at room temperature for about 15-20 minutes to return to that creamy texture. You’re going to love having this delicious treat on hand!
Conclusion
Making Keto Peanut Butter Pie in my kitchen has become a cherished ritual, and I hope my tips help you create your own indulgent masterpiece! Whether it’s for a special occasion or just a well-deserved treat for yourself, I guarantee this pie will bring joy to your taste buds. Happy baking, and enjoy every rich, creamy bite!