
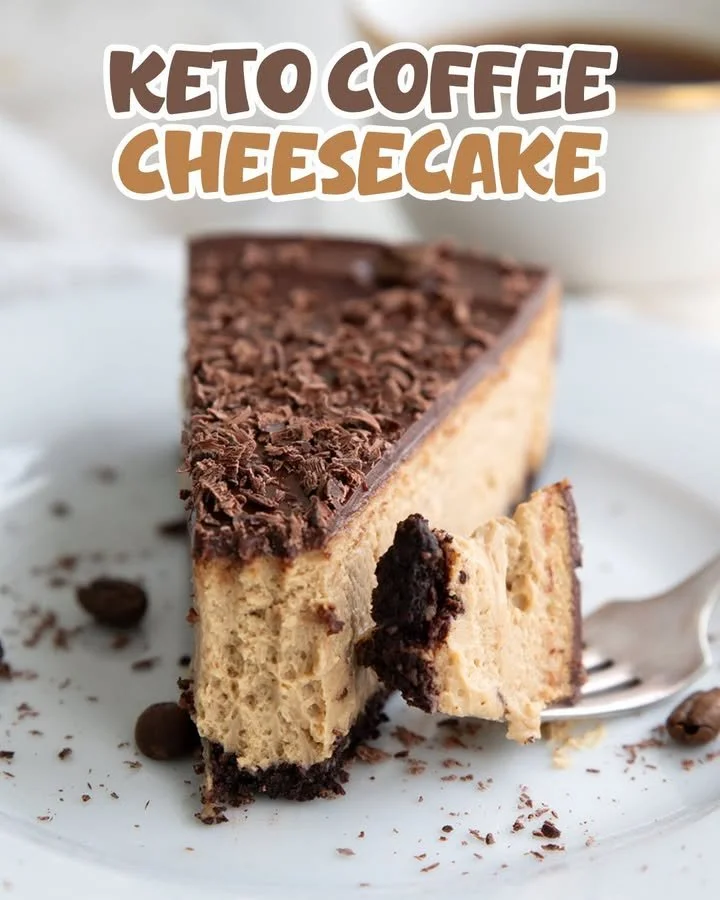
Welcome to my kitchen, where I’ve lovingly whipped up a delightful recipe that combines two of my absolute favorite things: coffee and cheesecake! If you’ve been on the keto diet or just searching for a low-carb dessert that doesn’t skimp on flavor, you’ll want to stick around. This Keto Coffee Cheesecake is luscious, creamy, and perfectly satisfying. With just the right amount of coffee to give you that warm, energizing kick, it’s a treat that keeps you on track without sacrificing pleasure.
Why You’ll Love This Recipe
One of the best parts about this Keto Coffee Cheesecake is that it feels indulgent while being completely guilt-free. The richness of cream cheese, combined with the nutty, aromatic flavor of coffee and a buttery, crumbly crust, will make you forget you’re eating something healthy. It’s perfect for those moments when you want a sweet treat but don’t want to derail your dietary goals. Oh, and did I mention it’s incredibly easy to whip up? It’s a win-win! (See the ingredients in the next page below…)
Ingredients
– 2 cups almond flour
– 1/2 cup unsweetened cocoa powder
– 1/2 cup butter, melted
– 3 tablespoons erythritol (or your preferred sweetener)
– 2 cups cream cheese, softened
– 1 cup heavy cream
– 3 large eggs
– 2 tablespoons instant coffee granules
– 1 teaspoon vanilla extract
– A pinch of salt
Equipment Needed
– 9-inch springform pan
– Mixing bowls
– Electric mixer or whisk
– Rubber spatula
– Measuring cups and spoons
– Baking sheet
– Parchment paper
Step-by-Step Instructions
Let’s start by preheating your oven to 350°F (175°C). While that’s heating up, I like to prepare the crust. In a bowl, combine the almond flour, cocoa powder, melted butter, and erythritol. Mix it until you get a crumbly texture. Once that’s ready, press it evenly into the bottom of the springform pan. Bake the crust for about 10–12 minutes, just until it’s firm. Oh, the aroma of the toasted almond flour mixed with cocoa is heavenly! (See the next page below to continue steps…)
In a separate bowl, I combine the softened cream cheese and heavy cream. Using my electric mixer, I beat them until it’s smooth and creamy. Then, I gradually add in the eggs, one at a time, mixing well after each addition. The next step is where the magic happens—mix in the instant coffee granules, vanilla extract, and a pinch of salt. The smell is simply intoxicating! Pour the cheesecake filling over the crust and spread it evenly with a spatula.
Now, it’s time to bake this beauty! Place the springform pan on a baking sheet, as this helps catch any drippings. Bake the cheesecake for about 45–55 minutes, until the edges are set but the center still has a slight jiggle. Don’t worry—it’ll firm up in the fridge. Once it’s done baking, let it cool at room temperature before placing it in the fridge to chill for at least four hours, preferably overnight.
When it comes time to serve, I love to add a dollop of whipped cream on top for an extra indulgent touch. I promise, the first bite will have you swooning with delight!
Pro Tips for Best Results
I tested this cheesecake a few times to get it just right. One of my top tips is to use room temperature cream cheese. Cold cream cheese doesn’t blend as smoothly, and we want that velvety texture. I also found that using high-quality instant coffee really elevates the flavor, so don’t skimp on that! The last pro tip: always chill it for at least four hours. Patience is key here; it just gets better with time.
When blending, I recommend starting with a lower speed to avoid splattering. Once the mixture starts to come together, you can turn up the speed for a fluffy consistency. It’s all in the details! And when it comes to the crust, pressing it down firmly ensures it holds its shape after baking. Trust me; it’s worth that extra effort!
Lastly, if you’re a chocolate lover like me, consider adding a couple of tablespoons of cacao nibs to the filling. It adds a delightful crunch and an extra depth of flavor that pairs beautifully with the coffee.
Common Mistakes to Avoid
One common mistake I made on my first attempt was underbaking the cheesecake. I found that a slight jiggle in the center is okay, but if it’s overly soft, it will collapse once cooled. Always remember: the cheesecake will settle as it chills! (See the next page below to continue…)
Another pitfall is not allowing the cheesecake to cool properly before refrigerating. Doing so can cause condensation, which might make your cheesecake soggy. Instead, I let mine cool at room temperature for about an hour or so.
Lastly, be mindful of your sweetener! Different keto sweeteners have different levels of sweetness, so adjust according to your taste. I recommend starting with less and tasting as you go—you can always add more, but you can’t take it out!
Serving Suggestions
When it comes to serving, I love to adorn my Keto Coffee Cheesecake with fresh whipped cream. Not only does it make it look purty, but the creaminess complements the cheesecake beautifully. Sometimes, I sprinkle a dash of cocoa powder or cinnamon on top for that extra flare. If I’m in the mood for a little crunch, toasted nuts or cacao nibs make fantastic toppings.
For a touch of fruitiness, you could also pair it with a spoonful of keto-friendly berry sauce. I’ve made a quick sauce by simmering a handful of raspberries with erythritol, and it adds a lovely tartness that cuts through the richness of the cheesecake.
Lastly, this cheesecake is perfect for entertaining! I often make it ahead of time for dinner parties, and it’s always a hit. Just slice it up, serve it on a beautiful platter, and watch the smiles!
Variations & Customizations
I love experimenting with different flavors in this recipe! One variation I tried was adding a swirl of peanut butter on top before baking. Just drop spoonfuls and use a knife to swirl it in for a delightful nutty bite. The combination of coffee and peanut butter is simply heavenly.
Another fun customization is using flavored coffee instead of regular instant coffee. Hazelnut, vanilla, or caramel coffee granules can add an interesting twist and keep things exciting. I even tried adding a hint of espresso powder for a more robust flavor; coffee lovers will adore it!
Finally, for those who prefer no chocolate, you could swap out the cocoa powder in the crust and use more almond flour or even coconut flour. The taste will shift slightly, but it remains delicious and keto-friendly!
How to Store, Freeze & Reheat
Storing leftover Keto Coffee Cheesecake is easy! Simply cover it tightly with plastic wrap or aluminum foil and keep it in the fridge for up to five days. I love having a slice ready to go; it makes for a quick grab-and-go dessert or snack!
If you want to freeze it, I recommend slicing it first. Wrap each piece tightly in plastic wrap and place them in an airtight container. It can last in the freezer for about two to three months. When you’re ready to enjoy, just let it thaw in the refrigerator for a few hours or overnight.
Reheating isn’t necessary for cheesecake, but if you prefer a slice slightly warmed, you can pop it in the microwave for about 10-15 seconds. Just be careful not to overdo it—nobody likes soggy cheesecake!
Conclusion
I hope you enjoy making this Keto Coffee Cheesecake as much as I did! It’s a delightful treat that satisfies sweet cravings without guilt. Perfect for gatherings, quiet evenings at home, or any time you want a bit of joy infused with coffee comfort. Happy baking, and enjoy every creamy, delicious bite!