
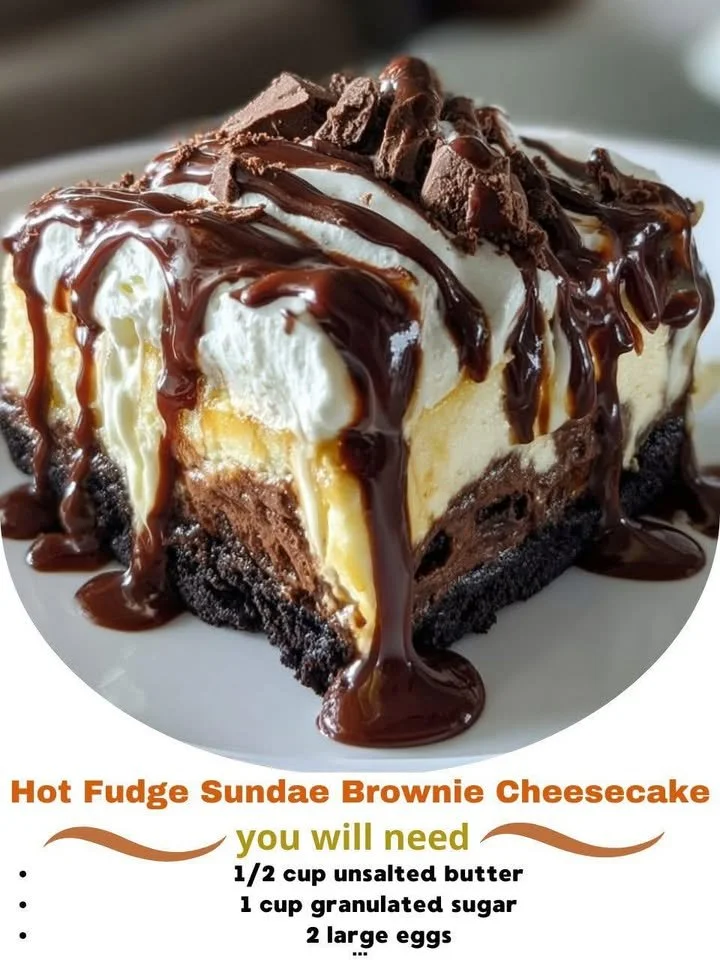
The Hot Fudge Sundae Brownie Cheesecake. If you love the rich, gooey texture of brownies, the creamy bliss of cheesecake, and the indulgent sweetness of hot fudge, then you’re in for a treat. This recipe is perfect for special occasions, holiday dinners, or even just a cozy night in with family. There’s something magical about combining these flavors into one stunning dessert that never fails to impress!
Why You’ll Love This Recipe
From the moment I first tasted this combination, I was hooked; it’s a symphony of textures and flavors that dances on your palate. The brownie layer is fudgy and rich, the cheesecake layer is silky smooth, and the hot fudge adds an irresistibly warm touch that brings everything together. You can hardly go wrong, and it’s sure to be a hit with anyone who takes a bite! So grab your apron and let’s dive in—I promise your taste buds will thank you! (See the ingredients in the next page below…)
Ingredients
- 1 box of brownie mix (plus ingredients called for on the box)
- 16 oz cream cheese, softened
- 1 cup granulated sugar
- 3 large eggs
- 1 teaspoon vanilla extract
- 1 cup sour cream
- 1 cup chocolate chips
- 1 cup hot fudge sauce (store-bought or homemade)
- Whipped cream (for topping)
- Chopped nuts or cherries (optional for garnish)
Equipment Needed
- 9-inch springform pan
- Mixing bowls
- Hand mixer or stand mixer
- Rubber spatula
- Measuring cups and spoons
- Double boiler or microwave-safe bowl for melting chocolate
Step-by-Step Instructions
To begin, preheat your oven to 350°F (175°C) and prepare your springform pan by greasing it lightly with non-stick spray or butter. First, prepare the brownie mix according to the package instructions. Pour the brownie batter into the bottom of the springform pan and spread it out evenly. Pop it in the oven and bake for about 20 minutes. It should still be slightly underbaked; trust me, this is key to that fudgy texture we love! (See the next page below to continue steps…)
Once your brownies are done, take them out of the oven and let them cool for a few minutes while you prepare the cheesecake layer. In a large mixing bowl, combine softened cream cheese and sugar, and mix on medium speed until fluffy. Adding the eggs one at a time, beat until just combined—it’s okay if there are a few small lumps, that just makes it more delicious! Next, mix in the vanilla extract and sour cream until everything is blended smoothly.
Now, pour the cheesecake batter over the cooled brownie base, spreading it evenly. Before putting it in the oven, sprinkle the chocolate chips on top. The cheesecake bakes for approximately 45 minutes. It’s done when the edges are set but the center has a slight jiggle to it; this means it’ll firm up nicely as it cools. Once the cheesecake is done baking, turn off the oven and let it cool in there for about an hour with the door cracked.
After that, refrigerate the cheesecake for at least four hours—or ideally overnight—so it’s set perfectly. When you’re ready to serve, carefully release the sides of the springform pan. For the pièce de résistance, warm up your hot fudge sauce and drizzle it generously over each slice, topping it off with whipped cream and your choice of nuts or cherries.
Pro Tips for Best Results
I tested this recipe a few ways, and I found that the key to that perfect brownie is underbaking by just a couple of minutes. Trust me; nobody likes a dry brownie, and you want that fudgy layer to complement the creamy cheesecake nicely. I also love to use high-quality chocolate chips because they add an extra layer of richness and flavor. If you ever wonder how to take it up another notch, you could even use chocolate chunks.
Another thing I learned is to give your cheesecake plenty of time to chill. Patience is essential! If you rush the chilling process, you might end up with a gooey cheesecake that falls apart when you slice it. I’ve also discovered that letting it sit at room temperature for about 15 minutes before serving allows it to soften just a bit, making it even creamier.
Lastly, do not be shy with the toppings. Hot fudge, whipped cream, and whatever else you love—it’s all part of the experience. I’ve experimented with caramel sauce and even fresh berries, and believe me, it just elevates your dessert to a whole new level of deliciousness!
Common Mistakes to Avoid
One common mistake I made initially was overmixing the cheesecake batter. It’s tempting to keep mixing until everything is perfectly smooth, but overmixing can introduce too much air, which leads to cracks during baking. I learned to mix just until combined, and the results were so much better! Another issue I encountered was not allowing the brownie base to cool before adding the cheesecake mixture—this caused the brownie to get overly soft and lose its distinct texture. (See the next page below to continue…)
I’ve also seen people pour hot fudge straight from the jar onto cold cheesecake—it’s a delightful thought, but let it warm gently first! Cold fudge on a chilled dessert doesn’t provide that satisfying melt-in-your-mouth experience; a nice warm drizzle is what truly transforms each bite. Finally, I often forgot to check the jiggle test for the cheesecake. Underestimating the baking time made some cheesecakes too firm, while others ended up a soupy mess.
So take your time, check each step, and don’t skimp on the chilling time! I can tell you from experience that it’s totally worth it for that perfect slice of cheesecake atop a brownie base.
Serving Suggestions
When it comes to serving this delightful Hot Fudge Sundae Brownie Cheesecake, I love presenting it on a beautiful cake stand. It adds that touch of elegance. A generous drizzle of warm hot fudge on top really draws the eye and just begs for a scoop of whipped cream. You can also have a little station with different toppings like sprinkles, chopped nuts, or even a variety of sauces. There’s something fun about making each slice unique!
For a cozy night in, I often pair a slice of this cheesecake with a scoop of vanilla bean ice cream. The warmth of the hot fudge against the cold ice cream creates that delightful contrast. Plus, it’s totally comforting! If I have friends over, I sometimes serve it as a plated dessert with coffee—trust me, it’s a match made in heaven!
Another fun way to serve it is in smaller pieces if you’re hosting a big gathering. You can cut the cheesecake into tiny squares and serve alongside mini cups of hot fudge for dipping. This interactive approach is always a hit with guests and allows everyone to indulge just the right amount.
Variations & Customizations
This recipe is so versatile; you can easily swap out flavors to match your preferences! For instance, if you love peanut butter, you can replace some of the cream cheese with creamy peanut butter and sprinkle crushed peanuts on top before drizzling with hot fudge. The combination is out of this world and lends a nostalgic flavor that reminds me of my favorite childhood treats!
If you want a fruity twist, consider adding fresh raspberries or strawberries between the brownie and cheesecake layers. The tartness of the berries contrasts beautifully with the richness of the chocolate and cream cheese, creating a balanced dessert that’s still indulgent but a little lighter!
Lastly, for the chocolate lovers out there (like me), you can amp up the chocolate flavor by using a chocolate brownie mix or even adding cocoa powder to the cheesecake batter. The added depth of flavor creates a show-stopping dessert that will have everyone begging for the recipe!
How to Store, Freeze & Reheat
Storing this cheesecake is a breeze! I usually cover it tightly with plastic wrap or aluminum foil and keep it in the refrigerator for up to a week. If you have leftovers, they often taste even better the next day as the flavors meld together beautifully. Just remember to bring it to room temperature before serving for that ideal creamy texture!
Freezing is also an option if you want to extend its life further. Individually wrapped slices freeze well for up to three months. Just make sure to wrap each piece tightly with plastic wrap and then ensure it’s in an airtight container or freezer bag to prevent freezer burn. When you’re ready to enjoy, simply transfer the pieces to the refrigerator to thaw overnight.
Reheating is all about ensuring each bite remains delightful and creamy. I typically avoid using the microwave, as it tends to make cheesecakes a bit rubbery. Instead, I opt for letting it sit at room temperature for about 30 minutes before serving—this way, the texture stays silky smooth, and you can warm your hot fudge sauce in the microwave or on the stovetop for that extra indulgence!
Conclusion
And there you have it—a deliciously decadent Hot Fudge Sundae Brownie Cheesecake that’s sure to bring smiles to the faces of everyone who tries it. Whether you’re celebrating a special occasion or simply treating yourself (which we all deserve from time to time), this dessert will make you feel like a culinary rockstar. I hope you enjoy making it as much as I do. Happy baking, friends!