
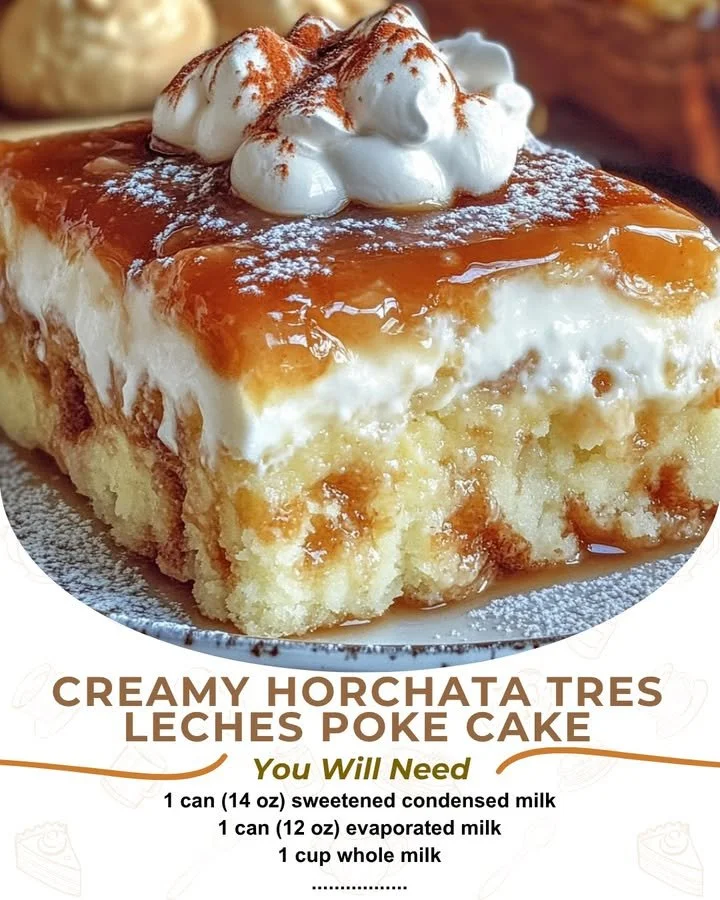
Creamy Horchata Tres Leches Poke Cake! If you’ve ever had the pleasure of tasting traditional tres leches cake, you know how delightfully moist and sweet it can be. Now, imagine taking that beloved classic and infusing it with the delightful flavors of horchata, a refreshing Mexican rice drink. In my kitchen, this cake doesn’t just make an appearance at celebrations; it’s a cozy treat I love to whip up for friends and family alike.
Why You’ll Love This Recipe
This recipe combines everything I adore about dessert: it’s easy to make, bursting with flavor, and incredibly satisfying. The creamy horchata soak gives the cake a rich depth, while the light and fluffy texture makes it difficult to resist going back for seconds. The sweet cinnamon and vanilla notes remind me of sunny afternoons spent with loved ones enjoying the simplest joys of life together. Trust me, once you serve this cake, it will become a favorite in your household, too! (See the ingredients in the next page below…)
Ingredients
– 1 box vanilla cake mix
– 3 large eggs
– 1 cup milk
– 1 cup sweetened condensed milk
– 1 cup evaporated milk
– 1 cup horchata (store-bought or homemade)
– 1 teaspoon vanilla extract
– 1 teaspoon ground cinnamon
– Whipped cream, for topping
– Ground cinnamon, for garnish
Equipment Needed
– Mixing bowls
– Electric mixer or whisk
– 9×13 inch baking dish
– A toothpick or skewer
– Measuring cups and spoons
Step-by-Step Instructions
First, preheat your oven to 350°F (175°C) and grease your 9×13 inch baking dish. I love this dish because it’s perfect for baking cakes that are easily shareable. Then, in a large mixing bowl, combine the vanilla cake mix, eggs, and milk. I usually use an electric mixer for this step because it makes the batter light and fluffy. Mix on medium speed until well combined and smooth. This step gets the cake off to a great start! (See the next page below to continue steps…)
Next, pour the batter into your greased baking dish and bake in the preheated oven for about 25-30 minutes, or until a toothpick inserted in the center comes out clean. The lovely aroma of the cake baking will start to fill your kitchen, reminding you just how wonderful homemade desserts can be! Once baked, let the cake cool completely in the pan, which is crucial for allowing the soaking liquids to absorb later.
While the cake cools, it’s time to prepare the soaking mixture. In a separate bowl, whisk together the sweetened condensed milk, evaporated milk, horchata, vanilla extract, and ground cinnamon. This creamy mixture is what truly transforms the cake into a tres leches wonder. Once the cake is cooled, use a toothpick or skewer to poke holes all over the surface, creating channels for the soaking liquid to seep in.
Now, slowly pour the horchata mixture over the entire cake, allowing it to soak in thoroughly for an hour in the refrigerator. This wait can feel long, but trust me, it will be worth every minute when you take your first bite of that moist, flavorful cake. Finally, before serving, top it with whipped cream and a sprinkle of cinnamon for that extra touch of elegance.
Pro Tips for Best Results
I tested this recipe three ways to see what worked best, and I learned that letting the cake soak overnight yields the most incredible texture! If you can, prepare it the day before you plan to serve it. I also discovered that using homemade horchata takes the flavor up a notch, but store-bought works just fine if you’re short on time.
Another little tip I stumbled upon is to serve this cake cold. It doesn’t just taste incredible; the chilled texture contrasts beautifully with the creamy topping. I often pop mine into the fridge after frosting it—it elevates the dessert to a whole new level of refreshment, making it a perfect summer treat.
Lastly, if you’re not a fan of whipped cream topping, feel free to substitute it with crema Mexicana for an authentic touch. The tanginess of the crema pairs wonderfully with the cake’s sweetness and enhances those horchata flavors perfectly.
Common Mistakes to Avoid
One mistake I made the first time I prepared this cake was pouring the soaking mixture over a still-warm cake. I found that this resulted in a slightly gummy texture rather than the beautifully moist cake I was aiming for. Remember, patience is key—you want that cake to cool completely! (See the next page below to continue…)
Another common pitfall is not poking enough holes in the cake. If you don’t create enough openings, the soaking mixture won’t be able to fully penetrate the cake. I learned this the hard way, ending up with dry spots in what should have been a glorious moist dessert. So, don’t be shy; get poking!
Also, keep in mind that it’s easy to over-whip the whipped cream if you’re going for a homemade topping. It should be light and airy rather than grainy. I often make mine using a hand whisk to keep things in check!
Lastly, storing the cake wrong can ruin all your hard work. I made the mistake of covering it tightly with plastic wrap instead of loosely with foil, which made the top sticky. Always store it covered, but leave space for it to breathe!
Serving Suggestions
When it comes to serving, I love to present this cake on a beautiful platter, garnished with a sprinkle of cinnamon and a sprig of fresh mint for a pop of color. You can also serve it with a side of fresh fruit for added brightness—slices of strawberries or drizzled mango puree never hurt!
If you’re hosting a gathering, consider pairing each slice with a refreshing glass of horchata or even a chilled Mexican soda. The combination brings out the flavors of the cake beautifully, creating a pleasant pairing experience that guests will love.
And don’t forget to include a few spoons next to your cake, as I guarantee people will want to savor every last bite. This cake is perfect for any occasion but shines at birthday parties or family get-togethers where you want to impress!
Variations & Customizations
While I adore this classic recipe, I sometimes like to shake things up a bit. For a chocolate twist, I’ve swapped the vanilla cake mix for chocolate cake mix. It may seem unusual, but the chocolate and horchata combination is delightful and adds an unexpected depth of flavor.
Another fun variation is to add different spices to the soaking mixture. I’ve experimented with a touch of nutmeg or cardamom, which adds an exciting layer of flavor that feels cozy and unique. Plus, you can adjust the sweetness based on your preference by adding more or less sweetened condensed milk.
Lastly, I’ve also tried topping the cake with different fruits. Think sliced bananas or shredded coconut! They not only create a visual feast but also enhance the tropical feel of this treat. Let your creativity guide you in the kitchen!
How to Store, Freeze & Reheat
To store leftovers, simply cover the cake loosely in the fridge with foil. It will stay fresh for about 3-5 days, but trust me, it’s so delicious it rarely lasts that long! When covered appropriately, those lovely flavors just get better with time.
If you have a lot left and want to save some for later, this cake can also be frozen. I recommend cutting it into individual servings before freezing. Place those pieces in airtight containers or wrap them tightly in foil. They can be stored in the freezer for up to three months. Just remember to label them with the date, so you know when to enjoy them!
When you’re ready to indulge in your frozen slice, just thaw it overnight in the refrigerator. I like to add a fresh dollop of whipped cream right before serving to bring it back to life and ensure it tastes as good as the day you made it.
Conclusion
I hope you feel inspired to bake this Creamy Horchata Tres Leches Poke Cake in your own kitchen! It’s a delightful dessert that combines cultural flavors with a charming twist. Whether you’re sharing it with friends or savoring it solo on a quiet evening, this cake will surely create sweet memories. Happy baking!