
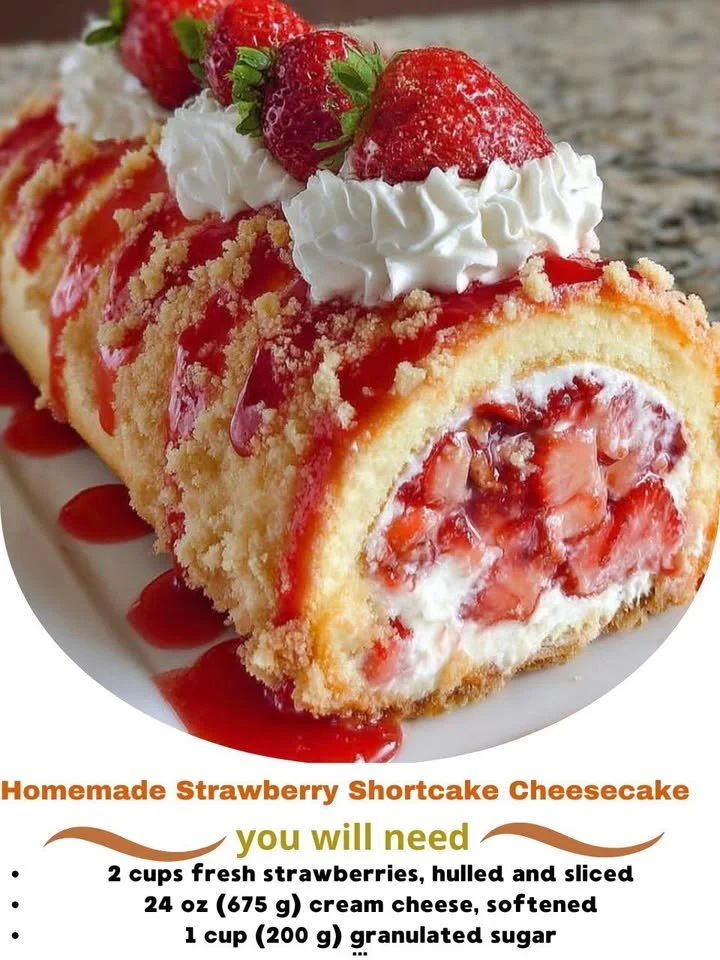
There’s something magical about strawberry shortcake when the strawberries are fresh and ripe, and the whipped cream is light and fluffy. Now, combine that with the creamy texture of cheesecake, and you’ve got something truly special! I love whipping up a Homemade Strawberry Shortcake Cheesecake in my kitchen, especially during the summer months when strawberries are bursting with flavor. This treat is the perfect balance of sweetness and creaminess, and it never fails to impress my family and friends. Let me take you through my delightful journey of creating this delicious dessert!
Why You’ll Love This Recipe
This Homemade Strawberry Shortcake Cheesecake is a dessert that feels luxurious but is surprisingly easy to put together! The creamy cheesecake layer is complemented perfectly by the sweet, juicy strawberries and fluffy whipped cream on top. It’s a beautiful centerpiece for any summer gathering or a sweet indulgence just for yourself! Plus, who wouldn’t love a recipe that merges two beloved desserts? (See the ingredients in the next page below…)
Ingredients
– 1 ½ cups graham cracker crumbs
– ½ cup granulated sugar
– ⅓ cup unsalted butter, melted
– 2 (8 oz) packages cream cheese, softened
– 1 cup powdered sugar
– 1 teaspoon vanilla extract
– 2 large eggs
– 2 cups fresh strawberries, sliced
– 1 cup heavy whipping cream
– 2 tablespoons sugar (for whipping cream)
– Additional sliced strawberries for topping
Equipment Needed
– 9-inch springform pan
– Mixing bowls
– Electric mixer or whisk
– Rubber spatula
– Baking sheet
– Parchment paper
Step-by-Step Instructions
To start off, preheat your oven to 325°F (160°C). In a mixing bowl, combine the graham cracker crumbs, granulated sugar, and melted butter. Stir until it’s well-combined and the mixture resembles wet sand. Press this mixture firmly into the bottom of the springform pan to create a solid crust. Pop it into the oven for about 10 minutes, until it’s set and slightly golden. The smell of toasting graham crackers fills my kitchen—absolutely delightful! (See the next page below to continue steps…)
Next, while your crust is cooling, it’s time to prepare the cheesecake filling. In a clean bowl, beat together the softened cream cheese and powdered sugar until it’s fluffy and smooth, then add the vanilla extract. Make sure there are no lumps; I find that this is key for that silky cheesecake texture. Gradually add in the eggs, one at a time, mixing just until blended. Pour this luscious mixture over your cooled crust and bake for about 50-60 minutes. The edges should look set while the center remains slightly jiggly—it’ll firm up as it cools.
Once your cheesecake is out of the oven, let it cool in the pan for about an hour before moving it to the refrigerator. Ideally, you’ll want it to chill for at least 4 hours or overnight for the best results. When you’re ready to serve, whip the heavy cream and sugar together until soft peaks form. Spreading this fluffy whipped cream over the cheesecake makes it look stunning, and the final touch of fresh strawberries on top adds a pop of color and freshness!
Don’t forget to slice the cheesecake with a nice sharp knife—you want that perfect slice to showcase all the delicious layers. As I serve it, I can’t help but feel excited about sharing this creation with loved ones. It’s not just a dessert; it’s a testament to the lusciousness of summer!
Pro Tips for Best Results
One thing I learned through my baking adventures is that using room-temperature ingredients, especially the cream cheese and eggs, helps achieve that smooth and creamy texture in the cheesecake. I’ve tried mixing when my ingredients were cold, and trust me, it’s a game changer!
Another tip is to avoid overbeating once the eggs are added. I tested this three ways, and I found that mixing just until combined prevents air bubbles from forming, which helps my cheesecake bake evenly without cracks.
Lastly, allowing the cheesecake to chill overnight really enhances the flavors and improves the texture. If you can resist the temptation to dig in right away, you absolutely should—it’s worth it!
Common Mistakes to Avoid
One common mistake I see (and have made myself!) is not preparing the springform pan properly. Make sure to grease the pan lightly or line the bottom with parchment paper to ensure easy removal. If the cheesecake sticks, it can ruin the beautiful presentation. (See the next page below to continue…)
Another thing to watch out for is baking the cheesecake at too high a temperature. Setting your oven too high can result in a cracked top and a less than ideal texture. I’ve found that a steady, moderate temperature helps the cheesecake bake evenly and beautifully.
Also, resist the urge to open the oven door during baking! I know it’s tempting to check on your cheesecake, but doing so can cause it to sink in the middle. Instead, I like to set a timer and trust the process.
Serving Suggestions
When it comes to serving this delightful dessert, presentation is key! I love serving slices on pretty dessert plates with a fresh strawberry on the side and a dollop of leftover whipped cream on top. It always gets compliments!
You could also drizzle some chocolate syrup or a berry sauce over the cheesecake for an added twist. The extra touch makes it feel extra special, perfect for birthday celebrations or summer gatherings.
If I’m feeling fancy, I sometimes like to sprinkle a little mint on the plate for garnish. It not only adds a pop of color but a refreshing taste that complements the strawberries!
Variations & Customizations
This recipe is wonderfully versatile, and I adore experimenting with different layers. You can swap strawberries for other berries like blueberries or raspberries. Each variation brings a unique flavor profile while keeping that creamy cheesecake base intact.
Another fun twist is to add crushed up cookies (like Oreos or chocolate wafers) into the crust. The chocolatey flavor contrasts beautifully with the sweet strawberries and is a hit with those who crave something a little different.
If you enjoy a bit of citrus zest, try adding some lemon or orange zest to the cheesecake filling. It brightens it up and complements the strawberries nicely, giving your cheesecake a refreshing zing!
How to Store, Freeze & Reheat
Store any leftovers in the refrigerator in an airtight container. It stays fresh for about 3-4 days, but I doubt it will last that long! The flavors meld together beautifully as it sits, making each bite a little more delicious than the last.
If you want to make this cheesecake in advance, it freezes like a charm! Wrap it tightly in plastic wrap followed by foil, and it can last in the freezer for up to 2 months. Just make sure to thaw it in the fridge overnight before serving.
Reheating isn’t necessary for this dessert; it’s best served chilled. However, if you prefer it at room temperature, just let it sit out for a little while before serving. Either way, I guarantee it will be a crowd-pleaser!
Conclusion
Creating this Homemade Strawberry Shortcake Cheesecake in my kitchen is always a joy, and I hope you feel inspired to give it a try! It’s a delightful blend of flavors that brings smiles all around. Whether you’re celebrating a special occasion or simply treating yourself, this dessert is sure to impress. Happy baking, and may your kitchen be filled with love and sweetness!