
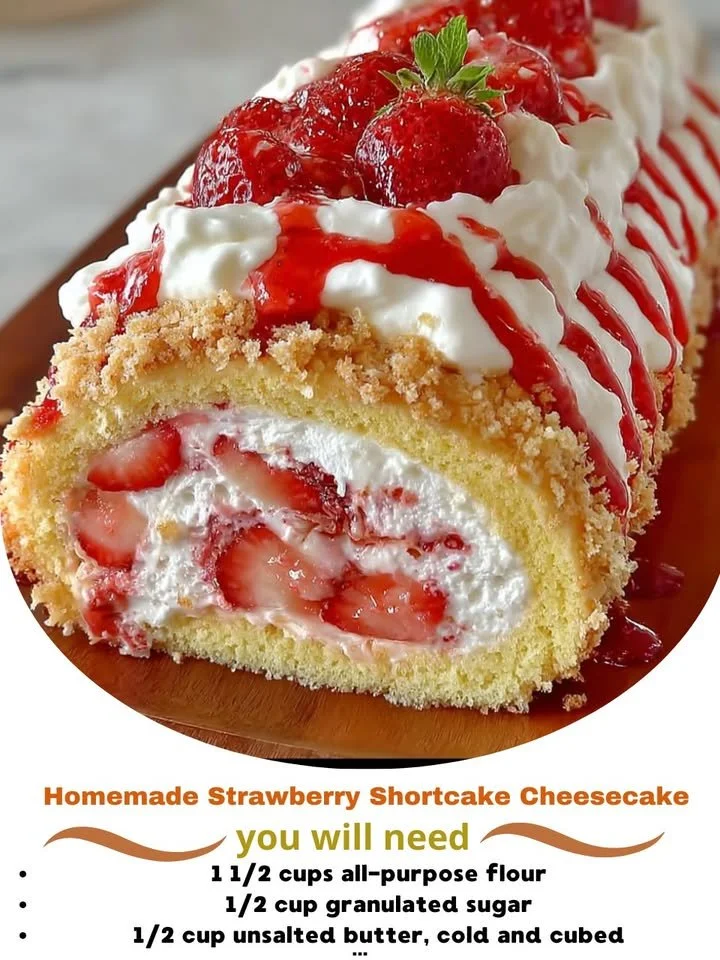
There’s something magical about strawberry shortcake, especially when you add the creamy richness of cheesecake into the mix. In my kitchen, this Homemade Strawberry Shortcake Cheesecake has become a favorite treat not just for special occasions but for any day that needs a little sweetening. Each bite is a delightful combination of fluffy cake, tangy cream cheese filling, and fresh strawberries. It’s a dessert that brings back childhood memories, and I can’t wait to share how easy it is to whip up this luscious treat.
Why You’ll Love This Recipe
This dessert is not only stunning to look at, but it also offers a perfect harmony of flavors that will make anyone swoon. The creamy cheesecake balances beautifully with the lightness of the shortcake, while the strawberries add that fresh, fruity twist that makes it truly irresistible. It’s a wonderful way to celebrate the sweet bounty of summer or treat yourself during any time of the year to something special. Trust me; once you make this cheesecake, it will surely become a staple in your dessert repertoire! (See the ingredients in the next page below…)
Ingredients
- 1 ½ cups crushed graham crackers
- ½ cup unsalted butter, melted
- 2 tablespoons sugar
- 3 (8-ounce) packages cream cheese, softened
- 1 cup sugar
- 1 teaspoon vanilla extract
- 3 large eggs
- 1 cup sour cream
- 2 cups fresh strawberries, sliced
- ¼ cup strawberry jam (optional)
- Whipped cream for topping
Equipment Needed
- 9-inch springform pan
- Mixing bowls
- Electric mixer
- Rubber spatula
- Measuring cups and spoons
- Oven
- Cooling rack
Step-by-Step Instructions
To start your journey towards this delicious cheesecake, preheat your oven to 325°F (160°C). In a medium bowl, combine the crushed graham crackers, melted butter, and 2 tablespoons of sugar. Mix them until they resemble wet sand. Press this mixture firmly into the bottom of your springform pan and bake it for about 10 minutes until lightly golden. The smell of toasted graham crackers wafting through my kitchen is already making me excited! (See the next page below to continue steps…)
Next, while the crust is cooling, it’s time to make the cheesecake filling. In a large mixing bowl, beat the softened cream cheese with an electric mixer until smooth and creamy. Gradually add in the sugar and vanilla, mixing until everything is well combined. Then, add the eggs one at a time, making sure not to overmix — a few lumps are okay! Once that’s done, gently fold in the sour cream until it’s just blended in. This mixture is truly one of the most delicious things I’ve ever tasted; it’s rich and velvety!
Now, pour the cheesecake filling over the cooled crust and spread it evenly with a rubber spatula. Bake it in the oven for about 55-65 minutes until the edges are set but the center has a slight jiggle. It’s normal for the cheesecake to puff up a little while baking — don’t worry, it will settle as it cools. After removing it from the oven, let it cool at room temperature for an hour, and then refrigerate for at least four hours or overnight if you can wait that long!
Once it’s chilled and set, top the cheesecake with sliced fresh strawberries and a drizzle of strawberry jam for that extra sweetness. You can also add whipped cream for decoration and an added touch of indulgence. You will feel like a true pastry chef when you present this beautiful dessert!
Pro Tips for Best Results
I’ve made this cheesecake a few times, and through my trials, I found that letting the cream cheese come to room temperature is crucial for achieving that smooth texture. If it’s too cold, you’ll end up with lumps in your filling, and nobody wants that! I tested this three ways and can confidently say that room temp cream cheese makes all the difference!
Another pro tip: always use fresh strawberries for topping. Frozen ones can make the topping watery and less visually appealing. The fresh ones not only provide a beautiful pop of color but also bring that vibrant flavor that pairs so perfectly with the cheesecake. Plus, there’s nothing quite like the smell of fresh strawberries in your kitchen!
Lastly, remember to cool the cheesecake in the oven with the door slightly ajar after it’s done baking. This helps prevent cracks from forming on the surface. I’ve had a few cracks in my cheesecakes in the past, and this simple trick significantly reduced those issues!
Common Mistakes to Avoid
One of the biggest mistakes I’ve made is rushing the cooling process. If you take the cheesecake out too soon, it can collapse, which will break your heart, and trust me, I know this from experience! Patience is key, so make sure to allow it ample time to set in the fridge before serving. (See the next page below to continue…)
Another mistake is overmixing the batter after adding the eggs. It’s easy to get carried away with our mixers, but overmixing incorporates too much air, which can lead to cracks while baking. A gentle folding technique works wonders here, ensuring a happy, crack-free cheesecake!
Also, using a springform pan that isn’t properly greased can lead to a nightmare when it comes to removing your cheesecake. Always take a moment to grease the pan with some butter or non-stick spray. This small step saves you from the disaster of your cake sticking to the sides!
Lastly, not adjusting the bake time for a dark-colored springform pan can lead to a slightly overcooked crust. It’s a subtle difference, but if you have a dark pan, reduce the bake time by 5-10 minutes to prevent burning.
Serving Suggestions
When serving this Homemade Strawberry Shortcake Cheesecake, I love to add a dollop of freshly whipped cream on top. The lightness of the whipped cream complements the density of the cheesecake perfectly, creating a delightful contrast in every bite. For special occasions, I’ll even sprinkle some fresh mint leaves for a pop of color and flavor!
Another fun way to serve this cheesecake is by cutting it into bite-sized squares for casual gatherings. It makes for a great finger food dessert option, and everyone seems to love being able to grab a smaller piece without the fuss of plates and utensils. I’ve often made mini versions in cupcake liners for easier serving. You could say the easier, the better!
For a more extravagant feast, consider layering individual glasses with cheesecake, whipped cream, and strawberries. This beautiful presentation dazzles guests and makes for a unique dessert experience. It’s always fun to add your own personal touch to serve and entertain!
Variations & Customizations
One of the things I love about this cheesecake recipe is the flexibility to make it your own! If you want to change things up, consider swapping the strawberries for other fruits like blueberries or raspberries. This will result in an equally delicious cheesecake that highlights whatever fruit you love most. Mixing a variety of fruits can create a colorful presentation that’s just as tasty!
Additionally, if you prefer a different crust, you can easily substitute graham crackers with crushed Oreos for a chocolate twist. The rich chocolate flavor pairs effortlessly with the cream cheese filling, creating a unique take on the classic flavor profile. I tested this once while my friends were over, and it was a total game-changer!
For those who want a dessert with added texture, consider incorporating crushed nuts like pecans or almonds into the crust. It gives every bite a little crunch and adds a delightful contrast to the creaminess of the cheesecake. So many ways to make it your own!
How to Store, Freeze & Reheat
After making your cheesecake, it’s essential to store any leftovers properly. I recommend keeping it in an airtight container in the refrigerator, where it can last for about 5-7 days. If you find yourself with busy days ahead, slicing pieces and wrapping them well in plastic wrap can help maintain freshness if you decide to share or serve later!
If you want to save your cheesecake for a later date, I’ve successfully frozen slices! I wrap each piece in plastic wrap and then place them in a freezer-safe bag. They can last up to 2-3 months; just remember to thaw them in the fridge overnight when it’s time to enjoy again. It’s the perfect way to ensure you have a lovely treat on hand!
When it comes to reheating, I generally recommend letting the cheesecake come back to room temperature rather than heating it. This helps avoid altering its lovely creamy texture. Simply remove it from the fridge a few hours before serving, and you’ll have a deliciously creamy cheesecake ready for your enjoyment!
Conclusion
I hope you’re as excited about making this Homemade Strawberry Shortcake Cheesecake as I always am! It’s a joyful recipe that not only fills your tummy but also fills your heart with warmth. Whether for a special occasion or just a delicious treat for yourself, this cheesecake will surely impress everyone who has the pleasure of tasting it. Happy baking, and enjoy every bite of your delightful creation!