
Another mistake is not letting the cheesecake cool gradually. I’ve tried speeding up the process by throwing it in the fridge right after it comes out of the oven, and while it might seem tempting, it often leads to cracks. A gradual cooldown helps maintain that smooth surface we want.
Lastly, when it comes to drizzling the chocolate and caramel, make sure they’re both warm but not hot. This ensures they flow nicely and create that gorgeous marbled effect on top. I tried using cold toppings once, and it just clumped and wouldn’t drizzle nicely—definitely not the look I was going for!
Serving Suggestions
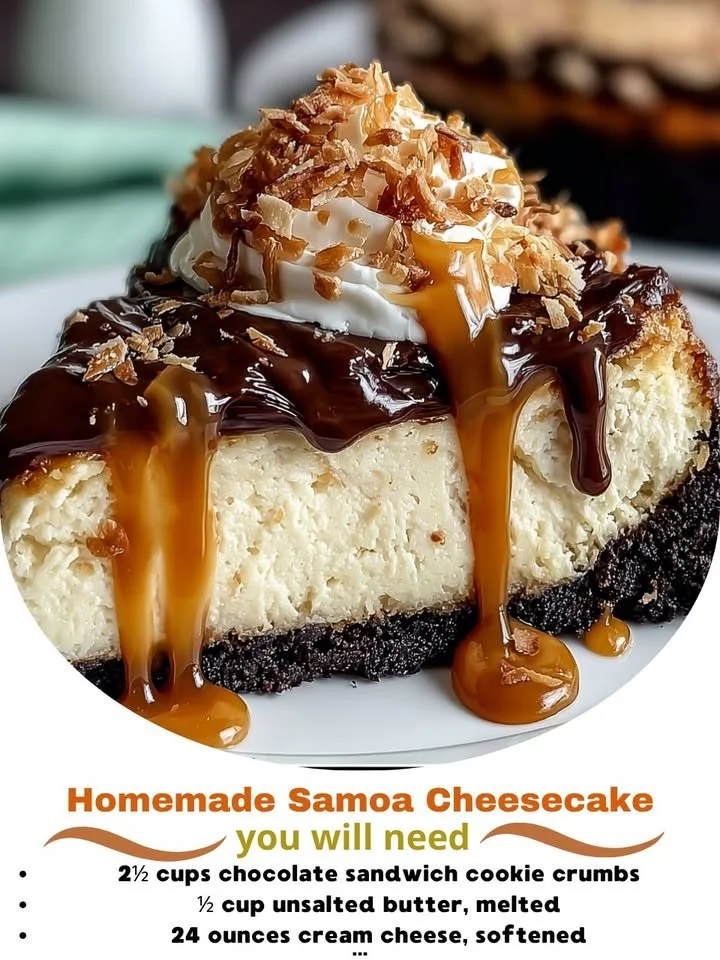
This Homemade Samoa Cheesecake is fabulous on its own, but if you want to impress guests, consider serving it with some lightly whipped cream on the side. I love how the sweetness of the whipped cream complements the rich flavors of the cheesecake without overpowering it. You can even sprinkle some extra toasted coconut on top for that extra visual flair!
Pairing a slice with a cup of coffee or a warm cup of tea creates a lovely experience. The bitterness of coffee really balances the sweetness of the cheesecake, making each bite even more enjoyable. I often find myself savoring the moment with friends and family around the table—it’s the perfect sweet treat for good conversations!
For special occasions, I love to go the extra mile and garnish individual slices with a sprig of mint or fresh berries. It adds a pop of color and makes the plate visually stunning. Plus, it’s an easy way to elevate the presentation without much effort!
Variations & Customizations
Feel free to customize the coconut content by playing around with different types, like using unsweetened versus sweetened coconut. I’ve found that using unsweetened coconut gives a more natural coconut flavor, while sweetened coconut can amp up the dessert’s sweetness level if that’s what you prefer. Either way, toasting it is key to bringing out the flavors!
If you’re looking for a chocolatey twist, consider adding a layer of chocolate ganache on top before drizzling it with caramel. Simply warm up some heavy cream and chocolate, stir until smooth, and pour that luscious mix over the cooled cheesecake. The combination of chocolate and coconut is absolutely divine!
For a different flavor profile, think about using different nut crusts, like pecans or almonds, instead of the shortbread. This can give the cheesecake a slightly different bite and flavor depth. I once tried a pecan crust and was delighted by the nutty richness it brought to the dish!
How to Store, Freeze & Reheat
This cheesecake stores excellently in the fridge for about a week, making it a great make-ahead dessert for gatherings. Just be sure to cover it tightly with plastic wrap or store it in an airtight container to keep it fresh. When I make this in advance, I find that the flavors meld beautifully as it sits!
If you want to save some for later, freezing works wonderfully too! I wrap individual slices in plastic wrap and then place them in a zip-lock freezer bag. When I’m ready for a slice of bliss, I pop it in the fridge overnight to thaw—easy and delicious! I find that the cheesecake holds up well in the freezer for up to three months without compromising its taste or texture.
Reheating isn’t necessary; it’s best served chilled. However, if you prefer it slightly warmer, you can let it sit at room temperature for about 20 minutes before serving. This helps soften the cheesecake, making each bite even creamier!
Conclusion
I hope you love making and enjoying this Homemade Samoa Cheesecake as much as I do! It has that perfect blend of flavors and textures that truly captures the essence of those classic cookies. Whether you’re celebrating a special occasion or just in the mood for something sweet, this cheesecake is sure to be a hit. Happy baking, and enjoy every slice!