
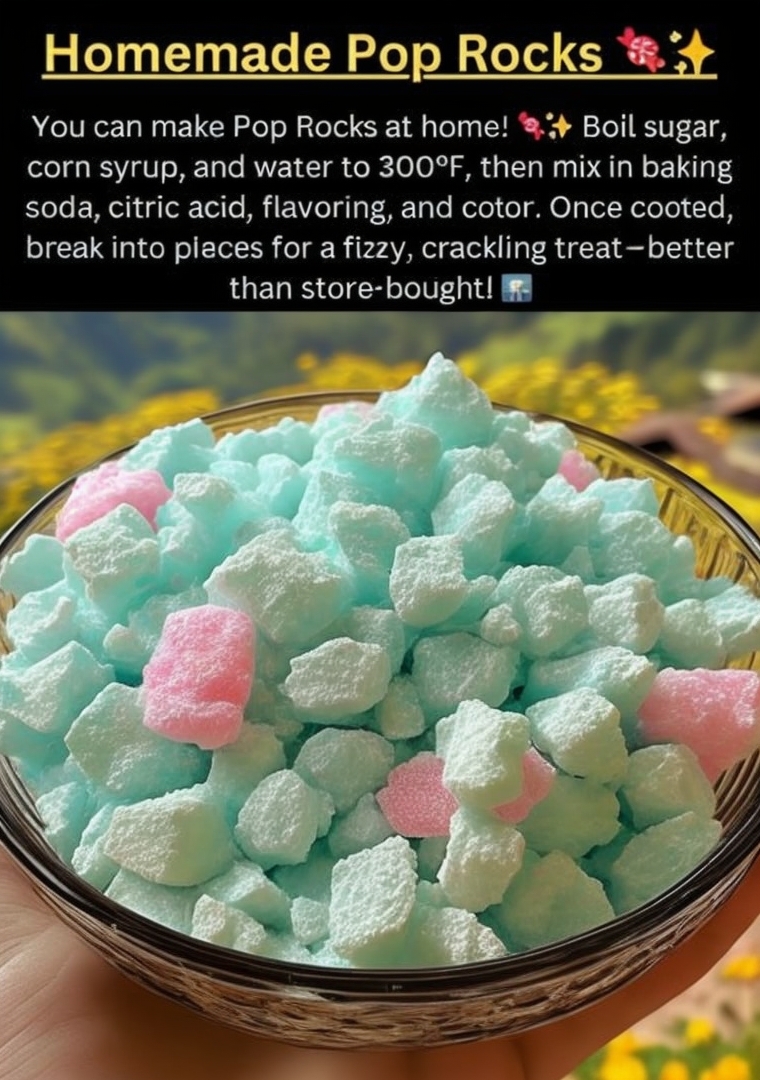
I tried making Homemade Pop Rocks out of pure, whimsical curiosity, wondering if I could really capture that childhood magic in my own kitchen. The process was a thrilling science experiment: watching the sugar syrup climb to 300°F, smelling the sharp tang of citric acid, and hearing the first faint sizzle when a droplet hit water. The moment I poured the molten candy onto my baking sheet and it hardened into a thin, glassy sheet, my heart raced. But the real magic happened when I broke off a piece and put it on my tongue—the immediate, explosive crackle and fizz was pure, hilarious joy. It felt like I’d unlocked a delicious secret.
Why You’ll Love This Recipe
You are going to love this recipe because it turns your kitchen into a candy lab and gives you a treat that’s genuinely fun to make and even more fun to eat. It’s a fantastic project to do with curious kids (with careful supervision!) or to impress your friends with your culinary wizardry. The satisfaction of creating that iconic popping sensation from scratch is unbeatable. Plus, you can customize the flavors wildly, making your own signature Pop Rocks that are, in my opinion, even more vibrant and fizzy than anything from a store packet.
Ingredients
- 1 cup granulated sugar
- 1/2 cup light corn syrup
- 1/4 cup water
- 1/4 teaspoon baking soda
- 1/2 teaspoon citric acid (find it in the canning or spice aisle)
- 1 teaspoon flavored extract (like lemon, orange, or cherry)
- 1-2 drops food coloring (optional)
- A pinch of salt (to balance sweetness) (See the next page below to continue…)
Equipment Needed
- Heavy-bottomed medium saucepan
- Candy thermometer (digital is best and non-negotiable)
- Silicone spatula
- Baking sheet lined with a silicone mat or heavily greased parchment paper
- Small bowls for pre-measured dry ingredients
- Mortar and pestle or spice grinder (for a fine powder)
- Tongs or a butter knife for breaking the candy
Step-by-Step Instructions
First, let’s talk safety and preparation. Making candy is a hot business, so I clear my stove of any clutter and make sure my little ones are occupied elsewhere. I line my baking sheet with a silicone mat—I’ve tried greased parchment, but the candy can sometimes stick horrifically. A silicone mat is your best friend here. Then, I measure out my dry ingredients: the baking soda and citric acid. This is crucial: I grind them together in a mortar and pestle until they’re a super-fine powder. Any coarse grains won’t incorporate properly and can create “dead spots” in your candy. I set this mixture aside, along with my chosen extract and food coloring.
Now, for the syrup. In my heavy-bottomed saucepan, I combine the sugar, corn syrup, water, and a tiny pinch of salt. I stir it just until the sugar looks wet, then I attach my candy thermometer and turn the heat to medium-high. Here’s the golden rule: DO NOT STIR AFTER THIS POINT. I learned the hard way that stirring can cause crystallization, leading to a grainy, sad candy. I just let the mixture bubble away, swirling the pan occasionally for even heating. I watch that thermometer like a hawk. It needs to hit 300°F, which is the “hard crack” stage.
The moment the syrup hits 300°F, I act fast. I immediately remove the pan from the heat and let the furious bubbles subside for about 30 seconds. Then, I quickly whisk in my pre-mixed baking soda and citric acid powder. It will foam up dramatically—this is normal and exciting! As soon as it’s combined, I whisk in the flavor extract and food coloring. The whole mixture will be frothy and light. I immediately pour it onto my prepared silicone mat. I don’t spread it; I let it flow and settle into its own thin, irregular shape. It starts hardening almost the second it touches the mat. (See the next page below to continue…)
Now, the hardest part: the wait. I let the candy sheet cool completely at room temperature. This takes about 30-45 minutes. Trying to break it while warm will result in sticky, pliable pieces that won’t pop properly. Once it’s completely cool and hard, I use my hands (protected with a clean kitchen towel) or the handle of a butter knife to crack the sheet into small, Pop Rock-sized pieces. The sound of it shattering is incredibly satisfying. And then, the taste test: that first piece on my tongue erupts into a crazy, crackling party.
Pro Tips for Best Results
My number one tip is to use a reliable candy thermometer. I tested this by trying to judge the stage by dropping syrup in water (the “cold water test”), and I failed miserably. Under-cooked syrup stays sticky and chewy; over-cooked syrup burns and tastes bitter. 300°F is the sweet spot for the hard, glassy structure that will shatter properly. A digital thermometer that clips to the pot is the best investment for this project.
Grinding the citric acid and baking soda into a fine, uniform powder is the secret to the pop. I’ve tried just whisking them together as-is, and the result was uneven fizz—some pieces were duds, others were volcanic. Taking the extra two minutes to grind them ensures every single crystal of sugar gets coated with the reactive mixture, leading to a consistent, explosive experience in every bite.
Work with speed and confidence once you hit temperature. The syrup is over 300 degrees and will start to set up as it cools. Have all your add-ins measured and within arm’s reach. The moment you remove it from heat, you have about a 60-second window to add the powders and flavoring and get it poured. Hesitation leads to a pot full of solid, unusable candy. I set up my station like a TV chef before I even turn on the stove.
Common Mistakes to Avoid
The first and biggest mistake I made was stirring the syrup as it boiled. I got nervous and gave it a little stir around 250°F. Almost instantly, the clear syrup became cloudy and grainy. This is sugar crystallization, and it ruins the smooth, glassy texture you need. Remember: after the initial stir to combine, don’t touch it with a spoon until it’s off the heat. Just swirl the pan gently if you need to distribute heat. (See the next page below to continue…)
Not letting the candy cool completely before breaking it is a frustrating error. In my excitement, I tried to peel it off the mat after 10 minutes. It bent instead of breaking, was chewy, and the popping reaction was weak. The candy needs to be completely room temperature and brittle. If it’s a humid day, this might take even longer. Patience is a key ingredient in candy-making.
Using old or clumpy citric acid can sabotage your fizz. Citric acid absorbs moisture from the air. If your container has been open for a while and the powder feels at all damp or has clumps, it won’t react as powerfully. I always buy a fresh, small container specifically for this project and store any leftovers with a silica gel packet. Fresh, dry citric acid makes a world of difference.
Pouring the syrup too thick is another common error. If you pour a thick puddle, the candy will be too chunky and hard to break into small pieces. It also won’t have the right delicate structure to pop easily. You want a thin, almost lace-like sheet. Don’t worry if it doesn’t cover the whole mat; it’s better to have a thin, brittle sheet in one area than a thick, tough slab.
Serving Suggestions
I love serving these homemade pop rocks in small, colorful dishes at a party or as a fun dessert garnish. I’ll sprinkle them over a bowl of vanilla ice cream or lemon sorbet—the contrast of cold, creamy, and explosively fizzy is a guaranteed showstopper and always gets laughs and wide eyes from my guests.
For a truly interactive experience, I set out small bowls of different flavors I’ve made—like lemon, strawberry, and blue raspberry—and let people mix and match. They’re also a fantastic topping for cupcakes or a rim for a fun cocktail (for adults only—imagine a margarita with a fizzy rim!). Just be sure to add them right before serving so they don’t get soggy.
Because they’re so novel, they make a wonderful homemade gift. I pack them in small, clear cellophane bags or tiny glass jars with a label that says “Homemade Magic Rocks.” Kids (and nostalgic adults) absolutely adore receiving them. It’s a gift that’s personal, playful, and shows you put in some special effort.
Variations & Customizations
The flavor possibilities are endless. Instead of just extract, I’ve infused the syrup with herbs by steeping a rosemary sprig in it off the heat for a minute before adding the fizz powders, creating a “Rosemary Lemonade” pop rock. You can also use flavored drink powders like Kool-Aid in place of some of the citric acid for a sour punch and bold color.
For a “warhead” style sour experience, you can increase the citric acid to 3/4 teaspoon. Just be warned—it’s intensely sour! You can also create a two-layer effect by making one batch, breaking it, and then very quickly dipping the pieces in another thin layer of plain, colored hard candy syrup. This gives a slightly delayed pop.
If you want to get really creative, try making “cola” flavored pops by using a cola extract and a drop of brown food coloring. Or, mix in a tiny amount of finely ground freeze-dried fruit powder (like strawberry or raspberry) with the citric acid for a more natural fruit flavor and a pretty, speckled appearance.
How to Store, Freeze & Reheat
Storing these correctly is critical to maintaining their pop. Moisture is the enemy. As soon as they’re broken up, I store them immediately in an absolutely airtight glass jar or container with a tight-sealing lid. I add a food-safe silica gel packet if I have one to absorb any ambient moisture. Stored this way in a cool, dry pantry, they’ll retain their fizz for 2-3 weeks. Do not store them in the fridge, as condensation will ruin them.
I do not recommend freezing homemade pop rocks. The freezing and thawing process introduces moisture, which will cause the candy to become sticky and the baking soda/citric acid reaction to activate prematurely. The goal is to keep them bone-dry. Freezing is more likely to kill the pop than preserve it.
There is no way to reheat or refresh homemade pop rocks once they’ve gone soft or lost their fizz. The chemical reaction is a one-time deal. If they’ve absorbed moisture and become sticky, they’re sadly past saving. This is why the airtight storage right after making them is so important. The best plan is to make them close to when you plan to serve or gift them.
Conclusion
Making Homemade Pop Rocks is one of the most delightfully surprising projects I’ve ever done in my kitchen. It blends simple science with sweet nostalgia and ends with a treat that’s guaranteed to make you smile. I hope you grab your thermometer and embrace the fun, fizzy chaos of this recipe. It’s a wonderful reminder that a little culinary bravery can lead to something truly magical. Now, go heat that syrup and get ready for the pop!