
Another mistake is not chilling the filling long enough. If the centers are even a little bit soft, they’ll fall apart in the warm chocolate. I’ve had a few tragic “mint blobs” that melted into the chocolate bowl because I didn’t wait long enough. Patience pays off here.
Avoid letting water get anywhere near your chocolate. Even a single drop can make melted chocolate seize into a grainy mess. Make sure bowls, spatulas, and your hands are completely dry before stirring or dipping.
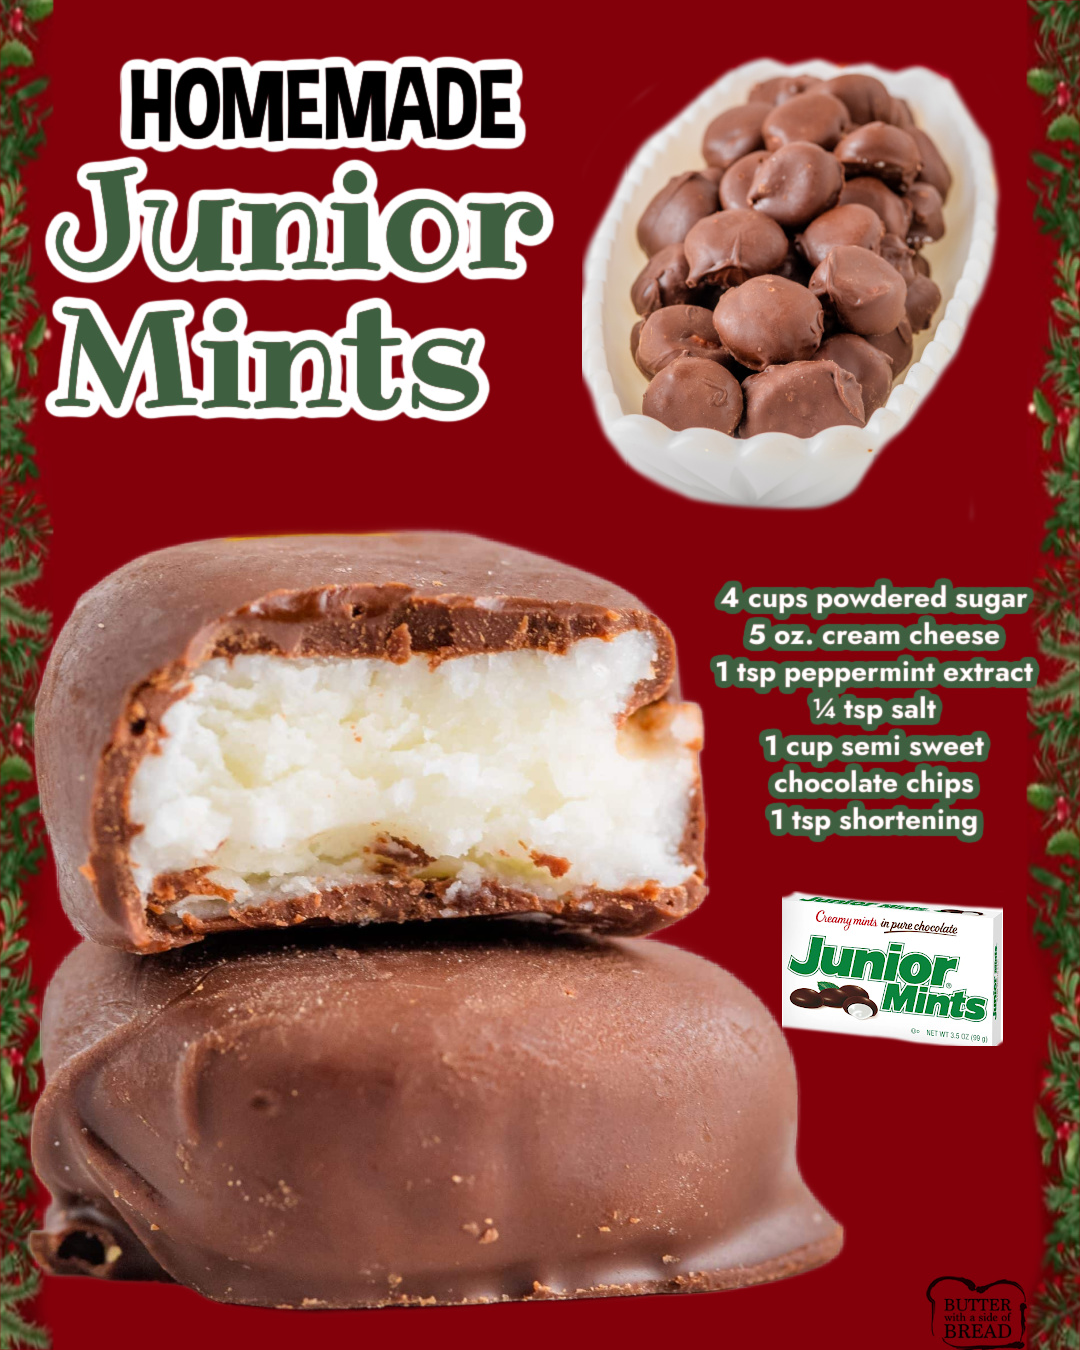
Also, don’t skip the shortening in the chocolate coating. Without it, the coating loses its smoothness and becomes more brittle. The shortening ensures the chocolate sets beautifully without cracking when you bite into it.
Serving Suggestions
I love serving Homemade Junior Mints on holiday dessert platters because they add the perfect pop of glossy chocolate and snowy mint centers. They’re refreshing after heavy meals and pair beautifully with other candies or cookies.
Another fun way to serve them is in cellophane bags tied with festive ribbon. They make wonderful hostess gifts, stocking stuffers, or sweet surprises for neighbors. Everyone loves something homemade, especially when it resembles a nostalgic favorite.
If I’m hosting a movie night, I set out a bowl of these mints alongside popcorn and hot chocolate. It feels like the ultimate movie theater upgrade—classic flavors with a homemade twist. Guests always ask for the recipe.
You can even use these candies to decorate cakes or cupcakes. I’ve sliced a few in half and placed them on top of chocolate frosting, and the combination looks and tastes amazing. Their soft centers add a fun texture contrast.
Variations & Customizations
One of my favorite variations is dipping the mints in dark chocolate instead of semi-sweet. Dark chocolate adds a slightly bitter edge that pairs beautifully with the sweetness of the mint center. It tastes more like a gourmet confection.
You can also add a drop of green food coloring to the mint filling if you want a classic minty look when you bite into them. I usually leave mine white to mimic the original, but the subtle green is adorable for holidays.
If you want a stronger mint flavor, try adding a few crushed peppermint candies to the filling. It adds a light crunch and a holiday feel. Just don’t go overboard or the texture becomes gritty.
Another fun twist is swapping peppermint extract for spearmint extract. Spearmint has a softer, sweeter flavor that reminds me of gum or meltaway mints. It’s a refreshing twist and tastes completely different from peppermint.
How to Store, Freeze & Reheat
These Homemade Junior Mints store really well. I keep them in an airtight container in the refrigerator for up to two weeks. Because of the cream cheese filling, they must stay chilled to maintain their texture and freshness.
They also freeze beautifully. Just place them in a single layer on a baking sheet until frozen, then transfer them to a freezer-safe container or bag. They stay fresh for up to two months. When you want one, let it thaw in the fridge for about 15 minutes. The filling softens perfectly without getting mushy.
You don’t need to reheat these since they’re meant to be enjoyed cold. However, if you prefer them slightly softer, set them on the counter for five minutes before eating. The chocolate coating warms up just enough to become velvety without melting.
If you’re packing them for gifting, keep them refrigerated until the last possible moment. They hold their shape perfectly once chilled, but warm rooms can soften the filling more quickly.
Nutrition Information
These treats are definitely indulgent, thanks to the powdered sugar and chocolate coating, but because they’re small and intensely flavorful, a little goes a long way. Each mint has a satisfying sweetness balanced by the refreshing peppermint, making them an ideal after-dinner bite.
The cream cheese adds a bit of richness and creaminess to the center. It also contains some calcium and protein, although the amounts are small since each candy is bite-sized. Still, that richness is part of what makes them melt so beautifully on your tongue.
Semi-sweet chocolate adds antioxidants and depth of flavor. If you want a slightly healthier spin, swapping to dark chocolate increases antioxidant content and reduces sugar. It also makes the candies taste even more luxurious.
Overall, these Homemade Junior Mints are a fun, nostalgic treat meant for enjoyment rather than strict nutrition goals. They’re perfect for holidays, celebrations, or whenever you want a cool chocolate bite that tastes like something magical.
FAQ Section
Can I use low-fat cream cheese?
I’ve tried it, and the texture becomes too soft. Full-fat cream cheese works best for firm centers.
Can I use coconut oil instead of shortening?
Yes, coconut oil works well and gives a beautiful sheen, though it may add a faint coconut flavor.
How strong should the mint flavor be?
It’s totally up to you. Start with 1 teaspoon and add a tiny bit more if you want a stronger kick.
Can I make the centers ahead of time?
Absolutely! You can freeze the undipped centers for up to a month and dip them whenever you want fresh candies.
Why did my chocolate coating crack?
The mint centers were likely too cold when dipped. Let them sit for 2–3 minutes after removing from the freezer.
Conclusion
Making these Homemade Junior Mints has become one of my favorite kitchen traditions. There’s something so satisfying about transforming simple ingredients—cream cheese, powdered sugar, peppermint, and chocolate—into candies that taste just as magical as anything from the store. Each bite has that dreamy cool-mint center wrapped in velvety chocolate, and I love watching friends’ faces light up when they try them. I hope you enjoy making these as much as I do and that they bring a sweet, refreshing touch to your holiday table or any day that needs a little extra treat.