
Another common mistake is overdoing the mint extract. I know it seems tempting to add “just a little more” for extra mintiness, but don’t do it. I’ve made that mistake too, and the mints ended up tasting like toothpaste instead of a refreshing treat. Measure carefully and trust me—½ teaspoon is enough to fill your whole kitchen with that festive peppermint aroma.
Using the wrong food coloring can also ruin your dough. Liquid coloring has too much water, and when I used it once, the dough turned sticky and too soft, forcing me to add more powdered sugar than I wanted. That ended up making the mints too dry. Gel coloring is much more concentrated and works perfectly every time.
Finally, don’t skip the drying time. These mints really do need time to firm up. I tried refrigerating them once to speed up the process, and while they hardened in the cold, they became sticky again once they warmed to room temperature. Letting them dry naturally gives the best texture—soft and creamy on the inside with a delicate shell outside.
Serving Suggestions
I love serving these cream cheese mints on a pretty platter with holiday sprinkles scattered around the edges. The pastel colors look magical next to Christmas décor, and they instantly brighten up any dessert table. When I host holiday gatherings, I always make a big batch because people grab them like candy—which, of course, they are.
These mints also shine at baby showers and weddings. I’ve wrapped them in small cellophane bags tied with curling ribbon, and they make the sweetest favors. The colors can match any theme; for a baby shower, I’ll do pink and blue, and for a Christmas party, I’ll do red and green swirls. They’re surprisingly versatile for such a simple candy.
One of my favorite ways to serve them is alongside hot cocoa or coffee. When you place one in your mouth after sipping something warm, it melts beautifully and leaves the most delightful peppermint finish. Try it at least once—you’ll see exactly what I mean.
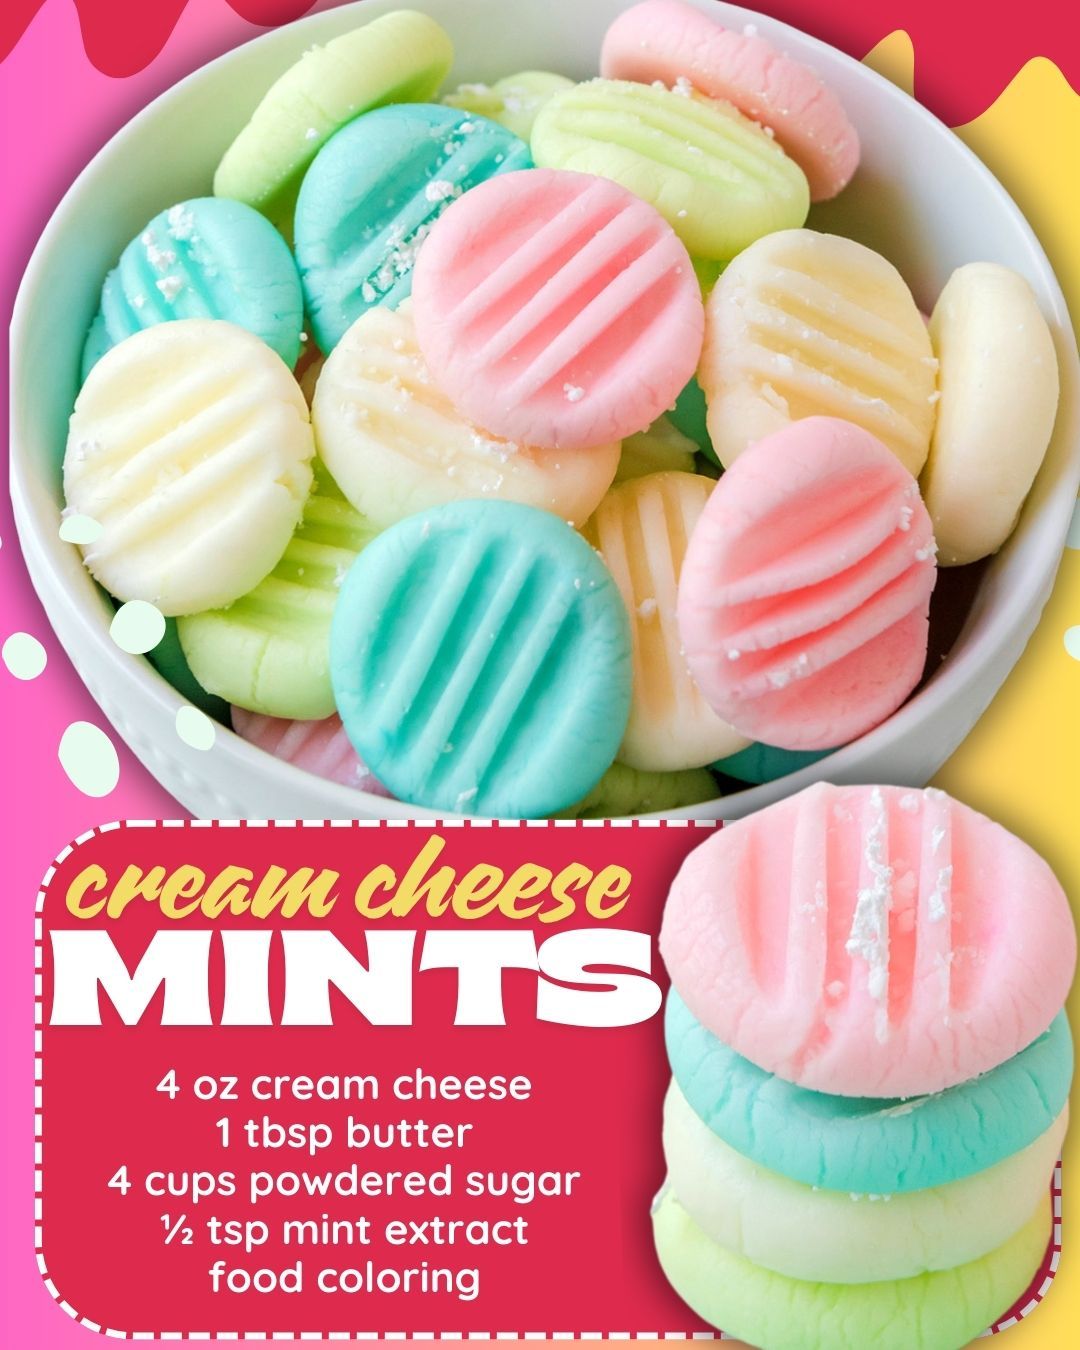
You can also place them on cookie trays as filler treats. Their soft texture pairs perfectly with crispy cookies, rich brownies, or buttery shortbread. They add color, variety, and that nostalgic candy-shop charm that makes dessert platters extra memorable.
Variations & Customizations
One variation I love is swapping out the mint extract for vanilla or almond extract. Vanilla makes the mints sweeter and more dessert-like, while almond adds a soft, fragrant flavor perfect for weddings. Peppermint is classic, but these other flavors make the recipe fun to play with.
Another variation is rolling the balls in granulated sugar before pressing them. This adds a sweet sparkle and a faint little crunch on the outside. It also keeps them from sticking together later if you store them in a container. I do this especially when I’m giving them as gifts.
If you want a multi-colored swirl, you can twist two colors of dough together before rolling them into balls. I did this once for Christmas using red and green swirls, and people went wild for them. They looked like tiny peppermint ornaments and tasted just as good.
And if you’re feeling extra creative, you can use silicone candy molds instead of rolling them by hand. Hearts, flowers, stars—anything works. Press the dough into the molds, pop them out, and you’ve got perfectly shaped mints with almost no effort.
How to Store, Freeze & Reheat
Storing these mints is one of my favorite things about them because they last such a long time. I keep them in an airtight container at room temperature if I plan to serve them within a couple of days. Just make sure they are fully dried before storing; otherwise, they’ll stick to each other.
For longer storage, the fridge works beautifully. Place parchment between layers to prevent sticking. They stay fresh for about two weeks in the refrigerator, and the texture stays perfectly creamy the whole time. I sometimes chill them just because I love the slightly firmer bite.
These mints also freeze incredibly well. I spread them on a baking sheet to freeze individually first, then transfer them to a freezer bag. They can stay frozen for months without losing quality. When I thaw them, I just leave them at room temperature for an hour or two—they soften right back to their original texture.
There’s no real “reheating” needed for this recipe, of course, but if your mints get too cold from the freezer or fridge and you want that creamy melt, letting them sit out for a few minutes does the trick. They warm quickly and regain their delightful softness without any effort.
Nutrition Information
Cream cheese mints are definitely a sweet treat, and they’re meant to be enjoyed in moderation—but honestly, they’re small enough that one or two feels completely satisfying. Each mint offers a creamy, sugary lift without being too heavy. I always think of them as tiny indulgent bites rather than a full dessert.
The main components—cream cheese, powdered sugar, and butter—contribute to their richness. Because they’re small, though, each piece tends to be lower in calories than most cookies or candies. I’ve found that guests love grabbing just a couple, which makes them perfect for parties.
If you want to lighten them up slightly, you can use a reduced amount of powdered sugar, but the texture will change a bit. I’ve tried reducing it before, and while the mints were still delicious, they were softer and harder to shape. For the classic melt-in-your-mouth feel, I stick with the full amount.
The mint extract adds freshness without adding calories, which I love. It’s amazing how such a tiny ingredient transforms the whole flavor experience. Overall, these mints are a fun, festive treat meant to be savored—one pretty pastel bite at a time.
FAQ Section
1. Can I use peppermint oil instead of mint extract?
Yes, but peppermint oil is much stronger than extract, so you’ll need only a tiny amount—usually just one or two drops. I’ve made the mistake of using too much oil before, and the flavor became overpowering fast. Add it sparingly and taste as you go.
2. How long should I let the mints dry?
Drying time varies depending on humidity, but I usually leave mine out overnight. A couple of hours will give you a firmer outer layer, but overnight drying creates that ideal texture: firm on the outside and velvety soft inside.
3. Can I make these without a mixer?
You can, but be ready for a workout! The dough gets very thick once the powdered sugar is added. I’ve mixed it by hand before, and while it worked, I definitely prefer a mixer because it gives a smoother, more even texture with far less effort.
4. Why are my mints sticky?
Sticky mints usually mean one of two things: too little powdered sugar or too much liquid. If you used liquid food coloring, that’s likely the cause. Add a little more powdered sugar until the dough becomes workable again and switch to gel colors in the future.
5. Can I make these ahead for an event?
Absolutely! These are one of my favorite make-ahead treats. In fact, they taste even better the next day once the flavors settle. Store them in an airtight container, and they’ll stay perfect for your event.
Conclusion
Every time I make these Homemade Cream Cheese Mints, I’m reminded just how special simple recipes can be. They bring color, nostalgia, and sweetness to any gathering, and the process of making them feels almost therapeutic. Whether you’re preparing them for a holiday tray, wedding shower, or just because you want something fun and delicious, these little melt-in-your-mouth candies never disappoint. Trust me—once you make them, they’ll become a tradition you look forward to year after year.