
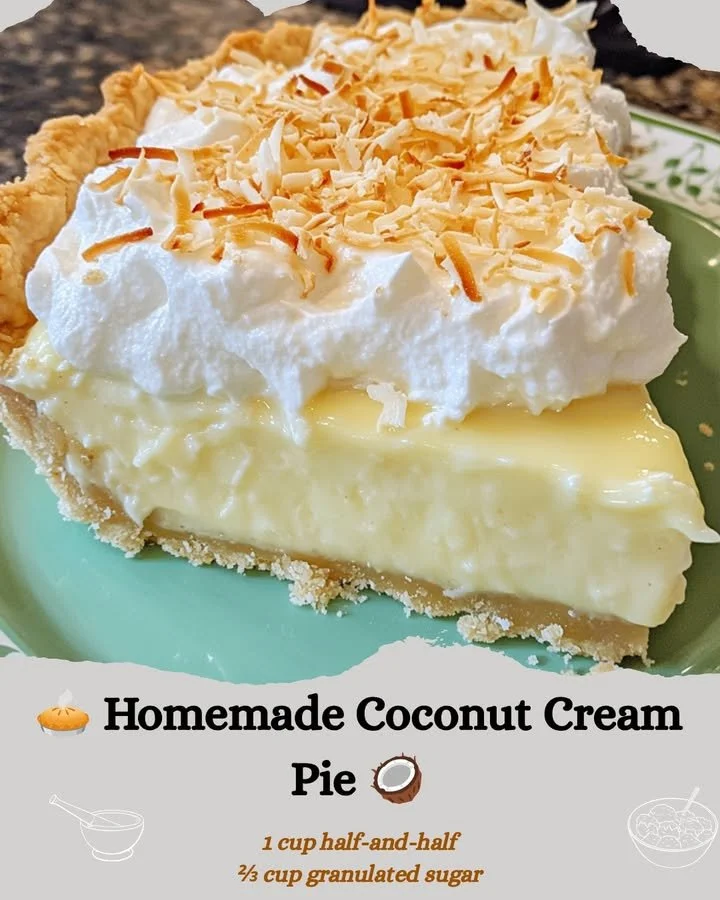
There’s something undeniably comforting about a slice of homemade coconut cream pie. The creamy filling, delightful coconut flavor, and flaky crust create a perfect harmony that makes each bite a mini vacation for your taste buds. Whenever I step into my kitchen with the goal of creating this pie, I know I’m about to embark on a culinary adventure that fills my home with sweet smells and my heart with warmth.
Why You’ll Love This Recipe
This homemade coconut cream pie is not only indulgent but also surprisingly easy to make. The combination of a buttery crust, luscious coconut filling, and fresh whipped cream on top creates a dessert that’s as beautiful as it is delicious. Every time I serve it, I am met with gasps of delight and requests for seconds. You’ll find that it’s perfect for any occasion, whether it’s a summer barbecue or a cozy winter gathering. The best part? Once you’ve made it, you’ll have found a new favorite to bring to your dessert table! (See the ingredients in the next page below…)
Ingredients
– 1 pre-made pie crust (or homemade if you prefer)
– 1 cup granulated sugar
– 1/4 cup cornstarch
– 1/4 teaspoon salt
– 3 cups whole milk
– 4 large egg yolks
– 1 teaspoon vanilla extract
– 1 cup sweetened shredded coconut
– 2 tablespoons unsalted butter
– Whipped cream for topping
– Toasted coconut flakes for garnish
Equipment Needed
– Oven
– A pie dish (9-inch)
– Medium saucepan
– Whisk
– Mixing bowls
– Rubber spatula
– Electric mixer (for whipped cream)
– Measuring cups and spoons
Step-by-Step Instructions
First, I start by preheating my oven to 350°F (175°C). If I’m using a pre-made pie crust, I bake it according to the package instructions until it’s golden brown, which usually takes about 10-15 minutes. The smell of the crust baking fills my kitchen and instantly brings back memories of family gatherings. If I’m feeling adventurous, I sometimes opt to make my own crust using flour, butter, and a little cold water. Once the crust is baked and cooled, I move on to making the filling. (See the next page below to continue steps…)
In a medium saucepan, I combine the granulated sugar, cornstarch, and salt. Then, bit by bit, I whisk in the whole milk until the mixture is smooth and free of lumps. I keep stirring this over medium heat until it begins to thicken and bubble—around 5 to 7 minutes. It’s such a wonderful sight when the mixture starts to steam; it makes me feel like a real chef! Next, I temper the egg yolks by whisking them together in a separate bowl and gradually adding a few spoonfuls of the hot mixture. This prevents the eggs from scrambling when I add them to the saucepan, which I carefully do afterward.
I continue to cook the mixture for another 2-3 minutes until it’s beautifully thick. Once it reaches the desired consistency, I stir in the vanilla extract, butter, and shredded coconut. Let me tell you, the aroma of that coconut mingling with the warm filling is simply divine! I then pour this luscious filling over the pre-baked pie crust and let it cool to room temperature. After a bit of patience, I cover it with plastic wrap and pop it in the fridge for a few hours—trust me, waiting is the hardest part!
Finally, just before serving, I whip up some heavy cream with a little sugar until it forms soft peaks, then spread it generously over the top of the pie. I love to top it off with toasted coconut flakes for that extra crunch and flavor. It makes the pie visually stunning, and believe me, it tastes just as good as it looks!
Pro Tips for Best Results
To make sure my coconut cream pie turns out perfectly every time, I’ve learned a few things along the way. First, I always use fresh ingredients, especially when it comes to coconut. While I love sweetened shredded coconut, I’ve found that using a mix of fresh coconut adds a delightful texture and taste. I tried making the pie using just the dried stuff, and while it was nice, it felt like it needed that fresh kick.
Another thing I recommend is allowing your filling to cool a bit before adding it to the pie crust. I used to pour it in right after cooking, which made the crust a little soggy. By letting it cool first, the filling sets up nicely without compromising the crust’s texture. Plus, patience is key—allowing it to chill in the fridge lets the flavors meld beautifully together.
Lastly, don’t skip toasting the coconut flakes that go on top; this adds an incredible depth of flavor. I remember my first attempt at the pie when I didn’t toast them, and it was fine but could have been more flavorful. Toasting them enhances their sweetness and gives that lovely crunch!
Common Mistakes to Avoid
One of the biggest mistakes I’ve made in the past was not measuring my ingredients carefully. Especially when it comes to sugar and cornstarch, a little too much or too little can change the consistency of the filling drastically. Make sure to use proper measuring cups and spoons for accuracy! I once ended up with a pie that had the filling of pudding—it was a sad day in my kitchen.(See the next page below to continue…)
Another thing to watch out for is cooking the filling too long. It’s easy to get distracted by the smell and lose track of time, but if you overcook it, you’ll end up with a grainy texture, which is not desired. Keep your eyes peeled and whisk continuously! If the filling begins to bubble too violently, lower the heat to keep it gentle.
Also, don’t overlook the chilling time. I’ve made the mistake of trying to serve the pie too soon, thinking, “How bad can it be?” Well, let me tell you, a warm coconut cream pie is nothing compared to a properly chilled one! It needs that time to set up and solidify, letting you slice it neatly without it falling apart.
Serving Suggestions
When it comes to serving my homemade coconut cream pie, I love to pair it with a cup of freshly brewed coffee or a hot cup of tea. The creamy sweetness of the pie pairs beautifully with the slight bitterness of coffee, creating a perfect balance on your palate. I also like to serve it alongside some fresh fruit like strawberries or raspberries. Their tartness contrasts wonderfully with the rich creaminess of the pie.
If I’m feeling extra fancy, I might drizzle some warm chocolate sauce over the top as I serve individual slices. Chocolate and coconut hold hands beautifully, and It’s a delightful surprise for anyone biting into a piece. A little touch goes a long way!
And of course, this pie is perfect for celebrations—birthdays, anniversaries, or just a beautiful spring day. I’ve brought it to potlucks and family gatherings, and it always disappears quickly, leaving everyone yearning for more.
Variations & Customizations
One of the best parts about making coconut cream pie is the endless possibilities for variations. For a chocolate twist, I sometimes incorporate cocoa powder into the filling to give it a rich chocolate coconut flavor. The process remains largely the same, but this little addition completely transforms the pie, and chocolate lovers will adore it!
For those who may have dietary restrictions, I’ve experimented with almond milk instead of whole milk, and while it gives a slightly different taste, it still turns out creamy and delicious. If you opt for a gluten-free crust, it accommodates those with gluten sensitivities, and I’ve found that it still holds up beautifully under the luscious filling.
Another variation I love is adding a layer of fresh mango or pineapple on top of the whipped cream. It adds a tropical twist that brightens the flavors even more and looks stunning on the table. Who needs to take a vacation when you can transport your taste buds to a tropical paradise with this lovely coconut cream pie?
How to Store, Freeze & Reheat
After making this delightful coconut cream pie, I often have leftovers (if I’m lucky!). To store it, I simply cover it with plastic wrap and keep it in the refrigerator. It’s best consumed within 3-4 days to enjoy its freshness. I have made the mistake of leaving it out too long, and while it was still good, it definitely lost some of its creamy texture.
If I know I won’t get to it soon, I sometimes freeze the pie before adding the whipped cream topping. To do this, I cover it tightly with foil and place it in the freezer for up to a month. When I’m ready to enjoy it, I simply thaw it in the fridge overnight. It’s a fantastic way to prep ahead for those busy weeks!
Reheating isn’t necessary for this pie, but if I find myself wanting a little warmth, I carefully introduce individual slices to the microwave for about 15-20 seconds—just long enough to take the chill off without making it soupy. Just be careful not to overheat it!
Conclusion
Making a homemade coconut cream pie has become one of my kitchen delights, and I hope this recipe finds its way into your heart (and your home!). Every slice tells a story of sweetness and love, making it the perfect treat to share with family and friends. So, roll up your sleeves, gather your ingredients, and enjoy this incredible dessert that brings joy into every bite. Happy baking!