
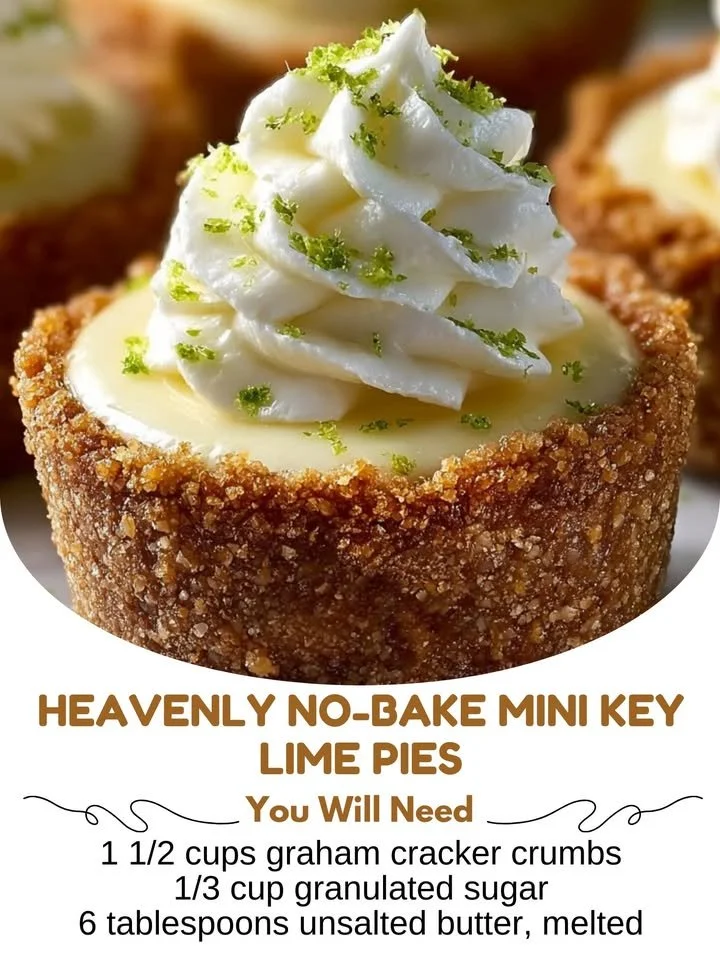
Heavenly No-Bake Mini Key Lime Pies. These cute little pies are like a burst of sunshine on a plate—perfectly tangy and creamy, just sweet enough, and oh-so-refreshing! If you’re looking for a simple yet impressive dessert to brighten your day or wow your guests, you’ve come to the right place.
Why You’ll Love This Recipe
What I adore about this recipe is that it’s so easy to make yet brings such joy to your taste buds. With zesty key lime flavor and a delightful graham cracker crust, these mini pies are sure to be a hit at any gathering. Plus, they’re no-bake, which means you can whip them up without turning on the oven or heating up your kitchen! What could be better than that? These little treasures are perfect for summer picnics, casual get-togethers, or even just a lovely night in with your favorite movie. (See the ingredients in the next page below…)
Ingredients
– 1 cup graham cracker crumbs
– 1/4 cup granulated sugar
– 1/2 cup unsalted butter, melted
– 1 (8 oz) package cream cheese, softened
– 1 cup sweetened condensed milk
– 1/3 cup key lime juice (freshly squeezed is best!)
– Zest of 2 key limes (for extra flavor)
– Whipped cream (for topping)
– Additional lime slices (for garnish)
Equipment Needed
– Mixing bowls
– Electric mixer or whisk
– Measuring cups and spoons
– Muffin tin or mini pie crust pans
– Rubber spatula
– Zester (for the lime zest)
Step-by-Step Instructions
The first step in making these Heavenly No-Bake Mini Key Lime Pies is to prepare the crust. In a mixing bowl, combine the graham cracker crumbs, sugar, and melted butter until everything is well mixed and resembles wet sand. Once combined, I love to take a tablespoon and press the crumb mixture into the bottom of each muffin tin or mini pie crust pan to form beautiful little crusts. It’s a bit of a workout, but the results are totally worth it! (See the next page below to continue steps…)
After your crusts are formed, place them in the refrigerator to chill while you prepare the filling. In a separate bowl, you’ll want to beat together the softened cream cheese and sweetened condensed milk until smooth and creamy. The mixture should be luscious and thick—perfectly spreadable. Once that’s all incorporated, slowly add the key lime juice and the lime zest while continuing to mix. Trust me; the aroma of that fresh lime juice will have your mouth watering!
Next, it’s time to fill those crusts. Carefully spoon the key lime filling into each mini crust, filling them to the top. I often use a piping bag or a zip-top bag with the corner snipped off for a cleaner look. Once all the crusts are filled, send them back to the fridge to chill for at least two hours—this helps them set and enhances the flavors.
When you’re ready to serve, just dollop some whipped cream on top of each mini pie and garnish with a slice of lime. The first bite is always the best—smooth, creamy, and bursting with tangy goodness!
Pro Tips for Best Results
I remember the first time I made these pies, and I was surprised by how quickly they disappeared! One thing I learned during my testing is that using freshly squeezed key lime juice really does make all the difference in flavor. There’s something about the brightness of fresh juice that makes these pies truly shine.
Another tip I love to share is about the crust: make sure you properly pack the graham cracker mixture into the muffin cups. If the crust is too loose, it can crumble apart when you go to serve them. I tested them with different packing methods, and pressing down firmly gives the best texture.
Lastly, don’t skip the lime zest! It adds an extra punch of flavor and really elevates the key lime experience. Plus, it looks beautiful sprinkled on top of your whipped cream. The more zest, the better, I say!
Common Mistakes to Avoid
One common mistake when making these mini pies is overmixing the cream cheese and sweetened condensed milk. You want a smooth filling, but too much mixing can introduce air, causing the filling to become too light and fluffy instead of rich and creamy. I made this mistake once and learned that all it took was a little gentler touch to keep that dreamy texture. (See the next page below to continue…)
Another issue people might encounter is not allowing enough time for the mini pies to chill in the refrigerator. The pies need a solid two hours to set, and if you rush this step, you might end up with a filling that doesn’t hold its shape. I once proclaimed to be a dessert ninja only to cut into a pie that just fell apart—oops!
Temperature matters too! Make sure your cream cheese is at room temperature. Cold cream cheese won’t incorporate as smoothly, leading to lumps in your filling. Trust me; I learned this the hard way, and nobody wants lumpy pie filling!
Serving Suggestions
When it comes to serving these mini key lime pies, the sky’s the limit! I love to serve them on a chilled platter surrounded by fresh lime slices and maybe even some mint leaves for a pop of color. It’s a simple yet elegant presentation that elevates the dish.
You can also pair these pies with a refreshing drink, such as iced tea or sparkling water infused with lime. The mix of flavors complements each other perfectly, making a lovely summer evening treat. If it’s a special occasion, consider serving them with a scoop of lime sorbet for a heavenly dessert experience.
Lastly, don’t forget to make a batch to take along for picnics or BBQs; they transport well and will undoubtedly impress your friends and family!
Variations & Customizations
One of the things I love about this recipe is how easy it is to customize! If you’re not able to find key limes, regular limes work just as well—you’ll still get that familiar brightness in flavor. You could even experiment with different zest, like lemon or orange, for a unique twist!
Another delightful variation I’ve tried is adding a hint of coconut to the filling. By incorporating a splash of coconut milk, the tropical flavor wonderfully complements the key lime. It’s like a mini vacation in each bite—who wouldn’t love that?
Lastly, you can switch up the toppings! Instead of or in addition to whipped cream, try sprinkling crushed graham crackers or even toasting some coconut flakes for a texture contrast. The possibilities are endless, and creativity in the kitchen is always encouraged!
How to Store, Freeze & Reheat
When it comes to storing these mini key lime pies, they can be kept in the refrigerator for up to five days. Just be sure to cover them with plastic wrap or keep them in an airtight container to maintain their freshness. I often find that they taste even better the next day as the flavors mingle!
If you want to prepare these in advance, you can freeze the unfilled crusts for about a month and make the filling fresh when you’re ready to serve. Just pop the filled pies back into the refrigerator after assembly, and they’ll set beautifully.
As for reheating, you actually won’t need to do that! These delightful treats are best enjoyed chilled, so simply take them out of the fridge right before serving. The cool, creamy texture is what makes them so heavenly!
Conclusion
I hope you’re as excited as I am to try making these Heavenly No-Bake Mini Key Lime Pies in your own kitchen! They truly are simple, delicious, and the perfect way to brighten any occasion. I can’t wait to hear how yours turn out—share your experiences and any fun twists you add! Happy baking (well, no-baking!), and enjoy every last bite of these charming little pies!