
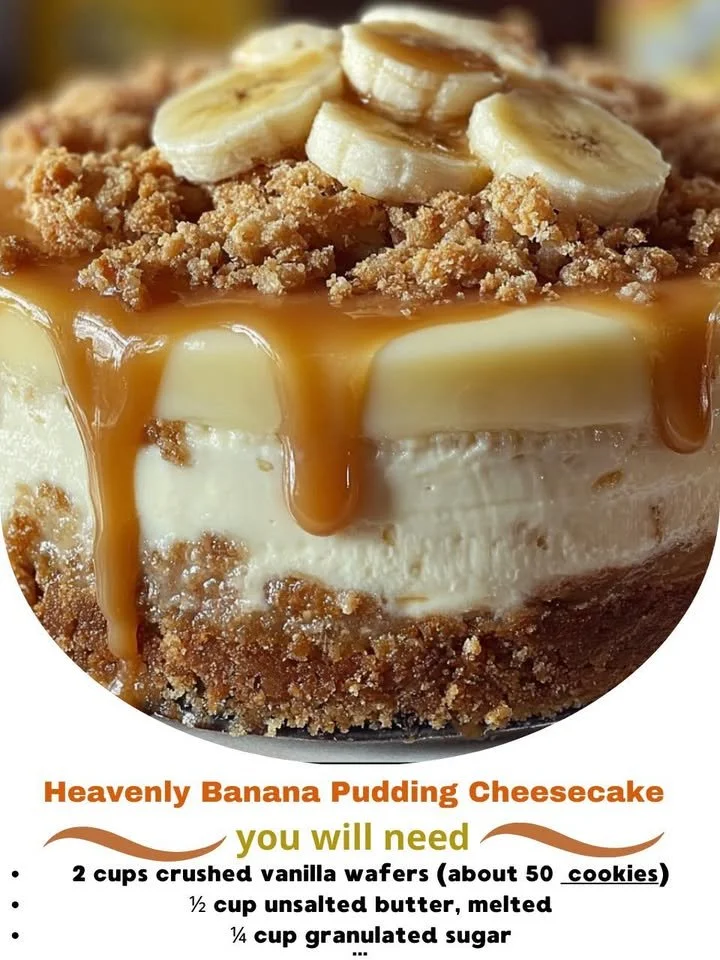
There’s nothing quite like the comforting flavors of banana pudding combined with the creamy decadence of cheesecake. That’s why I am absolutely thrilled to share my recipe for Heavenly Banana Pudding Cheesecake! This dessert has been a hit in my kitchen, bringing smiles to everyone who has been lucky enough to take a slice. Whether it’s for a family gathering or simply a cozy weekend treat, this cheesecake is sure to impress.
Why You’ll Love This Recipe
You’ll fall head over heels in love with this combination of textures and flavors. The smooth, velvety filling paired with the crunchy graham cracker crust and fresh banana slices creates a dessert experience that is both nostalgic and indulgent. Every bite reminds me of summer picnics and family reunions. It’s a recipe that brings joy and warmth to any gathering, making it a must-try for dessert lovers! (See the ingredients in the next page below…)
Ingredients
– 1 ½ cups graham cracker crumbs
– ½ cup unsalted butter, melted
– 2 (8 oz) packages cream cheese, softened
– 1 cup powdered sugar
– 1 teaspoon vanilla extract
– 2 cups heavy cream
– 1 (3.4 oz) box instant vanilla pudding mix
– 2 cups milk
– 3 ripe bananas, sliced
– Whipped cream for topping (optional)
– Additional banana slices for garnish (optional)
Equipment Needed
– 9-inch springform pan
– Mixing bowls
– Electric mixer
– Rubber spatula
– Measuring cups and spoons
– Refrigerator
– Serving platter
Step-by-Step Instructions
Let’s get started on this delightful cheesecake! First, I preheat my oven to 350°F (175°C). For the crust, I combine the graham cracker crumbs and melted butter in a mixing bowl until it resembles wet sand. I then press this mixture firmly into the bottom of my springform pan, making sure it’s evenly distributed. Once that’s done, I bake it for about 8-10 minutes until it’s lightly golden. My kitchen fills with this warm, buttery aroma, and I know I’m off to a great start! (See the next page below to continue steps…)
Next, I prepare the cheesecake filling. In a large mixing bowl, I beat the softened cream cheese and powdered sugar together with my electric mixer until it’s smooth and creamy. It takes a few moments, but the fluffy texture is worth it! Then, I add the vanilla extract, mixing until everything is well incorporated. In another bowl, I whip the heavy cream until stiff peaks form. Gently folding the whipped cream into the cream cheese mixture is my favorite part—I love watching it transform into a light and airy filling.
Now comes the fun part: assembling the cheesecake! I layer half of the cream cheese mixture over the cooled crust, followed by a layer of sliced bananas. I repeat this process, adding the remaining cream cheese mixture and another layer of bananas on top. My heart melts a little as I see how beautiful it turns out! After that, I prepare the instant pudding by whisking the pudding mix with milk according to the package instructions and pour it over the cheesecake layers. Finally, I chill the creation in the refrigerator for at least four hours, but sometimes I let it sit overnight for the flavors to deepen.
When it’s finally time to serve, I whip up some fresh whipped cream to top it off. If I have extra bananas, I use them to garnish the cheesecake for a pop of color. The anticipation builds as I slice into this creamy delight, and I can’t wait to dig in! This is definitely the moment when I know all the effort was worth it.
Pro Tips for Best Results
I learned a few things while perfecting this recipe. First, using ripe bananas really elevates the flavor of the cheesecake. I’ve tried with slightly under-ripe bananas, and while they still work, the sweetness is just not the same. Trust me; overripe bananas bring that rich flavor we all crave in banana desserts!
Another tip is to make sure your cream cheese is softened to room temperature before you start mixing. This helps create that luxuriously smooth filling. I tested this three ways, and the difference in texture was noticeable!
Lastly, if you’re worried about the bananas browning before serving, feel free to place a layer of plastic wrap directly on top of the sliced bananas before refrigerating. This tip has saved my cheesecakes from premature browning on many occasions!
Common Mistakes to Avoid
One mistake I’ve made in the past is not letting the crust cool completely before adding the cheesecake filling. I found that a warm crust can cause the cheesecake to become too soft and runny. So, patience is key! Once the crust is baked, set it aside to cool while you prepare the filling.(See the next page below to continue…)
Another thing to watch out for is overmixing the cream cheese. It may be tempting to keep beating until absolutely smooth, but overmixing can incorporate too much air, leading to cracks in your cheesecake as it bakes. I’ve learned that a good, gently beaten mixture works best for a perfect texture.
Sometimes, I forget to cover the cheesecake while it chills, which can lead to some unwanted smells being absorbed from the fridge. Covering it with plastic wrap prevents this from happening and keeps your cheesecake fresh and delicious!
Serving Suggestions
When it’s time to serve my Heavenly Banana Pudding Cheesecake, I love to dish it up with a dollop of freshly whipped cream on each slice. Sometimes, I sprinkle a little bit of crushed graham crackers on top for added texture—it’s a nice touch that always elicits compliments!
Pairing the cheesecake with a cup of coffee or a glass of cold milk takes it to another level. The rich flavors balance perfectly with something warm and comforting. Trust me, it’s a match made in dessert heaven!
For special occasions, I like to get a little creative with my presentations. Including a side of chocolate sauce or caramel drizzle can elevate this dessert even more, giving it a fancy touch that’s perfect for parties or gatherings.
Variations & Customizations
One of the best parts about this recipe is how adaptable it is! You can easily switch things up by using different flavors of pudding; I’ve made it with banana cream pudding for an extra banana kick, and it was fantastic! You can also incorporate different toppings, like toasty coconut or crushed nuts, which add a beautiful crunch to every bite.
If you’re looking for a lighter version, consider swapping some of the cream cheese with Greek yogurt. I’ve tried it, and although the texture is slightly different, it’s still delicious and adds a nice tang!
For a chocolate twist, adding cocoa powder to the cheesecake mixture is an incredible way to enhance the flavor. Just adjust the sugar a little, and you’ll have a luscious chocolate banana cheesecake that will knock your socks off!
How to Store, Freeze & Reheat
To store any leftovers (if there are any!), I recommend covering the cheesecake tightly with plastic wrap and keeping it in the refrigerator. It stays fresh for about five days, making it a fantastic dessert to prepare in advance for gatherings.
If you want to make this cheesecake ahead of time, you can freeze it! I usually wrap individual slices in plastic wrap, then place them in an airtight container. They can be frozen for up to three months. Just remember to let them thaw in the refrigerator before serving—patience is key again!
Reheating isn’t necessary for this cheesecake, as it’s best enjoyed chilled. However, if you do feel like warming it up a bit, I suggest doing so in the microwave for about 10 seconds—just to take the chill off, not to heat through completely. This little tip can create a beautifully soft texture that will melt in your mouth.
Conclusion
I hope you enjoyed this journey to discovering my Heavenly Banana Pudding Cheesecake recipe as much as I love making it! With its luscious textures and delightful flavors, this cheesecake is bound to be a hit in your home just as it is in mine. So gather your ingredients, roll up your sleeves, and let your kitchen fill with the delightful aroma of baking! Happy baking!