
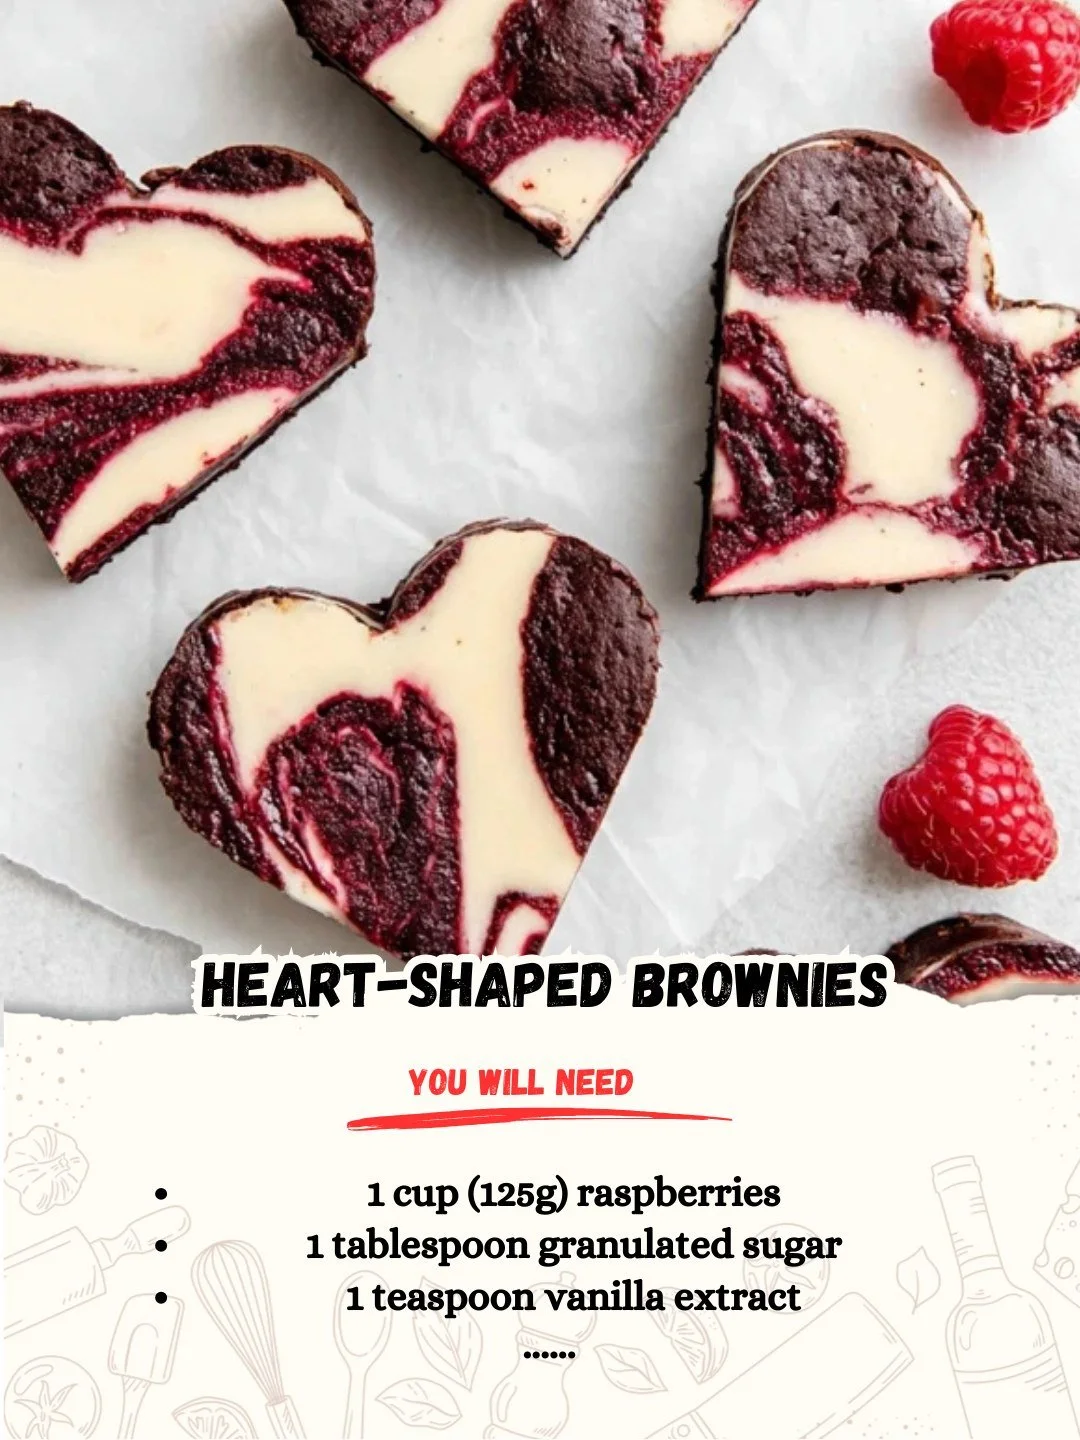
I don’t know about you, but whenever I think of brownies, I instantly crave something rich, fudgy, and irresistibly delicious. This Valentine’s Day, or any day you want to add a little sweetness to someone’s life, I decided to bring some cheer to my kitchen with heart-shaped brownies. These delightful treats are not just eye-catching but are also simple to make and sure to impress anyone you share them with.
Why You’ll Love This Recipe
This recipe is perfect for anyone who loves brownies but wants to give them a romantic twist. The heart shape adds a personal touch, making them ideal for gifting or sharing with friends and family. Plus, the rich chocolate flavor combined with the chewy texture is downright heavenly. I promise you’ll find it difficult to have just one! My kitchen smelled divine while these were baking, which made the whole experience even more enjoyable. (See the ingredients in the next page below…)
Ingredients
– 1 cup unsalted butter
– 2 cups sugar
– 4 large eggs
– 1 tablespoon vanilla extract
– 1 cup all-purpose flour
– 1 cup unsweetened cocoa powder
– 1/2 teaspoon salt
– 1/2 teaspoon baking powder
– Optional: chocolate chips or nuts for added texture
Equipment Needed
– Heart-shaped brownie pan (or a regular pan and a heart-shaped cookie cutter)
– Mixing bowls
– Whisk
– Spatula
– Measuring cups and spoons
– Oven
Step-by-Step Instructions
First, I start by preheating my oven to 350°F (175°C). While the oven is warming up, I prepare my heart-shaped brownie pan by greasing it lightly so that the brownies will slide out easily once they’re baked. This is crucial because we want our heart shapes to look perfect! Next, I melt the butter in a saucepan over low heat. The smell of melting butter is one of the best aromas that fill my kitchen! Once melted, I remove the pan from the heat and stir in the sugar, mixing it until it’s well combined. (See the next page below to continue steps…)
Next, I add the eggs one at a time, whisking after each addition. The mixture should become thick and glossy, and I can’t help but sneak a taste — it’s always so good at this point! Then, I mix in the vanilla extract, followed by the cocoa powder, flour, baking powder, and salt. I mix everything until just combined; I like to leave a few small lumps for that melt-in-your-mouth brownie texture. Now, I fold in any chocolate chips or nuts at this stage for an extra touch of richness.
Once the batter is ready, I pour it into my greased heart-shaped pan, making sure it spreads evenly. Then, I bake them for about 20 to 25 minutes, keeping an eye on them. I recommend performing the toothpick test: if it comes out with a few moist crumbs (but not wet batter), they’re done! The smell of these brownies baking is simply intoxicating — it’s a tough wait, but so worth it. After taking them out of the oven, I let them cool for about 10 minutes before attempting to remove them from the pan.
Pro Tips for Best Results
I’ve tested this brownie recipe several ways to get it just right. The first time, I overbaked them a bit, and they turned out dry instead of fudgy. So, trust your oven’s timing and do the toothpick test! I also found that using high-quality cocoa powder makes a world of difference in flavor. Don’t skimp; it’s worth it!
Another tip is to allow the brownies to cool completely before removing them from the pan. If you try to cut them too early, not only will they fall apart, but they won’t have that signature chewy edge I love so much. And lastly, if you like an extra layer of texture, sprinkle some flaky sea salt on top right after they come out of the oven — it elevates the chocolate experience!
Common Mistakes to Avoid
One common mistake to avoid is mixing the batter too much. Once you add the flour and cocoa, you want to mix until it’s just combined. Overmixing can lead to dense brownies, and I think we all prefer that fudgy goodness! Another pitfall is not greasing the pan well enough. I used to skip this step, thinking it wouldn’t matter, but trust me — you want those brownies to release easily!(See the next page below to continue…)
If you’re doubling the recipe, make sure you bake them in a larger pan and adjust the cooking time accordingly. I learned this the hard way when I tried to sneakily bake two batches in the same pan, only to end up with a gooey mess. And lastly, be cautious with variations! If you’re adding extra ingredients like fruit or creamy fillings, it might affect the baking time, so keep an eye on the oven!
Serving Suggestions
These heart-shaped brownies are fantastic on their own, but I love to serve them warm with a scoop of vanilla ice cream on the side. The contrasts of warm chocolatey goodness with cold ice cream are simply delightful! I also enjoy drizzling a bit of homemade chocolate sauce or caramel over the top for added indulgence.
For a fun-fashioned twist, consider dusting them with powdered sugar right before serving, giving them an elegant touch. And if you’re feeling extra festive, fresh berries make a great addition to the plate — they brighten it up and add a touch of freshness that pairs beautifully with chocolate.
Lastly, don’t underestimate the power of presentation! I like to arrange the brownies on a pretty plate, maybe even wrapping some in clear cellophane and tying them with a ribbon for a tasty gift. It’s a lovely way to share my baking with friends and family.
Variations & Customizations
If you’re feeling adventurous, you can try adding different flavors to your brownie batter! A swirl of peanut butter or Nutella works wonders and adds a creamy richness that you won’t forget. Alternatively, I love experimenting with flavored extracts, like almond or mint, to shake things up a bit.
You can also switch up the mix-ins based on what you have on hand — think walnuts, pecans, or even crushed pretzels for a salty crunch. For a more decadent version, you could layer cream cheese frosting on top, turning these brownies into a dessert that feels more like cake!
For those who need a gluten-free option, you can use gluten-free flour in place of all-purpose flour without compromising the delectable taste and texture. Just make sure your cocoa powder is also gluten-free to ensure everyone can enjoy these heart-shaped treats.
How to Store, Freeze & Reheat
If you somehow have leftovers (which rarely happens in my kitchen), these brownies can be stored in an airtight container at room temperature for up to a week. You can also refrigerate them if you want to extend their shelf life a little longer, though I prefer to enjoy them fresh.
If you want to make these brownies ahead of time, they freeze beautifully! Just wrap them in plastic wrap and place them in a freezer-safe container. They can last up to three months in the freezer. When you’re ready to enjoy them, simply take them out and let them thaw in the fridge overnight or on the counter for a couple of hours.
To warm them up, you can pop them in the microwave for about 10-15 seconds — just enough to get the chocolate slightly melty and decadent again. Trust me; the aroma alone will have everyone rushing to the kitchen!
Conclusion
Baking heart-shaped brownies has become one of my go-to recipes for sharing love and joy in my kitchen. They’re not just delicious; they infuse my home with sweet aromas and bring smiles all around. Whether you bake them for a special occasion or just because, I hope you enjoy creating and sharing these delightful treats as much as I do. Happy baking!