
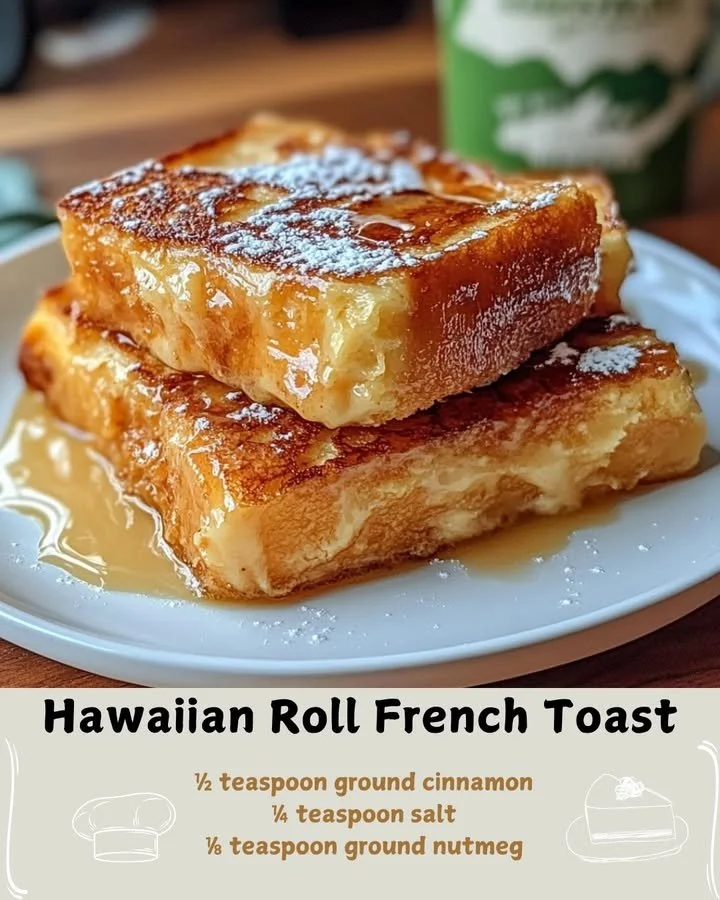
I’ve always been a big fan of breakfast, and there’s something about a warm, sugary French toast that pulls at my heartstrings. Today, I want to share one of my favorite recipes from my kitchen: Hawaiian Roll French Toast. It’s a delightful twist on a classic dish that’s soft, sweet, and just a little tropical. Trust me, once you try this, you won’t want to go back to regular bread.
Why You’ll Love This Recipe
This Hawaiian Roll French Toast is the perfect blend of sweetness and texture. The rolls soak up the rich custard beautifully and create that lovely, crispy outside while remaining soft and tender inside. Every bite is like a little hug of goodness! Not to mention, it’s super quick and easy to make, making it perfect for brunch gatherings or lazy weekend mornings when you just want to treat yourself. (See the ingredients in the next page below…)
Ingredients
– 1 pack of Hawaiian rolls (12 rolls)
– 4 large eggs
– 1 cup of whole milk
– 1/2 cup of heavy cream
– 1/4 cup of sugar
– 1 tablespoon of vanilla extract
– 1 teaspoon of ground cinnamon
– A pinch of salt
– Butter for cooking
– Maple syrup for serving
Equipment Needed
– Large mixing bowl
– Whisk
– Shallow dish or baking pan
– Griddle or non-stick skillet
– Spatula
– Serving platter
Step-by-Step Instructions
To start, I like to prep my ingredients first. This helps ensure everything goes smoothly, especially when I’m cooking the French toast. I whisk together the eggs, milk, heavy cream, sugar, vanilla, cinnamon, and salt in a large mixing bowl until the mixture is well-combined and slightly frothy. The aroma from the vanilla and cinnamon fills my kitchen, and I can already tell this is going to be amazing! (See the next page below to continue steps…)
Next, I take my Hawaiian rolls and slice them in half, making little sandwiches. I arrange them snugly in a shallow dish or baking pan. Once that’s done, I pour the egg mixture evenly over the rolls, making sure each piece gets a generous soaking. I usually let them sit for about 10-15 minutes so that the rolls can absorb all that delicious batter. It really does make a difference in texture!
While the rolls are soaking, I preheat my griddle or skillet over medium heat and add a pat of butter – you want enough to grease the surface well. Once the butter is melted and bubbly, I place the rolls on the cooking surface, cut side down. I cook them for about 3-4 minutes per side until they’re golden brown and a little crispy. The sweet, buttery smell wafting through my home at this point is just heavenly, and I can hardly wait to indulge!
When they’re done, I transfer the rolls to a serving platter and keep them warm in the oven while I finish cooking the rest. Serve them up with plenty of maple syrup and maybe some fresh fruit on the side, and you have a breakfast fit for kings!
Pro Tips for Best Results
I’ve tested this recipe a few times to nail down the best technique. One of my biggest takeaways is to be generous with the soaking time! Allowing the rolls to sit in the custard for a longer period helps them absorb more flavor and moisture. In my experience, letting them soak for at least 15-20 minutes gives you those beautifully custardy interiors everyone raves about.
Another pro tip is to keep an eye on the heat of your skillet. If it’s too hot, the outsides might burn before the insides are cooked through. A medium heat allows for a perfect sizzle without scorching, which is essential for that golden brown color and soft texture. If you’re in a hurry, lower the heat a bit and just take a little extra time to cook.
Lastly, don’t skip the butter! It’s what gives the French toast that rich, indulgent flavor. You can even add a sprinkle of powdered sugar on top for an extra touch of sweetness when serving.
Common Mistakes to Avoid
One mistake I’ve made in the past is not using enough custard mix. You really want to ensure each piece of roll is well-coated; otherwise, you’ll end up with some dry spots. Make sure you soak each half generously in the mixture and give it enough time to truly absorb the flavors. (See the next page below to continue…)
Another pitfall is using stale or old rolls. If your Hawaiian rolls are past their prime, they won’t soak up the custard as nicely, and your French toast may come out less flavorful and a bit chewy instead of deliciously soft. Fresh rolls really do make a world of difference.
Lastly, don’t forget the maple syrup! While the French toast is sweet enough to stand alone, a good drizzle of syrup really elevates the dish. I sometimes heat up the syrup slightly on the stove for that deep warmth as I serve it to my family, and their faces light up with joy.
Serving Suggestions
I love to serve my Hawaiian Roll French Toast with fresh fruit. Berries, bananas, or even a tangle of tropical fruits can really complement the sweet flavor of the rolls. Sometimes, I make a little fruit salad on the side to add a refreshing contrast to the richness of the toast.
If you’re feeling fancy, a dollop of whipped cream or a sprinkle of chopped nuts can elevate your presentation even more. I’ve experimented with toasted coconut, which goes perfectly with the island vibes of Hawaiian rolls!
Finally, for the adults in the room, I’ve been known to serve a side of bacon or sausage to balance out the sweetness. It makes for a hearty breakfast that everyone can enjoy.
Variations & Customizations
If you want to switch things up a bit, consider adding spices or extracts. A hint of nutmeg alongside the cinnamon gives an additional depth of flavor. I once tried almond extract in place of vanilla, and it brought a surprising twist that was incredibly delightful!
You can also customize this recipe by adding toppings. Sliced bananas or a sprinkle of coconut while cooking could add a nice tropical flair that pairs beautifully with the sweetness of the rolls. Sometimes, I even serve it with a drizzle of caramel sauce for an extra indulgent treat.
For those who prefer things a bit more savory, think about infusing some cheese into the mix. A little cream cheese spread inside the rolls before dipping them in the custard creates a sweet and savory experience that’s truly fabulous.
How to Store, Freeze & Reheat
If you’re lucky enough to have leftovers, Hawaiian Roll French Toast can be stored in an airtight container in the refrigerator for up to three days. Just make sure to let them cool completely before sealing them up to avoid sogginess.
For longer storage, I recommend freezing them. After cooking, allow the rolls to cool, arrange them in a single layer on a baking sheet, and freeze them until solid. Once frozen, transfer them to a zip-top bag and they can last for up to a month. Just pop them in the toaster or air fryer for a quick reheat!
When you’re ready to enjoy again, reheat the frozen French toast directly from the freezer. For the toaster, set it to a medium setting, and for the oven, preheat to 350°F and bake for about 10-15 minutes. You’ll be amazed at how delicious they still are!
Conclusion
I hope you give this Hawaiian Roll French Toast a try in your kitchen! It’s such a crowd-pleaser and brings a bit of sunshine to the breakfast table. With its fluffy, sweet texture and warm, comforting flavors, it’s a dish that makes my mornings feel a little bit extra special. So grab your Hawaiian rolls, and let’s get cooking!