
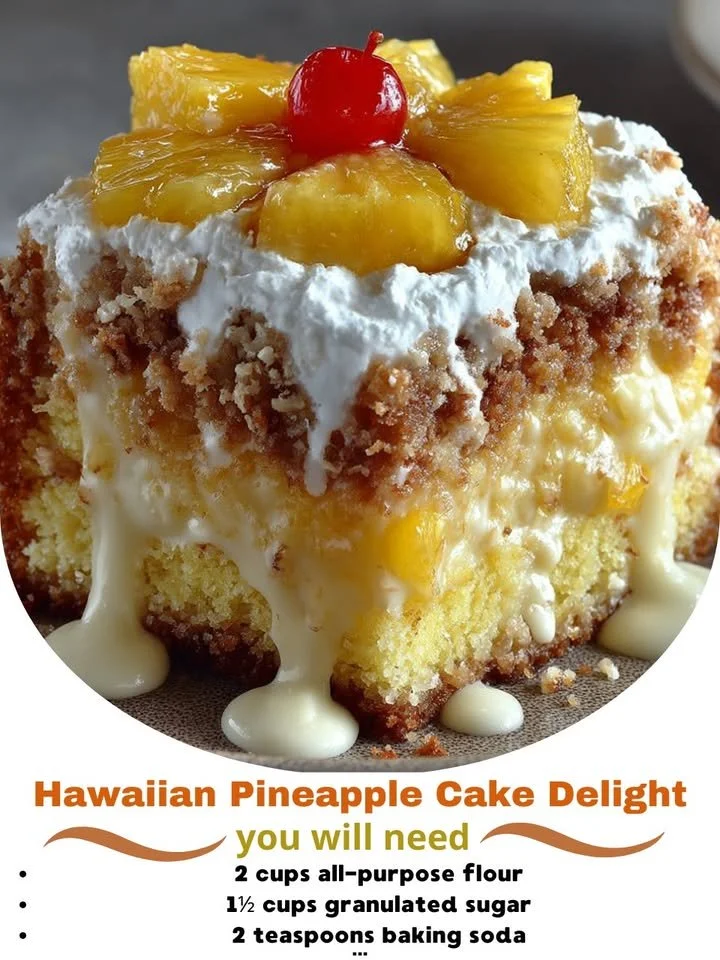
Whenever I think of a summer gathering or a family barbecue, Hawaiian Pineapple Cake Delight pops into my mind. This delightful dessert brings the taste of the tropics right to my kitchen with its sweet pineapple flavor and fluffy texture. Every bite is like a vacation on a plate, making it the perfect treat for any occasion. I’ve spent countless afternoons perfecting this recipe, and I can’t wait to share it with you!
Why You’ll Love This Recipe
This recipe is not only easy to whip up, but it also captures the essence of Hawaiian flavors, making it a fabulous centerpiece for any dessert table. With its creamy topping and a light, cake-like base, you’ll find that it’s both refreshing and satisfying. Plus, it’s great for sharing—your friends and family will be asking for seconds! Every time I serve it, I see smiles all around, and trust me, you’ll feel the same way too. (See the ingredients in the next page below…)
Ingredients
– 1 box of vanilla cake mix
– 1 can (20 oz) of crushed pineapple, drained
– 1 cup of shredded coconut
– 1 cup of whipped cream or Cool Whip
– 1 cup of cream cheese, softened
– 1/2 cup of powdered sugar
– 1 teaspoon of vanilla extract
– Cherries for garnish (optional)
Equipment Needed
– Mixing bowl
– Whisk or electric mixer
– 9×13 inch baking dish
– Spatula
– Measuring cups and spoons
– Knife (for garnishing)
Step-by-Step Instructions
First things first, preheat your oven to 350°F (175°C). In my kitchen, I love to gather all my ingredients beforehand to make the process smoother. In a large mixing bowl, I combine the cake mix and the drained crushed pineapple. The pineapple adds moisture and that lovely tropical flavor to the cake. Use a whisk or an electric mixer to blend them together until just combined, being careful not to overmix—that can lead to a tough cake. At this point, it already smells divine! (See the next page below to continue steps…)
Once the batter is ready, I pour it into a greased 9×13 inch baking dish. I like to smooth the top with a spatula for an even bake. Pop it in the oven and let it bake for about 25-30 minutes, or until a toothpick comes out clean. While it cools, I prepare the topping. In another bowl, I beat the softened cream cheese until it’s smooth, then add in the powdered sugar and vanilla extract. This mixture is where the magic happens; it becomes wonderfully creamy and pairs perfectly with the cake’s fluffy texture.
When the cake has cooled completely, I gently spread the cream cheese mixture on top. Then I sprinkle the shredded coconut evenly over the cream cheese layer for that delightful crunch. To finish it off, I like to add cherries on top for a pop of color, and it makes it look so inviting! Pop it in the fridge for at least an hour before serving; the flavors meld beautifully when chilled.
Pro Tips for Best Results
When I first made this cake, I learned the importance of letting the cake cool completely before adding the topping. If it’s even slightly warm, the cream cheese can become too runny. Trust me, waiting is worth it! I also like to use fresh pineapple juice saved from the can in my whipped cream, adding a little extra flavor that makes all the difference.
If you want a more intense pineapple flavor, try adding some fine pieces of fresh pineapple to the cream cheese mixture. I once tested it with and without, and the version with fresh pineapple was a hit with my family! Lastly, I always keep my whipped cream chilled until the moment I mix it in. Room temperature whipped cream can cause toppings to sag, and we want everything to be light and airy.
I also suggest keeping an eye on the baking time, as ovens can vary. I have an oven that sometimes runs hot, so I set my timer for 25 minutes and check with a toothpick. This flexibility keeps my cakes from drying out, ensuring that each bite is as fluffy as the first.
Common Mistakes to Avoid
One common mistake I’ve made is not draining the crushed pineapple well enough. If you skip this step, it can result in a soggy cake that doesn’t hold together well. The last thing we want is a delicious recipe that gets ruined by too much moisture! So I always make sure to press the pineapple in a sieve to remove excess liquid.(See the next page below to continue…)
Another pitfall is overmixing the batter. I once got a bit overzealous, thinking more mixing meant a fluffier cake, but I ended up with a dense result instead. Gently folding in the ingredients is the key to achieving that light and airy texture we all crave. If you hear any lumps, that’s perfectly fine; they will work themselves out during baking.
Lastly, don’t skip the chilling step! When I first made this, I served it right after assembling, and while it still tasted great, the flavors hadn’t had time to mingle. Chilling allows the flavors to develop and makes for a refreshing dessert on hot days.
Serving Suggestions
When it comes time to serve, I like to slice it into squares and place them on decorative dessert plates. The burst of colors from the cherries and the coconut truly makes it pop! This dish pairs exceptionally well with a scoop of vanilla ice cream or a dollop of additional whipped cream on the side; what a treat!
If I’m serving a larger crowd, I sometimes set up a mini dessert buffet alongside it, featuring tropical-inspired drinks like piña coladas or fresh fruit skewers. The cake complements these flavors so well, and it creates such a festive atmosphere!
For smaller gatherings, I keep a few squares for myself to enjoy later with a cup of coffee or tea. The flavors are just as delightful the next day, especially when served cold from the fridge. It’s a perfect way to extend the joy of that gathering a little longer!
Variations & Customizations
One of the great things about Hawaiian Pineapple Cake Delight is how adaptable it is! You could easily swap the vanilla cake mix for a coconut-flavored one to amplify the tropical vibe. I’ve tried this and found that adding coconut flavor elevated the dessert to a whole new level!
If you want to make it a bit healthier, consider using Greek yogurt instead of cream cheese. It’ll provide a lovely tang and reduce the overall calories. I often experiment by using flavored yogurt like coconut or vanilla, which still fits right in with the theme.
For a fun twist, I sometimes add nuts, like macadamia or pecans, to the cream cheese mixture. Not only does it add a crunchy texture, but the nuttiness beautifully complements the sweetness of the cake. Each variation feels like a brand-new dessert!
How to Store, Freeze & Reheat
This cake is best stored in the fridge, covered with plastic wrap or in an airtight container. It keeps well for up to five days, and honestly, the flavors intensify as it sits. I love the idea that I can make it ahead of time and let it chill in the fridge, ready for any occasion.
If you plan to freeze it, I’d advise doing so before adding the whipped cream topping. I wrap the cooled cake tightly in foil or plastic wrap, and it can be frozen for up to three months. When you’re ready to enjoy it, just thaw it in the fridge overnight and add your toppings fresh.
Reheating isn’t necessary for this chilled dessert, but if you prefer a warm slice, I recommend microwaving it for about 10-15 seconds. The coconut topping and cream cheese will soften, making it feel a bit indulgent without losing its delightful tropical essence.
Conclusion
I truly hope you enjoy making and sharing this Hawaiian Pineapple Cake Delight as much as I do! It’s a wonderful dessert that brings people together and elevates any gathering. Each bite is a little taste of paradise, and I guarantee it will become a favorite in your home. Happy baking!