
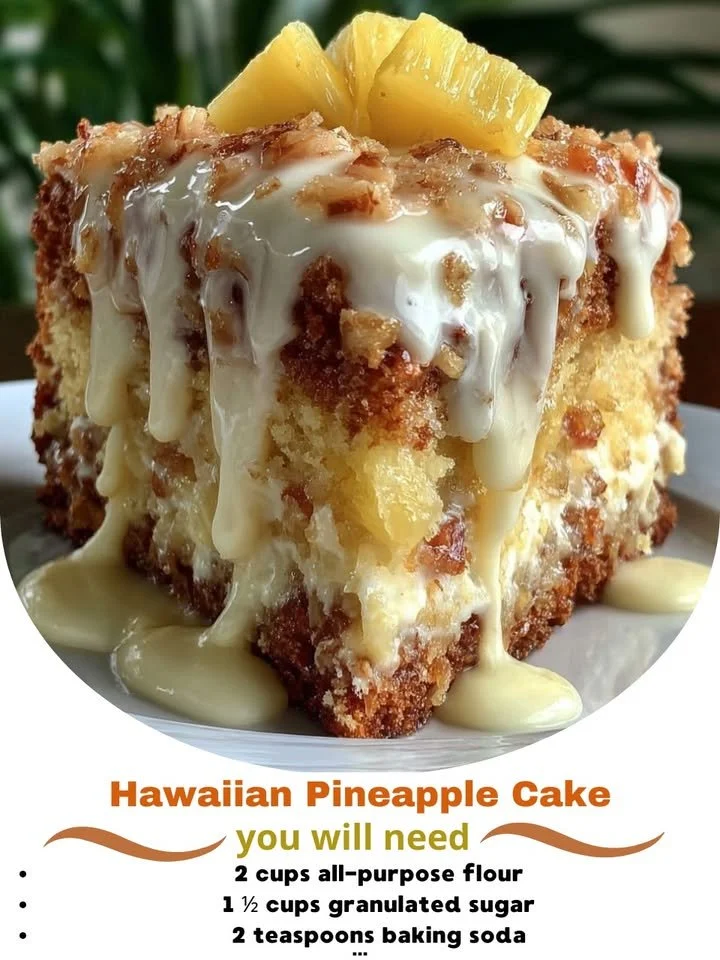
I’ve always had a soft spot for desserts that tell a story, and Hawaiian Pineapple Cake is no exception. Growing up, the sweet aroma of pineapple wafting through my kitchen meant something special was on its way. This cake embodies the sunny spirit of Hawaii, with moist layers and a tantalizing sweetness that transports you straight to tropical paradise. It’s a dessert that brings smiles, warmth, and a taste of something magical, making it the perfect addition to any gathering or a cozy night in.
Why You’ll Love This Recipe
This Hawaiian Pineapple Cake is not just delicious; it’s incredibly easy to make! I love how the combination of crushed pineapple and a light, fluffy batter creates a sun-kissed flavor that sings in every bite. The cake is tender, the frosting is creamy, and each element complements the other so beautifully. It’s also a great way to impress your guests without spending hours in the kitchen. Trust me, you’ll find yourself making this cake again and again! (See the ingredients in the next page below…)
Ingredients
– 2 cups all-purpose flour
– 1 1/2 cups granulated sugar
– 1/2 cup unsalted butter, softened
– 4 large eggs
– 1 can (20 ounces) crushed pineapple, drained
– 1 cup buttermilk
– 1 teaspoon baking soda
– 1 teaspoon baking powder
– 1/2 teaspoon salt
– 1 teaspoon vanilla extract
Equipment Needed
– 9×13 inch baking pan
– Mixing bowls
– Hand mixer or stand mixer
– Rubber spatula
– Measuring cups and spoons
– Cooling rack
Step-by-Step Instructions
To start off, preheat your oven to 350°F (175°C). I love the moment when the oven warms up, filling my kitchen with anticipation. In a large mixing bowl, cream together the softened butter and sugar until it’s light and fluffy. This should take about three to five minutes. Then, add in the eggs, one at a time, mixing well after each addition. The batter will start coming together beautifully! (See the next page below to continue steps…)
Next, gently fold in the drained crushed pineapple—this is where the magic happens! You’ll want to make sure to really mix this in well, so the pineapple gets evenly distributed throughout the batter. In a separate bowl, whisk together the flour, baking soda, baking powder, and salt. Gradually add this dry mixture to the wet ingredients, alternating with the buttermilk. I love how creamy the batter looks at this stage; it’s like liquid sunshine!
Once everything is combined, pour the batter into a greased 9×13 inch baking pan. Bake for about 35-40 minutes, or until a toothpick inserted in the center comes out clean. As the cake bakes, your home will be filled with an incredible aroma. Let it cool in the pan for about 10 minutes before transferring it to a cooling rack to cool completely while you prepare the frosting.
For the frosting, I whip together some cream cheese, softened butter, and powdered sugar until it’s nice and fluffy. Once the cake is completely cooled, generously spread the frosting on top, and enjoy a slice of this tropical delight!
Pro Tips for Best Results
One trick I learned the hard way is to always make sure your butter is at room temperature before starting. It really helps with the creaming process and leads to a fluffier texture in the final cake. I’ve tested it with cold butter, and trust me, it just doesn’t yield the same delightful results.
Also, don’t skip the step of draining the crushed pineapple thoroughly! The last thing you want is excess moisture affecting the texture of your cake. If you’re feeling adventurous, I sometimes reserve a bit of that juice to add to the frosting for an extra kick of flavor.
Lastly, I’ve found that letting the cake sit for a few hours (or better yet, overnight) before serving allows the flavors to meld together oh-so-perfectly. It’s worth the wait, trust me!
Common Mistakes to Avoid
One common mistake I’ve made in the past is not measuring the flour accurately. I started off with the classic “scoop and level” method, but I discovered that using a kitchen scale gives me perfect results every time. Too much flour can make the cake dense, and we want it light, airy, and tropical!(See the next page below to continue…)
Another thing to watch out for is not letting your cake cool completely before frosting it. If you frost while it’s still warm, the frosting may melt and slide off, leaving a sweet mess. I know because I tried to rush things once and ended up with a puddle of frosting on my plate!
Don’t forget to check your oven temperature! Ovens can be tricky sometimes, and a miscalibrated oven can ruin your beautiful cake. I always recommend using an oven thermometer to ensure you’re baking at just the right temperature.
Serving Suggestions
This Hawaiian Pineapple Cake is delightful on its own, but if you want to elevate it even further, I suggest serving it with a scoop of vanilla ice cream or a dollop of whipped cream. The creaminess pairs so well with the cake’s tropical flavors.
Another lovely touch is to add some toasted coconut flakes on top of the frosting for added texture and flavor. It adds that crunch that complements the soft, moist cake in a beautiful way.
Lastly, I love serving this at summer BBQs or potlucks. The bright flavors bring a cheerful vibe to any gathering, and it’s always a crowd-pleaser, inviting smiles and compliments all around.
Variations & Customizations
If you want to mix things up a bit, try adding some chopped macadamia nuts into the cake batter! They add a lovely crunch and a flavor that’s undeniably Hawaiian. I experimented with this once, and it was such a hit that it has become one of my signature twists on the recipe.
For a more tropical flavor, you can substitute half of the buttermilk with coconut milk. You’ll be surprised at the delightful richness it adds while still maintaining that signature pineapple flavor.
Lastly, if you’re looking for a fun twist, why not turn this cake into cupcakes? Just adjust the baking time to about 20-25 minutes, and you’ll have adorable little treats perfect for sharing.
How to Store, Freeze & Reheat
Once you bake your Hawaiian Pineapple Cake, you’ll want to store it properly to keep it fresh. I always cover it tightly with plastic wrap or aluminum foil and keep it in the fridge. It can last up to a week, but honestly, it rarely lasts that long in my house!
If you have any leftovers (a rare occurrence!), this cake also freezes beautifully. Simply slice it into pieces, wrap each piece in plastic wrap, and store them in an airtight container or a freezer bag. They’ll be good for about three months, and when you’re ready to enjoy it, just let it thaw in the fridge overnight.
Reheating can be a treat, too! You can warm individual slices in the microwave for about 15-20 seconds—enough to take the chill off—and serve it warm with some ice cream. It’s like enjoying a whole new dessert!
Conclusion
Baking Hawaiian Pineapple Cake has been one of my kitchen joys, and I hope it finds its way into your heart and home too. It’s not just a recipe; it’s a little piece of paradise you can create in your own kitchen. From the warm, tropical flavors to the smiles it brings, this cake has a special place in my collection. I can’t wait for you to try it and share the love!