
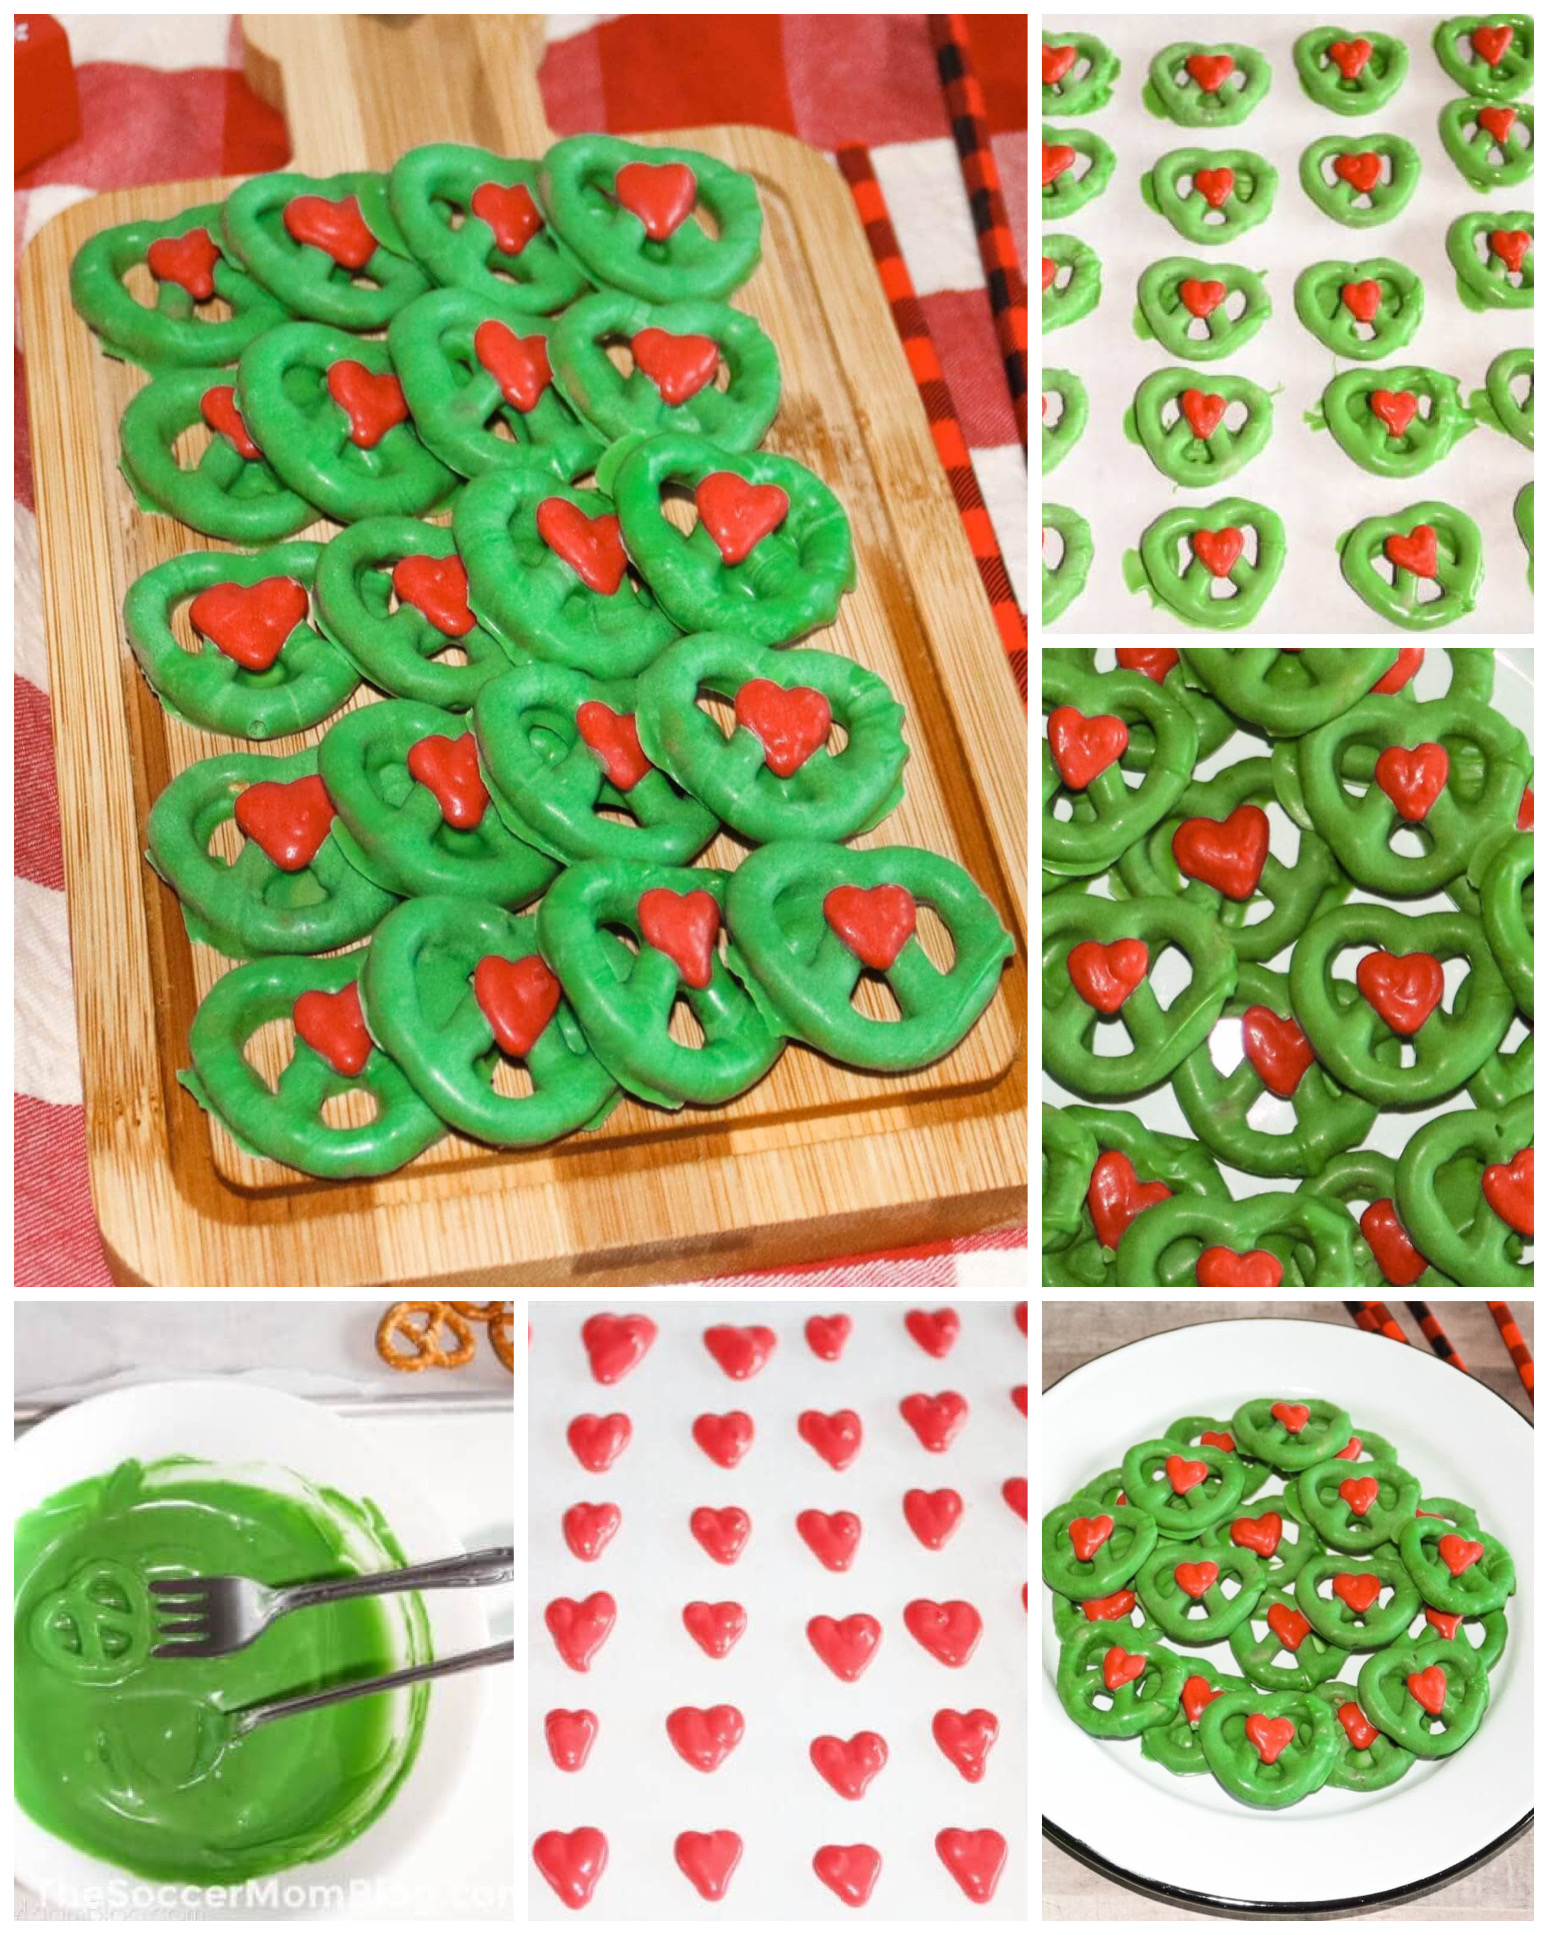
Once the candy coating is ready, I drop a pretzel into the melted green mixture, gently press it down with a fork, and lift it out, letting the excess drip off. This step always feels calming to me, like dipping each one transforms an ordinary pretzel into a little edible ornament. I set each coated pretzel on the parchment sheet, spacing them so the coating doesn’t touch.
Next, I melt the red candy melts using the same microwave technique—slow and steady always wins with candy coating. When the red melts are smooth and shiny, I transfer them to a piping bag. I pipe a small red heart shape at the top center of each pretzel, and even though I’ve made these countless times, I always smile when the hearts drop into place. It’s such a tiny detail, but it truly makes the pretzels look like something straight from the Grinch story.
Finally, I leave the pretzels to set completely. Sometimes I pop the tray into the fridge for a few minutes if I’m short on time, but usually they firm up perfectly at room temperature. When they’re done, they have a cheerful, glossy finish and a crunch that just feels like the holidays whenever you bite into one.
Pro Tips for Best Results
I tested this recipe three different ways, and the smoothest coating always came from melting candy melts in very short intervals in the microwave. It’s tempting to heat the bowl all at once, but trust me—slow melting gives you candy that coats beautifully and doesn’t clump. Stirring often is a small thing that makes a huge difference in the final texture.
Here’s what I learned the hard way: do NOT add water if the candy melts seem thick. Water causes melted candy to seize into a grainy paste instantly. Instead, use shortening or a melting aid designed for chocolate. A pea-sized amount is usually enough to loosen everything and restore that silky consistency.
Another tip is to prepare your baking sheet and piping bag before melting the chocolate. Once the candy melts are smooth, you want to move quickly. Candy melts start firming up faster than you think, so having everything laid out in advance keeps the process flowing smoothly.
Finally, don’t make your hearts too large. I’ve made that mistake before, and while the pretzels still tasted delicious, the oversized hearts made them look less cute and more comical. A small heart is all you need—they firm quickly, they hold their shape, and they complement the pretzels perfectly.
Common Mistakes to Avoid
I made this mistake the first time—overheating the candy melts. When they get too hot, they become thick and clumpy, and no amount of stirring will fix them. Now I warm them slowly and gently, and the difference is night and day.
Another common slip is not tapping off the excess coating. If you forget, you end up with puddles of candy around your pretzels, and they lose their crisp shape. I always give the fork a little shake before laying them on parchment. It takes one second and saves you so much cleanup.
Be careful not to let moisture anywhere near your melted candy. A single drop of water can ruin an entire bowl of chocolate. I learned this when I washed a bowl too quickly and didn’t dry it properly before melting again. Now I double-check everything before I start.(See the next page below to continue…)