
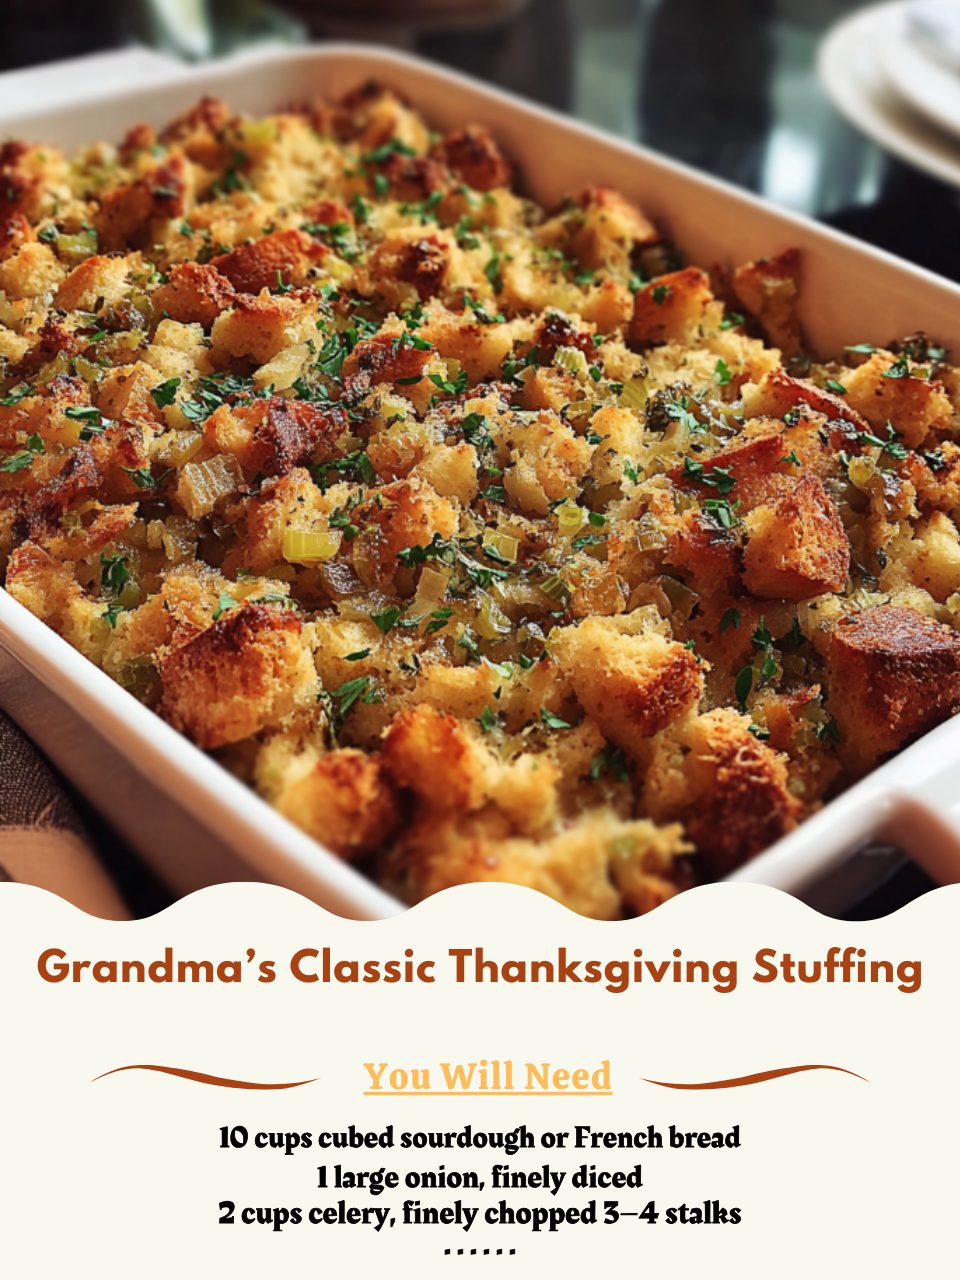
Grandma’s Classic Thanksgiving Stuffing is the dish that brings the whole holiday to life, filling the kitchen with the irresistible aroma of butter, toasted bread, and warm herbs. This recipe has been passed down through generations, the kind of beloved tradition everyone looks forward to all year long. It combines simple ingredients—bread cubes, onions, celery, broth, and plenty of seasoning—into a comforting, savory masterpiece that tastes like pure nostalgia.
Whether you call it stuffing or dressing, this version bakes up perfectly golden on top, tender inside, and full of cozy flavor in every bite. It’s one of those comforting holiday classics that magically brings everyone to the table with excitement and just might steal the spotlight from the turkey itself.
Equipment You Will Need
- Large skillet
- Mixing bowls (medium and large)
- 9×13-inch baking dish
- Aluminum foil
- Measuring cups and spoons
- Wooden spoon or heat-safe spatula
- Whisk
- Cooling rack
Ingredients List
- 1 ½ loaves (about 14 cups) cubed day-old bread, white or sourdough
- 1 cup unsalted butter
- 2 large onions, finely diced
- 4–5 celery stalks, finely diced
- 4 cloves garlic, minced
- 3–4 cups chicken or turkey broth
- 2 large eggs
- 2 tbsp fresh parsley, chopped
- 1 tbsp fresh sage, chopped (or 1 tsp dried)
- 1 tbsp fresh thyme leaves (or 1 tsp dried)
- 1 tsp poultry seasoning
- 1 tsp salt, or to taste
- ½ tsp black pepper
- Optional add-ins: 1 cup cooked sausage, 1 cup chopped apples, 1 cup dried cranberries, or 1 cup toasted pecans
Step-by-Step Instructions
Start by prepping the bread, which is the heart of any truly great stuffing. If your bread isn’t already dried out, spread the cubes onto baking sheets and toast them in a 275°F (135°C) oven for 30–40 minutes, tossing occasionally until dry and slightly golden. Once finished, transfer the cubes into a large mixing bowl and let them cool while you prepare the flavorful aromatic base.
In a large skillet, melt the butter over medium heat, creating that rich, nostalgic scent Grandma always had floating through the kitchen. Add the onions and celery, sautéing until soft, fragrant, and lightly translucent. Stir in the minced garlic and cook just until aromatic without burning it.
Next, sprinkle in the parsley, sage, thyme, and poultry seasoning, letting the herbs bloom in the warm butter. This is when your kitchen begins to smell unmistakably like Thanksgiving. Remove the skillet from heat and pour the buttery vegetable mixture over the dried bread cubes.
Use a wooden spoon or spatula to gently toss everything together, ensuring every piece of bread gets a glossy coating of butter and herbs.
In a separate bowl, whisk the eggs with two cups of broth, then pour this mixture evenly over the bread. Toss lightly again. Add additional broth as needed until the bread feels damp but not soggy—Grandma always said the perfect stuffing should feel like a well-squeezed sponge.
Preheat your oven to 350°F (175°C). Grease a 9×13-inch baking dish, then transfer the stuffing mixture into it, spreading it out evenly without compacting it too tightly. For a softer stuffing, cover the dish with foil before baking.
For a crispier top, leave it uncovered. Bake for 30 minutes, then remove the foil if using and continue baking for another 20–25 minutes until the top turns golden brown and crisp. Allow the stuffing to rest on a cooling rack for 10 minutes before serving so the flavors settle beautifully.
Every warm, buttery, herby bite tastes like home—and exactly like Grandma made it.
Expert Tips for Success
Perfecting Grandma’s stuffing comes down to giving each ingredient the attention it deserves so the final dish has the ideal texture and flavor. Start with day-old or toasted bread, because fresh bread becomes soggy and mushy when the broth is added.
Dry bread absorbs liquid evenly, ensuring a tender inside without losing the structure that keeps stuffing wonderfully scoopable. When measuring your broth, add it gradually. Different breads absorb differently, and too much liquid can turn your stuffing dense. The key is to aim for moist, not mushy—your stuffing should easily clump together when pressed but shouldn’t feel wet or heavy.
Another essential tip is sautéing your aromatics long enough to develop real depth. Butter is the flavor backbone of stuffing, so don’t rush it. Take your time softening the onions and celery, allowing them to release sweetness and meld beautifully with the herbs. Be generous with seasoning and herbs; bread absorbs flavor, so more is usually better.
If you prefer a crisp top, bake uncovered for the last portion of cooking, or broil for one to two minutes for a crunchy golden finish. And above all, resist cutting into the stuffing too early—letting it rest helps it bind and improves the overall texture tremendously.
Variations and Substitutions
One of the best things about Grandma’s stuffing recipe is how endlessly customizable it is while still maintaining that nostalgic holiday flavor. For a meaty version, fold in browned sausage or bacon before baking, adding richness and a savory punch.
If you want a sweet contrast, chopped apples or dried cranberries bring brightness and festive charm to the dish. Nuts such as pecans or walnuts add satisfying crunch and pair beautifully with winter herbs. You can also switch up the bread: sourdough adds tanginess, brioche adds sweetness, and whole wheat creates a deeper, nuttier flavor profile.
If you need to adapt the recipe for dietary needs, there are simple swaps that still give you a delicious result. Gluten-free bread works surprisingly well as long as you dry it out thoroughly beforehand. For a vegetarian version, simply use vegetable broth instead of chicken or turkey broth.
If you want a lighter option, use olive oil instead of butter and reduce the amount slightly. For an herbier flavor, add rosemary or marjoram alongside the classic sage and thyme. No matter how you customize it, the core method stays the same—and the flavors stay comforting and irresistible.
Serving Suggestions and Pairings
Grandma’s Classic Thanksgiving Stuffing shines as the centerpiece side dish on any holiday table, but pairing it wisely makes the whole meal feel more cohesive and delightful. It naturally complements roasted turkey, gravy, and mashed potatoes, creating that iconic Thanksgiving flavor trifecta everyone looks forward to all year.
Serve alongside green beans, glazed carrots, Brussels sprouts, or a fresh fall salad to balance the richness with something crisp and vibrant. A drizzle of turkey gravy or a scoop of homemade cranberry sauce also adds brightness and ties the dish beautifully into a complete plate.
When planning your holiday spread, strive for variety in textures to complement the soft, savory nature of stuffing. Crunchy roasted vegetables, creamy casseroles, and zesty condiments all make excellent companions.
If you’re serving a buffet-style dinner, arrange stuffing near the main proteins so guests naturally pair them together. For beverages, white wine, sparkling cider, and herbal teas pair wonderfully without overpowering its comforting flavors. And if you’re lucky enough to enjoy stuffing leftovers, it pairs surprisingly well with breakfast eggs or reheated as part of a cozy lunch plate.
Storage, Freezing, and Reheating
Storing Grandma’s stuffing properly ensures you can continue enjoying its comforting flavors in the days following your holiday feast. Once the stuffing has cooled completely, transfer it into an airtight container or cover the baking dish tightly with plastic wrap.
Refrigerated stuffing lasts up to four days, keeping its savory aroma and soft, buttery texture intact. If you find the stuffing has dried slightly after storage, mix in a splash of warm broth before reheating to restore moisture. Reheat individual servings in the microwave or larger portions in the oven at 325°F (160°C) until thoroughly warmed.
Freezing stuffing is surprisingly easy and helps preserve its flavor for future meals. To freeze, portion the stuffing into freezer-safe containers or wrap tightly in foil and place in a heavy-duty freezer bag. It will stay fresh for up to three months.
Thaw overnight in the refrigerator before reheating. For best results, reheat in the oven rather than the microwave to maintain texture, adding broth if needed. Whether you’re saving leftovers or prepping ahead for busy holidays, properly stored stuffing retains its charm and remains just as comforting and satisfying as the day Grandma made it.
Frequently Asked Questions
Can I use fresh bread instead of dried?
You can, but you must toast it first to avoid mushy stuffing.
Can I stuff this inside the turkey?
Yes, but baking separately gives better texture and is safer.
Can I make it the day before?
Absolutely—assemble it, refrigerate, then bake the next day.
What if my stuffing is too dry?
Add warm broth gradually until the texture softens.
Can I make it vegan?
Yes—use vegetable broth, vegan butter, and dairy-free bread.