
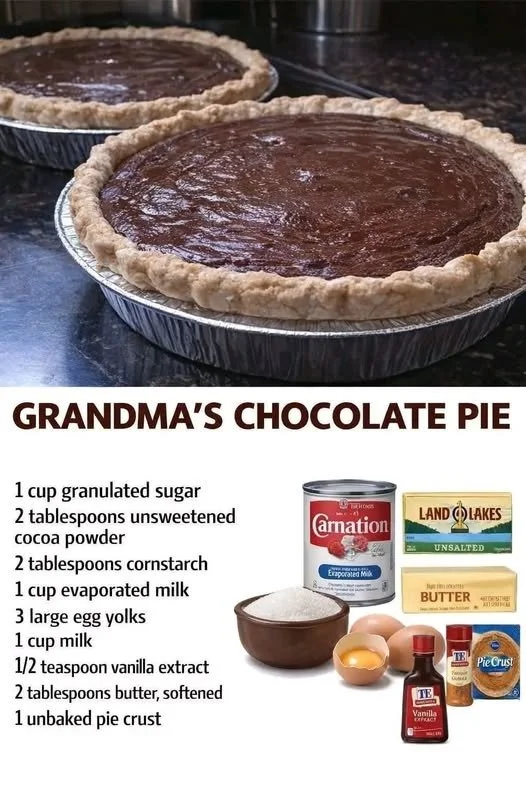
I can still remember the first time I tasted Grandma’s Chocolate Pie. The rich, velvety filling, topped with a luscious layer of whipped cream, was an experience that danced on my taste buds. It was one of those desserts that could light up any room, filled with warmth and love, and I can’t help but smile when I think about my grandma standing proudly by the kitchen counter, pie in hand, ready to share it with the family. Sharing this recipe feels like sharing a piece of my heart — and I’m excited to take you through it!
Why You’ll Love This Recipe
What’s not to love about a chocolate pie that comes from the heart of Grandma’s kitchen? It’s simple yet indulgent, and every bite is a reminder of cozy family gatherings and laughter echoing through the halls. This pie is not only a classic, but it’s also easy to whip up and will impress anyone who gets to indulge in it. Trust me, once you take that first delicious bite, you’ll be hooked! (See the ingredients in the next page below…)
Ingredients
– 1 pre-made pie crust
– 1 cup granulated sugar
– 1/3 cup unsweetened cocoa powder
– 1/4 cup cornstarch
– 1/4 teaspoon salt
– 2 3/4 cups milk
– 3/4 teaspoon vanilla extract
– 3 tablespoons butter
– Whipped cream for topping
Equipment Needed
– Mixing bowls
– Measuring cups and spoons
– Whisk
– Saucepan
– Pie dish
– Rubber spatula
Step-by-Step Instructions
First things first, preheat your oven to 350°F (175°C) and prepare your pie crust in your favorite pie dish. If you’re using a pre-made crust, simply fit it into the dish and poke a few holes in the bottom to prevent air bubbles while baking. In a large mixing bowl, combine the granulated sugar, cocoa powder, cornstarch, and salt. Whisk them together until everything is evenly mixed — this is where the magical flavor starts! (See the next page below to continue steps…)
Next, you’ll want to gradually whisk in the milk. Take your time with this step to ensure everything blends well together, creating a smooth mixture. Transfer the mixture into a saucepan over medium heat, stirring continuously. The mixture will start to thicken, and when it does, you’ll want to bring it to a gentle boil. Once it starts bubbling, take it off the heat and stir in vanilla extract and butter until they melt into the chocolatey goodness.
Now, pour your beautifully thickened filling into the prepared pie crust, smoothing it out to create an inviting surface. If you want to add an extra touch of love, place a piece of wax paper directly on the filling to prevent a skin from forming as it cools. Allow it to cool completely at room temperature before placing it into the fridge — this will help the filling set perfectly.
When you’re ready to serve, dollop lots of whipped cream on top. I mean, who doesn’t love whipped cream? It’s like a hug for the pie. Slice it up, serve it to your friends and family (or just to yourself — no judgment here), and enjoy every single bite of this creamy, dreamy dessert!
Pro Tips for Best Results
One thing I noticed after testing this recipe a few times is that the type of cocoa powder you use does make a difference. I’ve tried a few different brands, and oh boy, it’s worth going for a high-quality, Dutch-processed cocoa powder! It adds a depth of flavor that elevates the pie so much more.
I also recommend allowing the pie to chill overnight if you can; it gives the filling a chance to fully set up and creates a more delightful texture. Nothing beats that silky texture! After cooling, I like to lightly cover it with plastic wrap to keep its freshness intact.
Lastly, if you have a vanilla bean lying around, feel free to scrape the seeds into the pie filling for an extra touch of luxury. It’s these little nuances that make the pie feel even more special, and trust me, your taste buds will thank you!
Common Mistakes to Avoid
One common mistake I made in the beginning was not stirring the mixture continuously while it cooked. Letting it sit can lead to clumping, and no one wants chunky chocolate pudding in their pie! So keep that whisk moving and enjoy the soft bubbling sounds of chocolate magic happening in your pot. (See the next page below to continue…)
Another pitfall is being too impatient. While it might be tempting to slice into the pie soon after you’ve poured in the filling, resist the urge! Letting it cool completely before refrigerating is crucial for achieving the right texture. I learned this the hard way — a runny pi just isn’t what you want.
Also, don’t skip out on the whipped cream topping — it truly finishes the pie off beautifully! I once thought I could “cut corners” by not making whipped cream and just using the store-bought stuff, and while it was decent, it just didn’t have that homemade creaminess that compliments the pie so well.
Serving Suggestions
Grandma’s Chocolate Pie is a showstopper on its own, but pairing it with fresh berries is a delightful touch. The burst of tartness from strawberries or raspberries offers a perfect contrast to the sweet chocolate, creating a well-rounded dessert experience.
If you’re feeling extra indulgent, serve it with a scoop of vanilla ice cream. The combination of warm pie and cold ice cream is an incredibly comforting treat. The melts of the ice cream create a lovely little pool of creaminess that you simply can’t resist.
And of course, there’s nothing better than enjoying a slice with a steaming cup of coffee or a glass of cold milk. This classic duo will invite you to sit back and reminisce, making it not just dessert but a moment to cherish.
Variations & Customizations
If you’re looking to switch things up, consider adding a dash of espresso powder to deepen the chocolate flavor. It’s a subtle touch that can take your pie to a new level, giving it a bit of a gourmet flair. Just mix it in with the dry ingredients, and you’ll be amazed at how delicious it turns out!
For a fun twist, try adding a layer of peanut butter to the filling before you pour it into the crust. Just whisk together peanut butter with a bit of cream cheese to help it blend smoothly. This will create a deliciously nutty layer that pairs beautifully with chocolate.
Finally, if you’re a mint lover, consider adding a few drops of peppermint extract to the filling for a refreshing twist. This combination is a delightful way to usher in the holidays or simply to enjoy a nostalgic treat with a new flavor profile!
How to Store, Freeze & Reheat
If you have leftover pie (which is quite a feat in my family), you can easily store it in the refrigerator for up to four days. Just be sure to cover it properly to keep that delicious whipped cream intact.
For longer storage, you can freeze slices of the pie. Simply wrap each slice in plastic wrap tightly, then place them in a freezer-safe container. You can enjoy your pie for up to two months in the freezer!
When it’s time to enjoy that frozen slice, simply take it out and let it thaw in the fridge for a few hours. If you want to reheat it slightly, do so gently in the microwave, checking it in 15-second increments to avoid overheating.
Conclusion
I hope you find as much joy in making and sharing Grandma’s Chocolate Pie as I do. Every bite is a sweet reminder of family love and memories made around the table. So, roll up your sleeves, grab those ingredients, and create your own family memories. I can’t wait for you to experience this comforting treat—happy baking!