
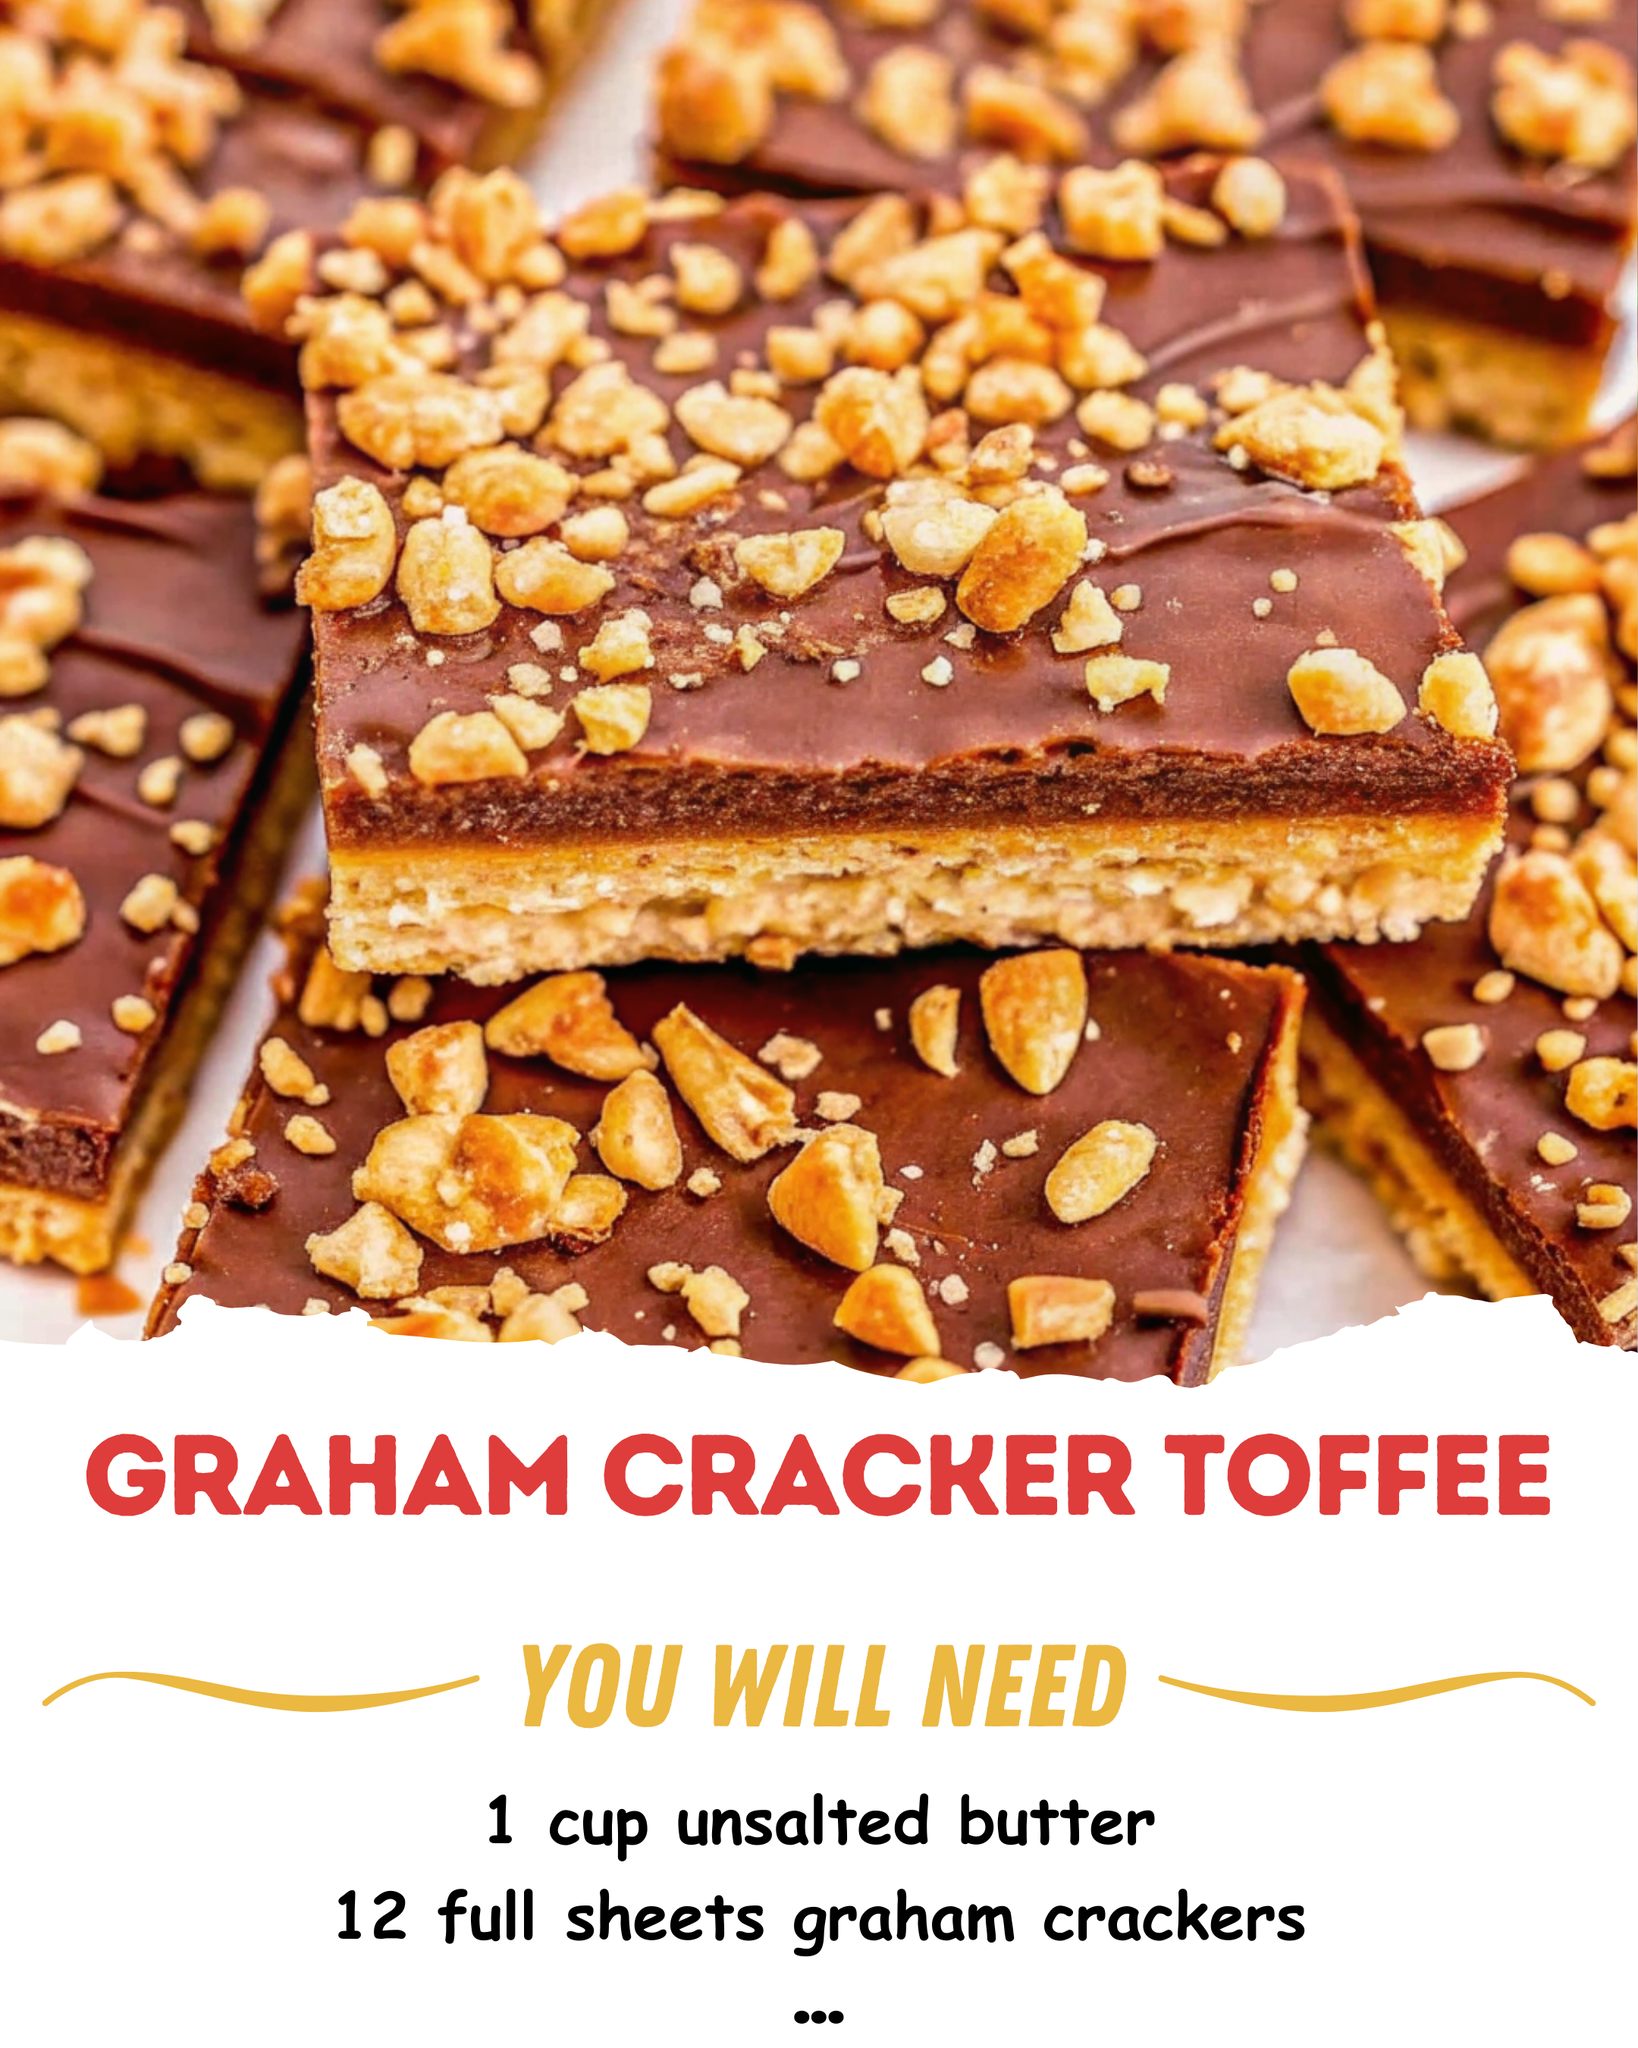
The moment I pull the hot pan from the oven, I immediately sprinkle the chocolate chips evenly over the top. I wait about 3-5 minutes to let the residual heat soften the chips. Then, using an offset spatula or the back of a spoon, I gently spread the melted chocolate into a smooth, glossy layer. This is the time to add any toppings—a sprinkle of flaky sea salt, chopped pecans, or toffee bits. I press them in lightly so they stick. Then, the hardest part: patience. I let the pan cool completely at room temperature, then I transfer it to the refrigerator for at least 2 hours to set the chocolate and harden the toffee perfectly. Once it’s cold and solid, I lift it out using the parchment paper and break it into rustic, uneven pieces with my hands.
Pro Tips for Best Results
A heavy-bottomed saucepan is your best friend. I used a thin pot once, and the butter and sugar mixture scorched on the bottom before it even came to a proper boil, giving the whole batch a burnt taste. A heavy pan distributes heat evenly and prevents this disaster.
Don’t walk away during the 2-minute boil. This step cooks the sugar and evaporates enough water to create the perfect toffee texture that hardens when cooled. Under-boiling leaves it sticky and chewy; over-boiling can make it bitter or cause separation. A steady, attentive 2 minutes is the sweet spot.
Let the chocolate melt on its own from the pan’s heat. I used to try to spread the chips right away, which made a mess. Waiting those few minutes lets them get perfectly soft so they spread like a dream. If your kitchen is cool and they’re not melting, pop the pan back in the turned-off oven for a minute.
Common Mistakes to Avoid
My biggest first-time mistake was using a pan that was too small. I used a standard quarter sheet pan, and the toffee layer was too thick, resulting in some pieces that were overly hard and others that were sticky. The large jelly roll pan ensures a thin, even layer that sets up with the perfect crisp-yet-biteable snap.(See the next page below to continue…)