
Next, I add the eggs one at a time, mixing well after each addition. I stir in the vanilla, then alternate adding the dry ingredients and milk. I’ve tried dumping everything in at once before, and the batter turned uneven. Slow and steady mixing creates a smoother cake crumb.
Once baked and fully cooled, I level the layers and begin frosting. I tint most of the buttercream a soft sage green and leave some cream-colored for piping. I apply a smooth crumb coat first — don’t skip this step. I’ve rushed it before and crumbs ended up in my final finish.
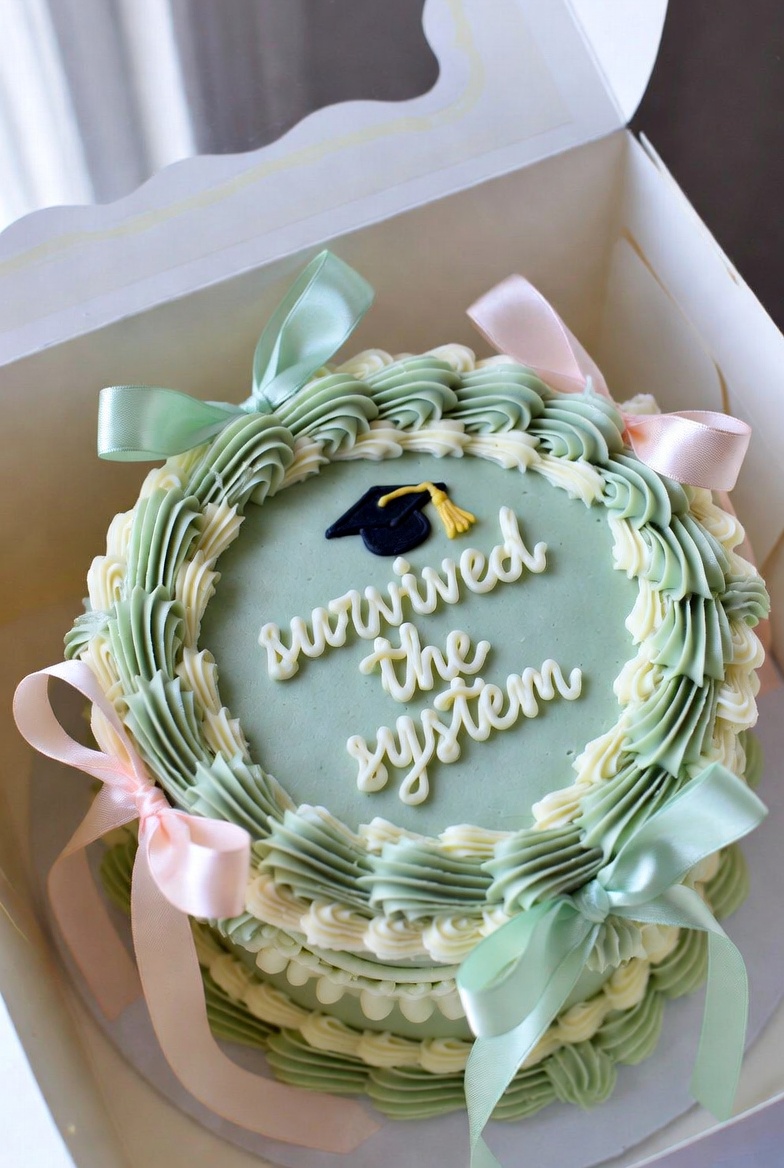
After chilling the crumb coat, I frost the cake smoothly and begin piping the vintage borders using a shell tip. I take my time here. The ornate look comes from layering textures. I pipe “survived the system” carefully in lowercase script. Then I add the ribbon bows around the sides and gently place the graduation cap topper on top.
Pro Tips for Best Results
I tested this cake design three different times, and here’s what I learned: chill between steps. Buttercream piping holds its shape much better when the base layer is slightly firm.
Here’s what I learned the hard way — don’t overmix your batter once the flour goes in. Overmixing creates a dense cake. Mix just until combined.
Another major tip: use gel food coloring, not liquid. I once used liquid coloring and it changed the frosting consistency. Gel keeps your buttercream stable and gives you that soft pastel tone.
Common Mistakes to Avoid
I made the mistake once of decorating while the cake was still slightly warm. The buttercream slid and lost definition. Always make sure your layers are completely cool. (See the next page below to continue…)