
I add the eggs one at a time, mixing well after each addition, then stir in the vanilla. I alternate adding the dry ingredients and milk slowly. I’ve tried rushing this step before, and the batter didn’t come together as smoothly. Gentle mixing keeps the texture tender.
After baking and completely cooling the layers — and I mean completely — I level them and apply a thin crumb coat. I’ve learned the hard way that skipping the crumb coat leads to visible cake crumbs in your final frosting. I chill the cake for about 20 minutes before applying the final smooth layer of buttercream.
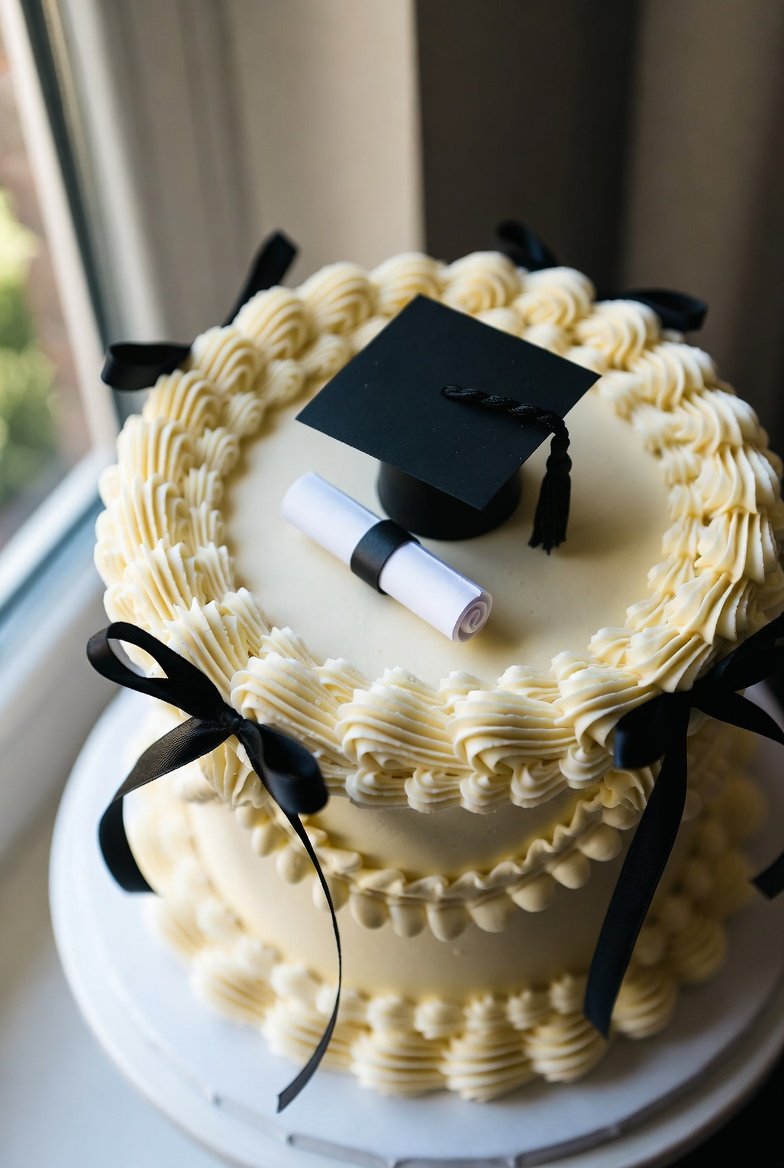
Now comes my favorite part: decorating. I use a shell piping tip to create vintage-style borders along the top and bottom edges. I take my time here. Slow, steady pressure creates those beautiful ridges. Then I tie black satin ribbons into neat bows and attach them gently around the cake. Finally, I place the graduation cap and diploma scroll on top for that polished finishing touch.
Pro Tips for Best Results
I tested this cake design several times, and here’s what I learned: smooth buttercream makes or breaks the look. If your frosting feels too thick, add a tiny splash of cream. If it’s too soft, chill it slightly. Consistency matters.
Here’s what I learned the hard way — don’t decorate in a warm kitchen. Buttercream loses its definition quickly. If your space is warm, chill the cake between decorating steps.
Another important tip: don’t overfill your piping bag. I once filled mine too much and lost control of the pressure, which ruined a border. Half-full piping bags give you better control and cleaner lines.
Common Mistakes to Avoid
I made the mistake once of frosting the cake while it was still slightly warm. The buttercream slid and wouldn’t hold shape. Always make sure the cake layers are completely cool. (See the next page below to continue…)