
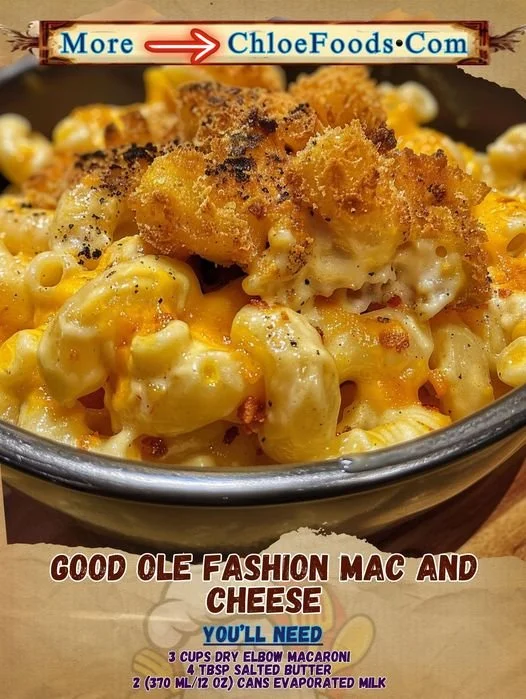
The mere mention of mac and cheese brings back a flood of warm memories, doesn’t it? For me, it’s more than just a dish; it’s a hug on a plate. I remember watching my mom whip up this creamy, cheesy goodness on a cold Sunday afternoon. With each spoonful, I felt love and comfort. Today, I’m excited to share my version of Good Old Fashioned Mac and Cheese that has become a staple in my kitchen. It’s rich, gooey, and enough to make anyone feel right at home.
Why You’ll Love This Recipe
This mac and cheese is incredibly satisfying, balancing a crispy topping with a lush, creamy interior. Each bite is a delightful combination of flavors and textures, perfectly bringing together the vintage taste I grew up loving with my own modern twist. Plus, it’s so uncomplicated to prepare that even after a long day, I can throw this together with ease. It’s the epitome of comfort food and is sure to be a hit with anyone who tries it! (See the ingredients in the next page below…)
Ingredients
– 1 pound elbow macaroni
– 4 tablespoons unsalted butter
– 4 tablespoons all-purpose flour
– 4 cups milk (whole milk recommended)
– 3 cups shredded sharp cheddar cheese
– 1 cup shredded mozzarella cheese
– 1/2 teaspoon garlic powder
– 1/2 teaspoon onion powder
– Salt and black pepper to taste
– 1 cup breadcrumbs (optional, for topping)
– 2 tablespoons melted butter (for topping)
Equipment Needed
– Large pot
– Colander
– Whisk
– 9×13 inch baking dish
– Cheese grater (if shredding cheese)
– Oven mitts
– Measuring cups and spoons
Step-by-Step Instructions
First things first, let’s cook the macaroni. Fill a large pot with water, add a generous sprinkle of salt (like I always say, it should taste like the sea), and bring it to a boil. Once boiling, toss in your elbow macaroni and cook until just al dente. You want that perfect bite since the pasta will continue cooking in the oven. When done, drain it in a colander and set aside. The aroma of pasta boiling fills my kitchen with nostalgia! (See the next page below to continue steps…)
Next up is the cheese sauce. In the same pot (less mess, yay!), melt the butter over medium heat. Once melted, sprinkle in the flour, and stir quickly with a whisk to form a roux, cooking for about 1-2 minutes until bubbly. Gradually add the milk, whisking constantly to avoid lumps. I like to let the mixture simmer for a few minutes until it thickens slightly. The smell of creamy milk and butter is just heavenly at this stage!
Now, it’s time to add the stars of the show—our cheeses! I usually combine sharp cheddar and mozzarella for the best flavor and texture. Stir in the garlic powder, onion powder, salt, and pepper; you can really tweak the seasonings to your liking here. Once the cheese is nice and melty, fold in the macaroni until each piece is coated in that lovely sauce.
If you want to take it up a notch, this is where we move to the baking dish. Pour the cheesy macaroni into a greased 9×13 inch baking dish. For a bit of crunch, I love to sprinkle breadcrumbs mixed with melted butter on top. Bake at 350°F (175°C) for about 25-30 minutes, or until the top is golden brown and bubbling. It’s hard to describe the aroma that fills the house as it bakes—just mouthwatering!
Pro Tips for Best Results
I always test the cheese combinations to reach the perfect balance. For instance, I’ve found that blending sharp cheddar with a bit of Gruyère gives it an elevated flavor that guests rave about. If you want to stick with a classic, just go with the cheddar, but don’t hesitate to experiment.
Make sure your milk is at room temperature before adding it to the roux; this ensures a smoother sauce. I used to add cold milk straight from the fridge, and let me tell you, it led to some lumpy disasters. Room temperature is the way to go!
Finally, don’t skip the breadcrumbs! The crunch on top contrasts so beautifully with the creamy pasta underneath. I sometimes add a sprinkle of paprika or Italian seasoning to the breadcrumbs for an extra touch of flavor. Trust me, it’s worth it.
Common Mistakes to Avoid
One of the biggest blunders I made early on was overcooking the pasta. Remember, we want it al dente; it’s going back into the oven, after all! If you cook it all the way through, you’ll end up with mushy mac and cheese, which is just sad.
Also, be cautious with the amount of salt. While the pasta water helps flavor the pasta, you don’t want to overdo it when seasoning your cheese sauce. Start with less and add more to taste! I can’t tell you how many times I’ve regretted oversalting.
Another mistake I’ve made is not letting the mac and cheese rest after it comes out of the oven. Allowing it to sit for about 5-10 minutes helps set the sauce and makes serving much easier. Trust me, patience pays off.
Lastly, if you’re using pre-shredded cheese, check the ingredients! Some contain anti-caking agents that can affect your cheese sauce. Freshly shredded cheese gives a smoother melt that your taste buds (and my own) will appreciate. (See the next page below to continue…)
Serving Suggestions
When it comes to serving this classic mac and cheese, I love to keep it simple. A side salad with a tangy vinaigrette cuts through the richness perfectly. If I’m feeling extra creative, I’ll toss in some roasted broccoli or peas for a pop of color and nutrients.
For a cozy night in, this dish pairs wonderfully with a glass of chilled white wine, such as Chardonnay. The acidity in the wine complements the creamy cheese beautifully. If you’re serving the mac and cheese at a gathering, consider a fun drink station with lemonade or iced tea.
And don’t forget dessert! After indulging in rich, cheesy mac and cheese, I like to finish the meal with something light—perhaps a fresh fruit salad or a scoop of lemon sorbet for a refreshing touch.
Variations & Customizations
One of the best parts about making Good Old Fashioned Mac and Cheese is how easily you can customize it! Want to jazz it up a bit? Consider mixing in cooked bacon or ham—both add a savory depth that I often find irresistible. Or if you’re looking to spice things up, jalapeños or diced green chilies do the trick.
You can also change the cheese combination to fit your mood. Sometimes I swap out half of the cheddar for a creamy blue cheese or a smoked gouda, which adds a fantastic twist. Don’t be afraid to play around with different cheeses until you find your favorite mix!
Finally, think about adding some vegetables. Spinach, broccoli, or even mushrooms can be sautéed and tossed in for added nutrition and flavor. Trust me; I’ve made a few veggie-packed versions that even my picky eaters loved.
How to Store, Freeze & Reheat
If you happen to have leftovers (which is rare in my kitchen), you can store them in an airtight container in the refrigerator for up to 3-4 days. I simply reheat them in the microwave, stirring occasionally to ensure even heating.
For longer storage, you can freeze the mac and cheese. I recommend portioning it out into freezer-safe containers. It can last up to 2 months in the freezer. When you’re ready to enjoy it again, just let it thaw overnight in the fridge, then reheat until bubbling.
To reheat, I like to pop it into the oven at 350°F (175°C) until warm, about 20-30 minutes. If you want that crispy top again, you can cover it with foil during the first half and then remove it for the last 10 minutes to let it brown. Perfect comfort food, reheated to perfection!
Conclusion
I hope this Good Old Fashioned Mac and Cheese recipe finds a special place in your heart like it has in mine. Cooking should be about creating joy, warmth, and comfort in your kitchen, and there’s nothing that brings people together quite like a bubbling dish of cheesy goodness. So, gather your loved ones, make this dish, and enjoy every cheesy bite. Happy cooking!