
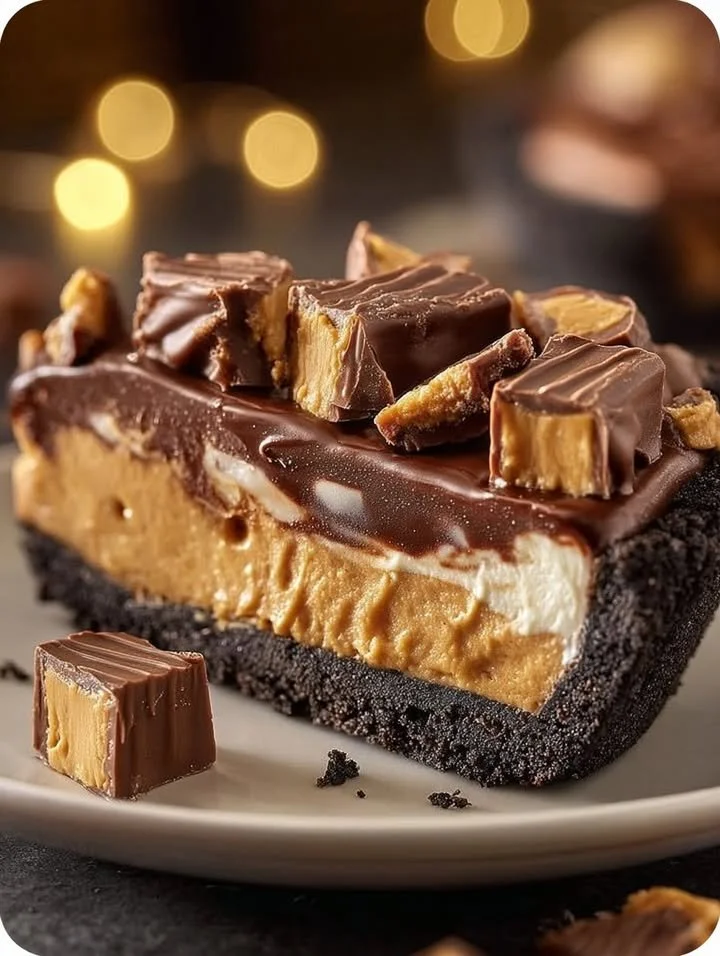
Another pitfall is not letting the chocolate base chill long enough. I once rushed through this step and ended up with peanut butter mixing into my chocolate instead of keeping nice distinct layers. Take your time; patience pays off in the end!
It’s also crucial to line the pan properly. I’ve made the mistake of thinking I didn’t need parchment paper and regretted it later when my giant treat stuck to the bottom. A little preparation goes a long way in keeping things neat and helping it come out in one beautiful piece!
Lastly, make sure your peanut butter is creamy! I once grabbed a jar of natural peanut butter, and it made the filling a bit gritty. Stick to the creamy stuff for that signature smooth texture that we all love!
Serving Suggestions
When it comes to serving this Giant Peanut Butter Cup, I love to pair it with a scoop of vanilla ice cream for an indulgent twist. The creamy softness of the ice cream complements the richness of the chocolate and peanut butter perfectly. Sometimes, I even drizzle a bit of chocolate sauce over the top for an extra layer of sweetness.
Another delightful suggestion is to sprinkle some crushed peanuts or sea salt on top right before serving. This adds a bit of crunch and contrast to the smooth textures, enhancing the overall flavor experience. You can also use this as a centerpiece for a special dessert table; it’s sure to get everyone’s attention.
Lastly, if serving at a gathering, I like to provide a few different toppings on the side such as whipped cream, extra chocolate chips, or even fruit slices. This impromptu topping bar lets everyone customize their slice to their liking, making it an interactive dessert experience!
Variations & Customizations
One of the fun parts of making a Giant Peanut Butter Cup is that you can easily customize it to fit your preferences. For instance, if you’re a fan of dark chocolate, you can swap out semi-sweet chocolate chips for dark chocolate ones. The deep, rich flavor of dark chocolate adds a sophisticated touch!
If you want to cater to nut allergies, consider using sunflower seed butter instead of peanut butter. It creates a similar creamy texture and delicious taste, making it a delightful alternative that everyone can enjoy without worry.
Also, think about adding layers of flavor by incorporating things like marshmallow fluff or caramel drizzle into the filling. You can even mix in crushed Oreos or pretzels for added texture. The possibilities are endless in making this dessert your own!
How to Store, Freeze & Reheat
Storing the Giant Peanut Butter Cup is super simple! I usually keep it in an airtight container in the fridge, where it will last about a week—if it lasts that long! Keeping it chilled not only preserves the creamy texture but also makes it more refreshing to eat.
If you find yourself with leftovers (which is a rarity, but it happens!), you can freeze this treat for up to three months. Just wrap it tightly in plastic wrap and then place it in a freezer-safe container. When you’re ready to enjoy, let it thaw in the fridge overnight for the best texture and flavor.
Reheating isn’t necessary, but if you want a melty experience, I suggest warming individual slices in the microwave for about 10-15 seconds. This creates a gooey, decadent effect that’s simply irresistible!
Conclusion
And there you have it—my deliciously giant take on the classic Peanut Butter Cup! I hope you enjoy making this delightful treat just as much as I do. Whether for a special occasion or a simple cozy night in, this dessert is sure to please. Happy baking, and may your kitchen be filled with the sweet scent of chocolate and peanut butter!