
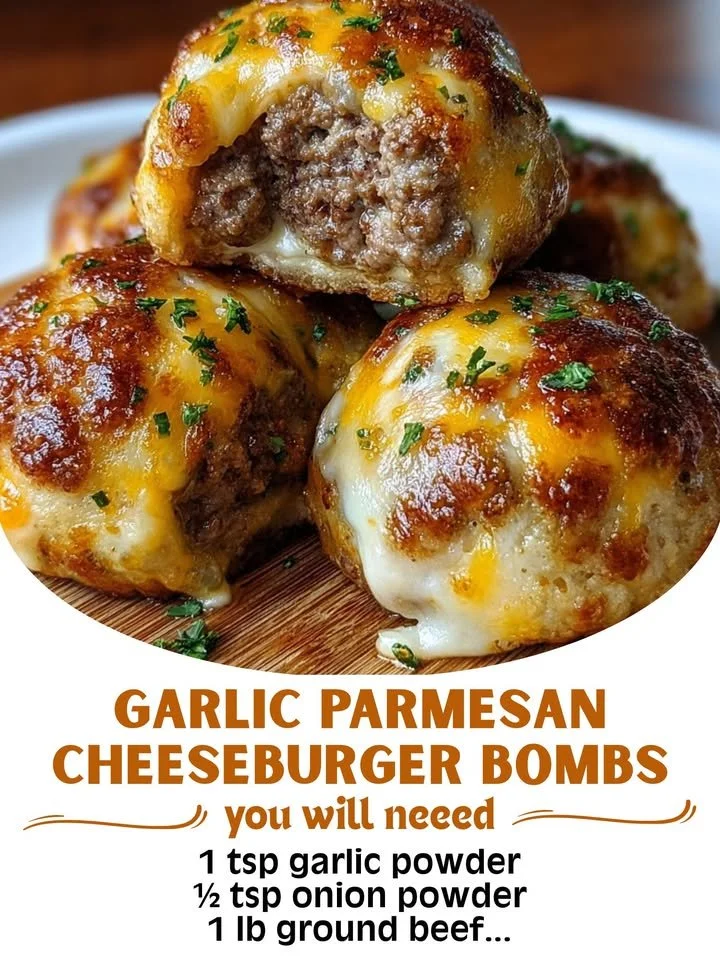
I stumbled upon the recipe for Garlic Parmesan Cheeseburger Bombs during a late-night scrolling session on my favorite food blog. The images alone made my mouth water, and I could already picture how my kitchen would smell as they baked. I decided right then and there that I had to give this a go, and I wasn’t disappointed. The combination of cheesy, garlicky goodness enwrapped in a soft, pillowy dough is something I now crave regularly. When these bombs are fresh out of the oven, my family makes a beeline to the kitchen, and I can’t help but smile at their excitement.
Why You’ll Love This Recipe
You’re going to love this recipe because it’s the perfect blend of comfort food and finger-lickin’ goodness. Imagine biting into a warm, flaky dough that encases a delicious mixture of juicy beef, melted cheese, and garlicky goodness. One bite and you’ll be hooked! Whether it’s game day or a cozy family dinner, these bites are pure joy on a plate. Plus, they’re really fun to make, so you’ll get to unleash your inner chef while impressing your friends and family. Trust me, everyone will want your secret recipe!
Ingredients
- 1 pound ground beef
- 1 cup shredded mozzarella cheese
- 2 tablespoons garlic, minced
- 1 tablespoon Worcestershire sauce
- 1 teaspoon onion powder
- 1 teaspoon salt
- ½ teaspoon black pepper
- 1 can (16 oz) refrigerated biscuits
- ¼ cup grated Parmesan cheese
- 2 tablespoons melted butter
- 1 teaspoon dried parsley (See the next page below to continue…)
Equipment Needed
- Large skillet
- Mixing bowl
- Baking sheet
- Parchment paper
- Pastry brush
Step-by-Step Instructions
When I first tackled this recipe, I started by browning my ground beef in a large skillet over medium heat. What I noticed right away was how the aroma of sizzling beef mingled with the garlic I added in—heavenly! I made sure to break up the meat while cooking, ensuring it cooked evenly. This step took about 7–10 minutes, and I was careful not to overcook it, as no one wants dry meat in their cheesebomb!
Once my beef was browned and finely crumbled, I added the minced garlic, Worcestershire sauce, and seasonings. The savory blend made my kitchen smell even more inviting. I let that simmer for a couple of minutes, just enough for the flavors to meld together beautifully. Then, I took it off the heat and mixed in the mozzarella cheese while the meat was still hot. The cheese melted slightly, creating a gooey mixture that was simply irresistible. I couldn’t resist stealing a spoonful, but trust me—a little restraint here goes a long way for the final product.
While my beef mixture cooled, I prepared the biscuits. I rolled out each biscuit on a floured surface to flatten them into little discs. At first, I rushed through this step, but I quickly learned that taking my time was key. This gives me enough room to fully encase the beef mixture without any risk of tearing. Once I laid out the flattened dough, it was time to scoop about a tablespoon of the beef mixture in the center of each biscuit. (See the next page below to continue…)
Now, the fun part! I neatly folded the edges of the biscuit dough over the filling, pinching them to seal tightly. I can’t stress enough how important this sealing step is. The first time I made these, I was a bit too casual with it, and they burst open while baking, leaving a cheesy mess in my oven. I lined a baking sheet with parchment paper, brushed the tops of each bomb with melted butter, and sprinkled them with Parmesan and parsley before popping them into the oven at 375°F for about 12-15 minutes. The aroma filled my home, and I could hardly wait!
Pro Tips for Best Results
I tested this recipe three different ways, and one major takeaway is to ensure that the ground beef is well-seasoned before you mix in the cheese. I’ve tried doing it afterward, but the flavors don’t meld as nicely, so please don’t skip this step. Additionally, I discovered that letting the mixture cool slightly before assembling makes it easier to handle and prevents burns from hot fillings.
If you prefer a little kick, you can add a pinch of red pepper flakes to your beef mixture. Trust me; it elevates the flavor beautifully without overpowering it. Also, be sure to keep an eye on those cheese bombs as they bake. Ovens can be tricky, and mine sometimes runs hot. If they’re golden brown too quickly, I reduce the temperature slightly to ensure they’re cooked all the way through without burning.
Lastly, if you can, use fresh garlic rather than jarred minced garlic, as it makes a huge difference in flavor. Fresh garlic has a vibrant and zesty flavor that simply can’t be matched by pre-minced varieties. You’ll thank yourself later!
Common Mistakes to Avoid
I made this mistake the first time and will save you the heartache: don’t skip the parchment paper! Without it, I ended up scraping half of my bombs off the baking sheet, and I lost some of that delicious golden cheesy goodness in the process. Using parchment not only helps with cleanup but also prevents sticking, ensuring each bomb comes out perfectly. (See the next page below to continue…)
Another common pitfall is overfilling the biscuit dough. I’ve had my fair share of exploding bombs because I wanted to get more meat in there. When you’re making these, remember that a tablespoon of filling is plenty. You want a delightful surprise, not a giant mess. Less really is more in this case!
Also, pay attention to baking time based on your oven. I initially followed the original recipe to the letter, but my first batch turned out slightly undercooked because I wasn’t monitoring closely. I suggest checking them a minute or two early, just to be safe. Every oven is different, so trust your gut once you get to that point!
Serving Suggestions
I like serving these Garlic Parmesan Cheeseburger Bombs with a side of homemade ranch dip for extra creaminess. It complements the cheesiness of the bombs, and my family can’t get enough of it. You can easily whip up a good batch with some sour cream, mayo, and ranch seasoning.
Another perfect accompaniment is a simple side salad for balance. When I have these bombs, I usually go for a light mix with fresh greens and a tangy vinaigrette to cut through the richness. It adds a nice contrast and a healthier option, which my conscience appreciates!
Finally, don’t shy away from finger foods! When I have friends over, I like to set up a fun appetizer spread. These bombs are usually a hit, and I pair them with various dipping sauces, like buffalo sauce or honey mustard, for some fun variety. Trust me—everyone loves playing around with different dips!
Variations & Customizations
I’ve experimented with several variations of these cheeseburger bombs to keep things interesting. One version I loved was adding jalapeños to the beef mixture for a spicy kick. If I feel adventurous, I’ll toss in some chopped green chilies, which provides a nice contrast to the rich cheese.
Another fun customization I tried involved swapping out the beef for ground turkey. It’s a great way to lighten things up, especially if you’re looking for a healthier option. Just be sure to adjust your seasonings slightly, as turkey can be a tad drier than beef.
Lastly, I’ve seen some people wrap these bombs in bacon before baking. What could be better than combining cheeseburgers and bacon, right? I haven’t tackled that one myself yet, but it’s on my list—because what’s not to love about a crispy, smoky finish?
How to Store, Freeze & Reheat
From my experience, these Garlic Parmesan Cheeseburger Bombs are fantastic the next day, but they’re best enjoyed fresh. However, if you have leftovers, storing them in an airtight container in the fridge works well for about 3-4 days.
If you want to make a big batch ahead of time, freezing them is my go-to method! After assembling the bombs, I freeze them individually on a baking sheet before transferring them to a freezer bag. This way, they won’t stick together, and I can bake just a few when I get a craving.
For reheating, I found that the oven is worth the extra effort. Preheat your oven to 350°F and place the bombs on a baking sheet lined with parchment. Bake them for about 10-12 minutes until they’re heated through and crispy again. I tried microwaving once, and let me tell you, the texture just isn’t the same!
Conclusion
Making Garlic Parmesan Cheeseburger Bombs has definitely become one of my favorite cooking adventures. It combines rich flavors and fun assembly, creating a fantastic experience in the kitchen. Each batch feels like a warm hug, bringing a crowd-pleasing dish to my table. I hope you give this recipe a try and love it as much as I do. Happy cooking!