
Using ground beef that’s too fatty, like 70/30, will make the bombs greasy. The fat renders out during baking and can soak the bottom of the dough, making it heavy and soggy. Lean ground beef (85/15 or 90/10) has enough flavor without the excess grease. Draining the cooked beef well is a non-negotiable step.
Not sealing the dough properly is a recipe for leakage. Take your time to pinch the dough together securely. If you’re struggling, you can moisten the edges of the dough circle with a little water before pinching to help them adhere. A failed seal means lost cheese and a less impressive presentation.
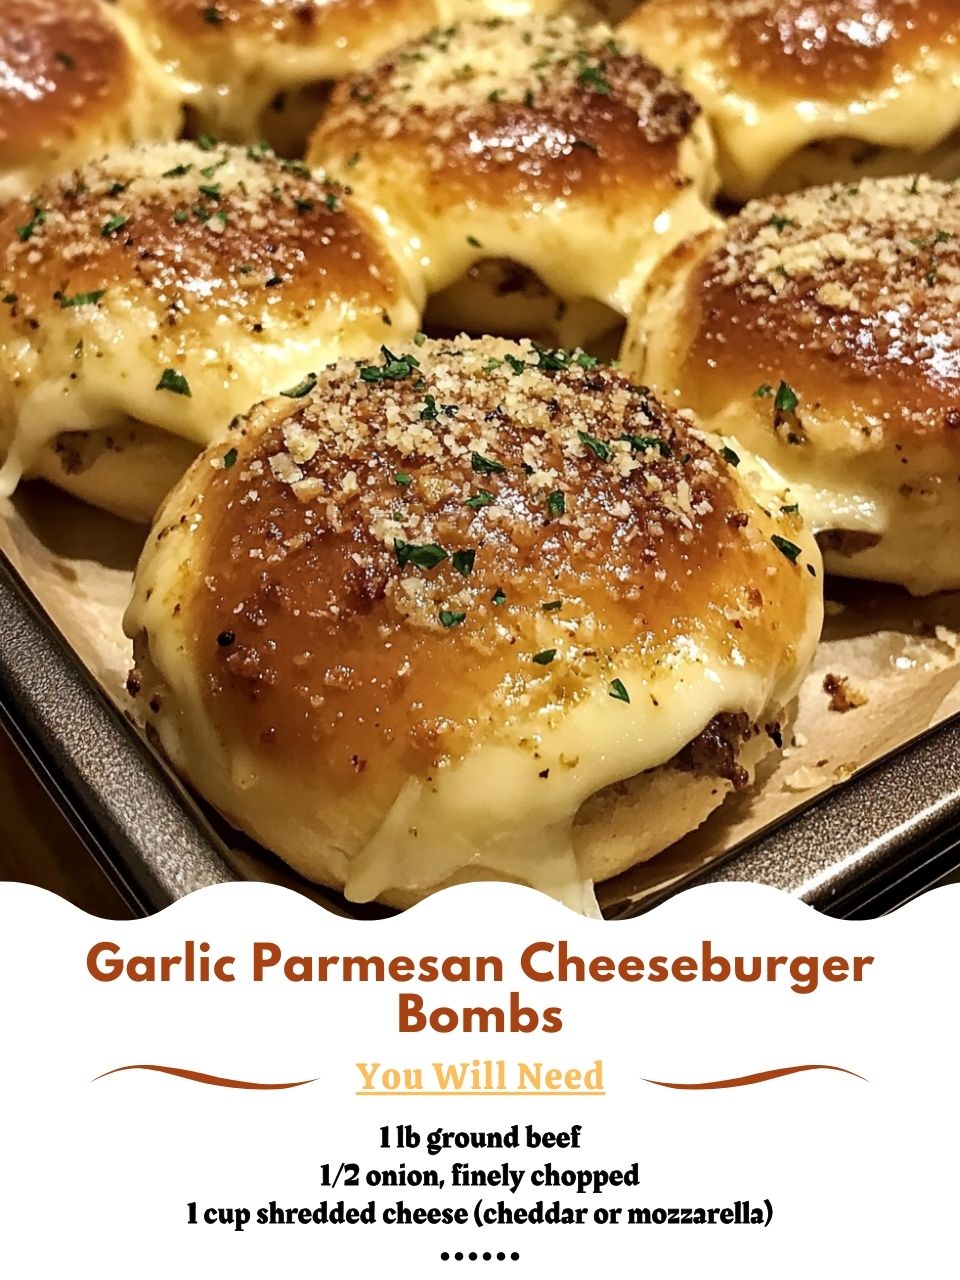
Baking on an unlined baking sheet is a messy error. The butter and cheese that inevitably leaks will bake onto the pan and be a nightmare to clean. Parchment paper or a silicone mat is your best friend here. It guarantees an easy release and the easiest cleanup imaginable.
Serving Suggestions
I love serving these bombs piled high on a platter the moment they’re cool enough to handle. They are the ultimate finger food for a party. I always put out small bowls of dipping sauces like a special burger sauce (mayo, ketchup, pickle relish), ketchup, mustard, or even a cool ranch dressing. Letting guests choose their dip makes it interactive and fun.
For a casual dinner, I serve them as the main event alongside simpler sides. A crisp green salad, some carrot and celery sticks, or a bowl of tomato soup for dipping are perfect complements. They turn a snack into a satisfying, well-rounded meal that everyone gets excited about.
They are also fantastic for packed lunches or picnics (once completely cooled). They hold their shape well and are just as delicious at room temperature. I pack a couple in a container with some fruit or veggies for a lunch that feels like a real treat.
Variations & Customizations
You can easily change up the filling. Try using ground turkey or chicken seasoned with taco spices for a Mexican-inspired version, and use Pepper Jack cheese. For a “pizza bomb,” mix the beef with some pizza sauce and use mozzarella and mini pepperoni.
Add different ingredients to the beef mixture. A tablespoon of cooked, crumbled bacon mixed in is divine. Finely diced pickles or jalapeños can add a tangy or spicy kick. A spoonful of barbecue sauce mixed into the filling creates a whole new flavor profile.
Experiment with the dough. While canned biscuits are classic and easy, you could use homemade pizza dough or even crescent roll dough sheets. The method remains the same: stretch, fill, and seal.
Change the topping. Instead of the garlic-Parmesan butter, try brushing them with everything bagel seasoning mixed into melted butter, or a sprinkle of shredded cheese in the last few minutes of baking.
How to Store, Freeze & Reheat
Leftover bombs store well in an airtight container in the refrigerator for up to 3 days. To reheat, place them on a baking sheet in a 350°F oven for 8-10 minutes until warmed through and crispy again. The microwave will work in a pinch (about 30 seconds) but will soften the crust.
You can freeze these before or after baking. To freeze unbaked, assemble the bombs, place them on a parchment-lined sheet, and freeze solid. Then transfer to a freezer bag. Bake from frozen, adding 5-10 minutes to the baking time. To freeze after baking, let them cool completely, then freeze on a tray before bagging.
Reheat frozen baked bombs in the oven at 350°F for 15-20 minutes until hot all the way through. This method restores the crispy exterior much better than the microwave.
Nutrition Information
Let’s approach this with a balanced perspective. These are a fun, indulgent treat. They provide protein from the beef and cheese, and carbohydrates from the biscuit dough. They are also rich in fats from the beef, cheese, and butter. They’re a satisfying, energy-dense food perfect for an occasional snack or party.
You can make them slightly lighter by using extra-lean ground beef, reduced-fat cheese, and brushing with less butter. However, part of their irresistible appeal is the rich, buttery, cheesy goodness. They are a celebration food.
Because they are quite filling, one or two bombs make a satisfying snack, while three or four with a side can be a meal. I find that serving them with a fresh vegetable side helps create a more balanced plate.
In my kitchen, these bombs are about joy, sharing, and fun. The happiness they bring to a gathering is a real part of their value, making them a worthwhile indulgence for special moments and casual get-togethers alike.
FAQ Section
Can I make these ahead of time?
Absolutely! You can assemble the bombs, place them on the baking sheet, cover tightly with plastic wrap, and refrigerate for up to 24 hours before baking. Brush with the butter mixture just before they go in the oven. You may need to add 1-2 extra minutes to the bake time since they’ll be cold.
My cheese leaked out everywhere. Why?
This usually means the filling was too hot when wrapped, the dough wasn’t sealed tightly enough, or the bombs were overfilled. Ensure your meat mixture is cooled, don’t overstuff, and pinch that seam securely. A little leakage is normal, but a flood means one of these steps needs adjusting.
Can I use pre-cooked or leftover ground beef?
Yes, this is a great way to use leftovers! Just warm your cooked, seasoned beef slightly, mix in the cheese, and let it cool to a warm temperature before proceeding. It’s a fantastic shortcut and reduces waste.
Conclusion
These Garlic Parmesan Cheeseburger Bombs are my ultimate fun food. They never fail to bring a smile, whether I’m serving them to my kids after school or to a crowd during the big game. I love how they turn simple ingredients into something magical and how the process of making them is as enjoyable as eating them. I hope this recipe becomes a go-to in your home for creating delicious, shareable moments. Now, go grab that can of biscuits and get ready for some seriously happy eaters.