
The first time I pulled a tray of Garlic Parmesan Cheeseburger Bombs from my oven, the smell was absolutely intoxicating. It was a game night experiment, and the scent of sizzling beef, melted cheese, roasted garlic, and buttery bread filled my kitchen with the kind of aroma that makes everyone gather instantly. As I watched them puff into golden, golden-brown spheres, I couldn’t wait to taste. That first bite—a crispy, garlicky, buttery crust giving way to a juicy, cheesy, savory beef filling—was pure, handheld perfection. They disappeared in minutes, and have been my secret weapon for parties, snacks, and fun family dinners ever since.
Why You’ll Love This Recipe
You’re going to love this recipe because it combines everything you adore about a cheeseburger and garlic bread into one irresistible, poppable bite. It’s fun to make, even more fun to eat, and is guaranteed to be the star of any gathering. Perfect for game day, parties, or a whimsical weeknight dinner, these “bombs” are crowd-pleasers that both kids and adults go crazy for. They’re surprisingly simple to assemble, using convenient ingredients for maximum flavor with minimal fuss. If you’ve ever wanted to eat a cheeseburger with your hands without the mess, this is your delicious answer.
Ingredients
For the Filling:
- 1 pound lean ground beef (85/15 or 90/10)
- 1/2 yellow onion, finely chopped
- 2 cloves garlic, minced
- 1 tablespoon Worcestershire sauce
- 1 teaspoon garlic powder
- 1/2 teaspoon onion powder
- 1/2 teaspoon salt
- 1/4 teaspoon black pepper
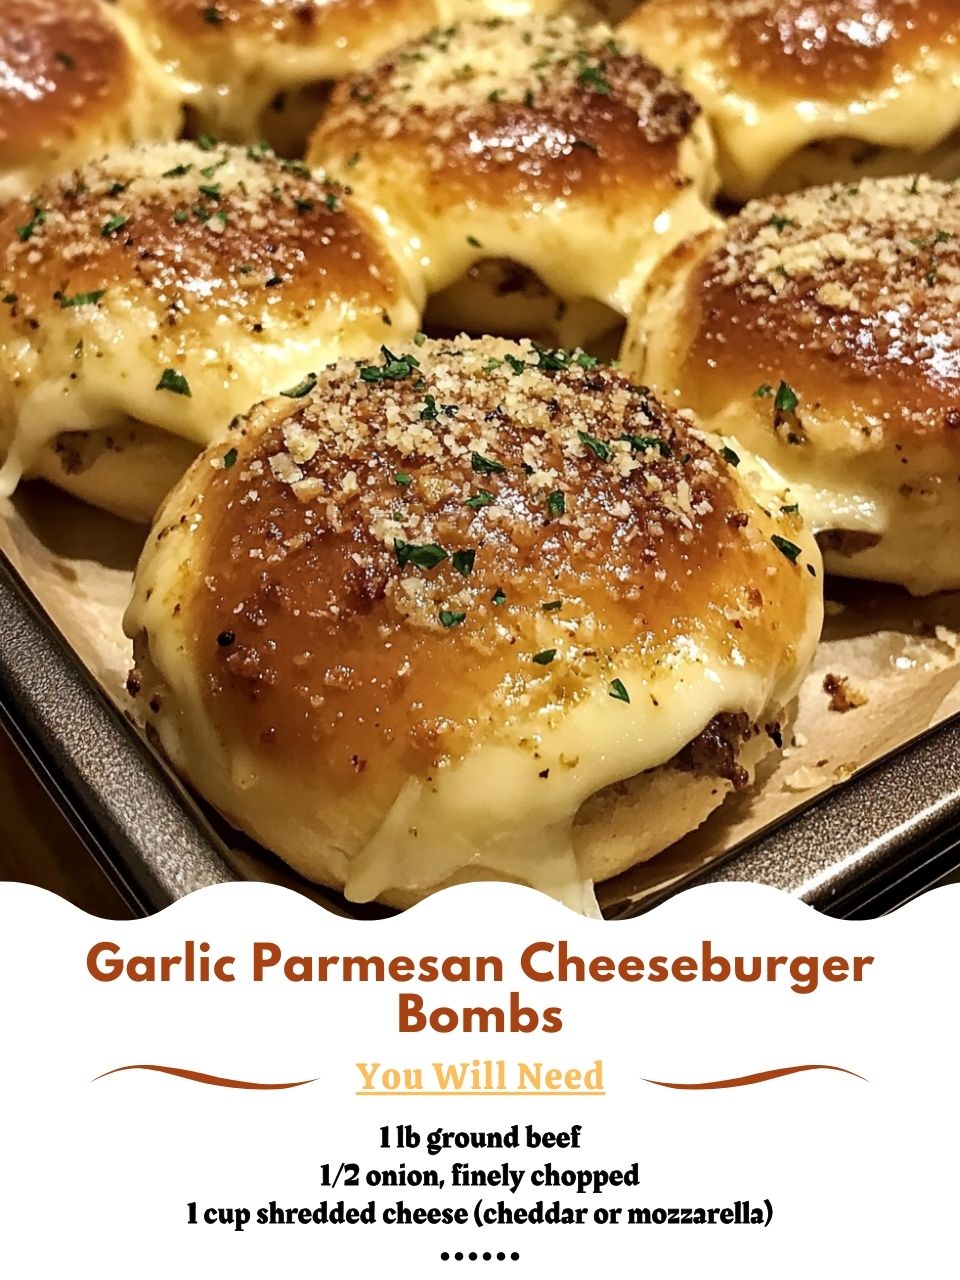
- 1 cup shredded cheese (a mix of cheddar and mozzarella is perfect)
For the Dough & Coating:
- 1 (16.3 oz) can refrigerated jumbo flaky biscuits (8 count)
- 1/4 cup (1/2 stick) unsalted butter, melted
- 1/4 cup grated Parmesan cheese
- 1 tablespoon fresh parsley, finely chopped (or 1 tsp dried)
- 1/2 teaspoon garlic powder
For Serving (Optional):
- Burger sauce, ketchup, or ranch for dipping
Let’s talk ingredients, because a few smart choices make all the difference. Using lean ground beef is important; too much fat can leak out and make the bombs greasy. The Worcestershire sauce is non-negotiable—it adds that deep, savory “burger” umami. Don’t skip it; it makes a huge difference. For the cheese, I shred my own from a block. Pre-shredded bagged cheese is coated to prevent clumping, which can make the melt less gooey. The jumbo flaky biscuits are the perfect vessel; they puff up and create wonderful layers. And the garlic-Parmesan butter coating? That’s the magic shell. Fresh parsley adds a pop of color and freshness you’ll love.
Equipment Needed
- Large skillet
- Mixing bowls (medium and small)
- Baking sheet
- Parchment paper or silicone baking mat
- Pastry brush or spoon
- Measuring cups and spoons
- Box grater (if shredding your own cheese)
Your equipment list is wonderfully simple. A large skillet is for browning the beef and onions to build the flavorful filling. A baking sheet lined with parchment paper is a must—the butter coating can drip and cause sticking, and this makes cleanup a breeze. A pastry brush makes applying the garlic-Parmesan butter a cinch, but the back of a spoon works too. You’ll need a couple of bowls: one for the filling and a small one for mixing the melted butter with the Parmesan and garlic. Having everything ready before you start assembling makes the process smooth and enjoyable.
Step-by-Step Instructions
I always start by preheating my oven to 375°F (190°C) and lining my baking sheet with parchment paper. In my large skillet over medium heat, I cook the ground beef and finely chopped onion together. I break the beef up into very small crumbles as it cooks—this is key for the filling to pack well. When the beef is no longer pink, I drain off any excess grease. Then, I stir in the minced garlic, Worcestershire sauce, garlic powder, onion powder, salt, and pepper. I cook for just one more minute until the garlic is fragrant, then I remove the skillet from the heat and let the mixture cool for about 10 minutes. This cooling step is crucial so the cheese doesn’t instantly melt when you mix it in.
Once the beef mixture is warm but not hot, I transfer it to a medium bowl and stir in the shredded cheese. The residual warmth will start to melt the cheese just enough to make everything wonderfully cohesive. I taste it at this point (my favorite part) and adjust the seasoning if needed. The filling should be savory, cheesy, and hold together when pinched.(See the next page below to continue…)