
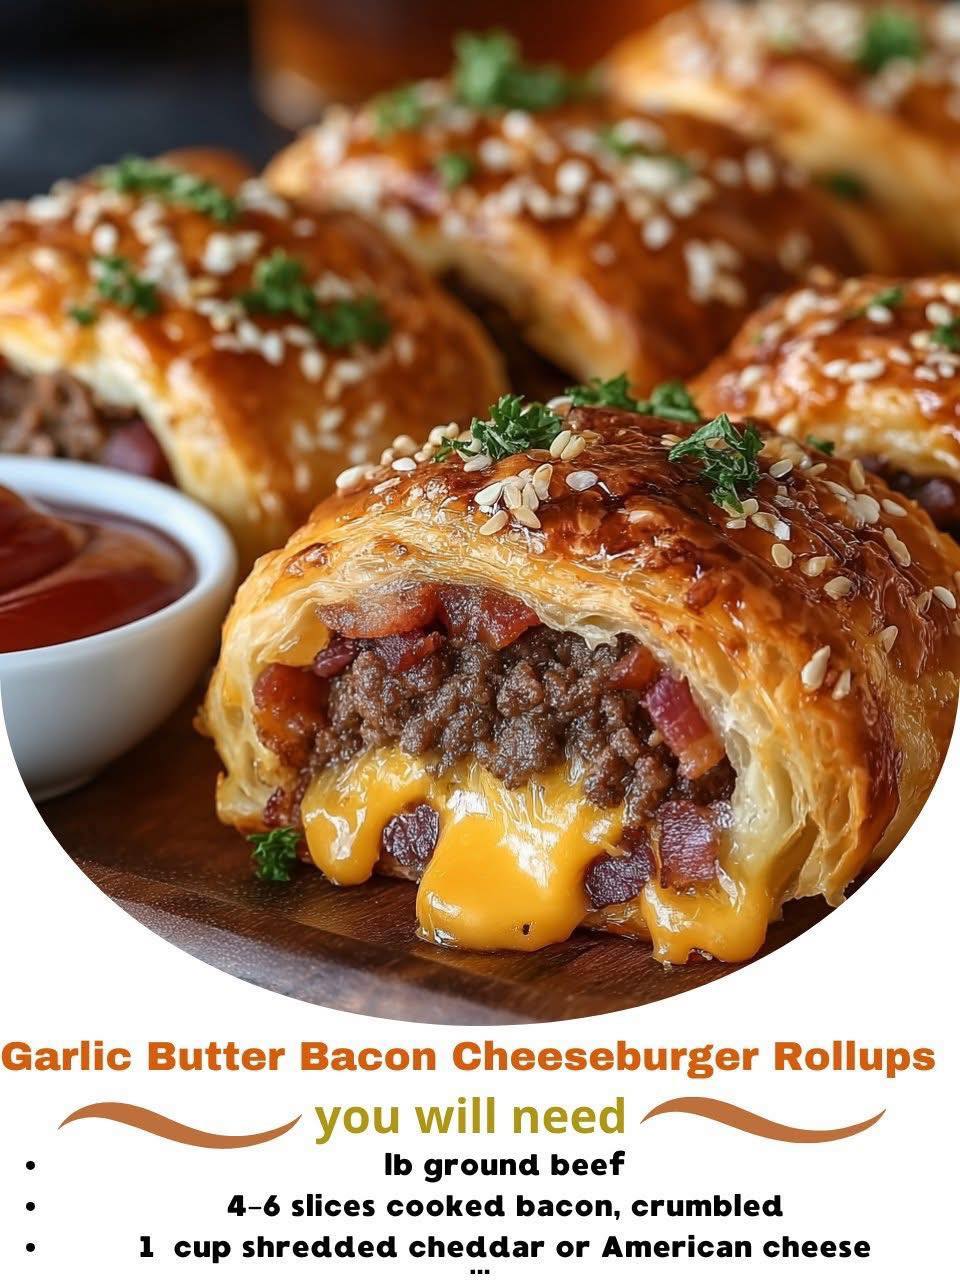
Garlic Butter Bacon Cheeseburger Rollups pack everything you love about a juicy bacon cheeseburger into golden, pull-apart swirls of dough brushed with garlicky butter.
Each roll is stuffed with seasoned beef, smoky bacon, and melty cheddar, then baked until the edges are crisp and the centers are gooey. They’re perfect for game day, family movie night, potlucks, or an easy weeknight dinner that feels fun and a little bit over-the-top.
Equipment You Will Need
- Large skillet
- Mixing bowl
- Wooden spoon or spatula
- Cutting board
- Sharp knife or bench scraper
- Rolling pin (if needed for dough)
- Baking sheet or rimmed tray
- Parchment paper or silicone baking mat
- Small bowl (for garlic butter)
- Pastry brush or spoon
Ingredients List
For the bacon cheeseburger filling
- 1 lb ground beef
- ½–¾ cup cooked bacon, crumbled
- ½ cup finely chopped onion (optional but recommended)
- ¼ cup diced pickles or relish (optional, for classic cheeseburger flavor)
- 1–2 teaspoons Worcestershire sauce
- 1 teaspoon garlic powder
- 1 teaspoon onion powder
- ½ teaspoon smoked paprika (optional)
- ½–1 teaspoon salt, to taste
- ½ teaspoon black pepper
For the dough and cheese
- 1 tube (about 13–16 oz) refrigerated pizza dough or crescent roll sheet dough
- 1½–2 cups shredded cheddar or cheddar-Jack cheese
For the garlic butter topping
- 4 tablespoons unsalted butter, melted
- 2–3 cloves garlic, minced (or 1 teaspoon garlic powder)
- 1 tablespoon chopped fresh parsley or 1 teaspoon dried parsley
Step-by-Step Instructions
Begin by making the bacon cheeseburger filling. In a large skillet over medium-high heat, add the ground beef and chopped onion. Cook, breaking the meat apart with a spoon, until the beef is browned and cooked through and the onion has softened.
Drain off any excess grease if needed, then return the skillet to the heat. Stir in the Worcestershire sauce, garlic powder, onion powder, smoked paprika, salt, and pepper, mixing well so the seasonings coat the meat evenly.
Add the crumbled cooked bacon to the skillet and stir it into the beef mixture. If you’re using pickles or relish inside the rolls, you can stir them in here or reserve them for sprinkling on top after baking.
Taste the mixture and adjust the seasoning if needed; it should be flavorful and slightly salty, since it will be surrounded by dough and cheese. Remove the skillet from the heat and let the filling cool for several minutes. Slightly cooled filling is easier to spread on the dough and helps keep the cheese from melting too early.
While the filling cools, prepare your dough. Preheat your oven to 375°F (190°C) and line a baking sheet with parchment paper or a silicone baking mat. Unroll the refrigerated pizza dough or crescent roll sheet onto a lightly floured surface.
If using pizza dough, gently roll or stretch it into a rectangle roughly 10×15 inches, trying to keep an even thickness. If using crescent dough, pinch any seams together to form one solid sheet.
Spread the cooled bacon cheeseburger mixture evenly over the surface of the dough, leaving about a ½-inch border along one long edge to help seal the roll.
Sprinkle the shredded cheese generously over the meat layer so every bite will have gooey, melty cheese. If you love extra cheesiness, lean toward the higher end of the cheese amount or even add a bit more.
Starting from the long edge opposite the border, roll the dough up tightly into a log, much like a cinnamon roll. Roll slowly and firmly, tucking in the filling as you go so it doesn’t spill out. When you reach the clean border, pinch the seam firmly to seal the log shut.
Turn the log seam side down to help keep it closed. Use a sharp knife or bench scraper to slice the log into 1–1½ inch thick pieces, wiping the blade between cuts if the cheese gets sticky.
Arrange the slices cut side up on the prepared baking sheet, leaving a little space between each roll so they have room to puff and brown.
If some pieces look a bit loose, gently tuck any stray filling back in and nudge the dough around it. You can nestle them closer together for softer sides, or leave more space if you want crispier edges all around.
In a small bowl, stir together the melted butter, minced garlic, and parsley to make the garlic butter topping. Use a pastry brush or the back of a spoon to generously coat the tops and sides of each roll with the garlic butter.
This step is what gives the rollups their irresistible, golden, garlicky crust, so don’t be shy with it. Reserve a little bit of the garlic butter for brushing on after baking if you like.
Place the baking sheet in the preheated oven and bake for about 15–20 minutes, or until the rolls are puffed, the dough is cooked through and golden brown, and the cheese is bubbling.
If the tops are browning too quickly before the centers seem done, you can loosely tent the tray with foil for the last few minutes. When finished, remove the pan from the oven and, if desired, brush the hot rolls with the remaining garlic butter for an extra glossy, flavorful finish.
Let the Garlic Butter Bacon Cheeseburger Rollups cool for a few minutes on the
tray so the cheese sets slightly and they’re easier to handle. Transfer them to a serving platter and garnish with a sprinkle of extra parsley if you like. Serve warm with your favorite burger condiments on the side—ketchup, mustard, mayo, burger sauce, or ranch—for dipping.
Expert Tips for Success
Letting the filling cool slightly before spreading it on the dough keeps the fat from melting through and helps you roll everything tightly without the dough becoming soggy. If the meat is piping hot, give it at least 5–10 minutes to come down in temperature. Spreading the filling in an even layer, all the way to the edges except for one small border, makes the rollups look swirled and ensures every piece has a balanced amount of meat, bacon, and cheese.
Use a sharp knife and a gentle sawing motion when slicing the log to keep the rolls neat. If the dough is very soft, you can briefly chill the filled log in the refrigerator for 10–15 minutes to firm it up before cutting; this makes cleaner spirals and helps keep the filling from squishing out.
Brushing the rolls with garlic butter before baking and again right after they come out of the oven builds layers of flavor and gives you that beautiful, bakery-style sheen.
For maximum cheeseburger flavor, don’t under-season the meat. The dough and cheese soften the impact of the spices, so the filling should taste slightly more intense than you might expect when sampling it alone. Remember that bacon and cheese add salt too, so balance the salt gently but confidently, tasting as you go.
Variations and Substitutions
There are lots of ways to customize Garlic Butter Bacon Cheeseburger Rollups. Swap cheddar for a blend like cheddar-Jack, mozzarella, or even American slices chopped up and scattered over the meat for ultra-gooey, nostalgic cheeseburger vibes. For a smoky twist, use smoked cheddar or add a little BBQ sauce drizzled over the meat before rolling.
You can also play with the flavor profile by changing seasonings. Add a bit of chili powder, cayenne, or crushed red pepper flakes for a spicy kick, or stir in a spoonful of ketchup and mustard to the meat mixture for an all-in-one burger sauce inside the rolls.
If your crowd loves pickles, sprinkle extra diced pickles over the cheese before you roll, or serve them on top after baking for crunch and tang.
For a slightly lighter version, use lean ground beef or even ground turkey, and reduce the amount of cheese or bacon slightly.
You can also use homemade pizza dough or a thinner dough sheet for less bread per bite. If you prefer a tortilla-style rollup, the same filling can be rolled into tortillas, brushed with garlic butter, and baked until crisp for a different texture.
Serving Suggestions
Garlic Butter Bacon Cheeseburger Rollups are incredibly versatile at the table. Serve them as a main dish with fries, tots, or a simple green salad on the side for a fun twist on burger night.
They also shine as a party appetizer or game day snack: arrange them on a platter with small bowls of ketchup, mustard, burger sauce, ranch, or BBQ sauce for dipping.
For a full “burger bar” experience, set out toppings and let guests customize their plates. Offer shredded lettuce, diced tomatoes, pickles, jalapeños, and crispy onion strings on the side so people can pile them on top of their rollups. These rolls are also great for kids—they’re handheld, dippable, and familiar in flavor—so they work well for sleepovers, birthday parties, and casual family gatherings.
Storage, Freezing, and Reheating
If you have leftovers, let the rollups cool to room temperature, then transfer them to an airtight container and refrigerate for up to 3–4 days.
To reheat, place them on a baking sheet and warm in a 350°F oven or air fryer until heated through and the edges are crisp again. The oven or air fryer preserves the texture better than the microwave, which can make the dough soft.
These rollups also freeze well, making them a great make-ahead option. You can freeze them baked or unbaked. For unbaked, assemble, slice, and place them on a baking sheet to freeze until firm, then transfer to a freezer bag or container.
When ready to bake, place them on a tray, brush with garlic butter, and bake from frozen at 375°F, adding extra time as needed. For baked leftovers, freeze cooled rollups in a single layer, then reheat from frozen in the oven until hot and crisp. This flexibility makes Garlic Butter Bacon Cheeseburger Rollups an excellent choice for stocking the freezer with quick, crowd-pleasing meals or snacks.