
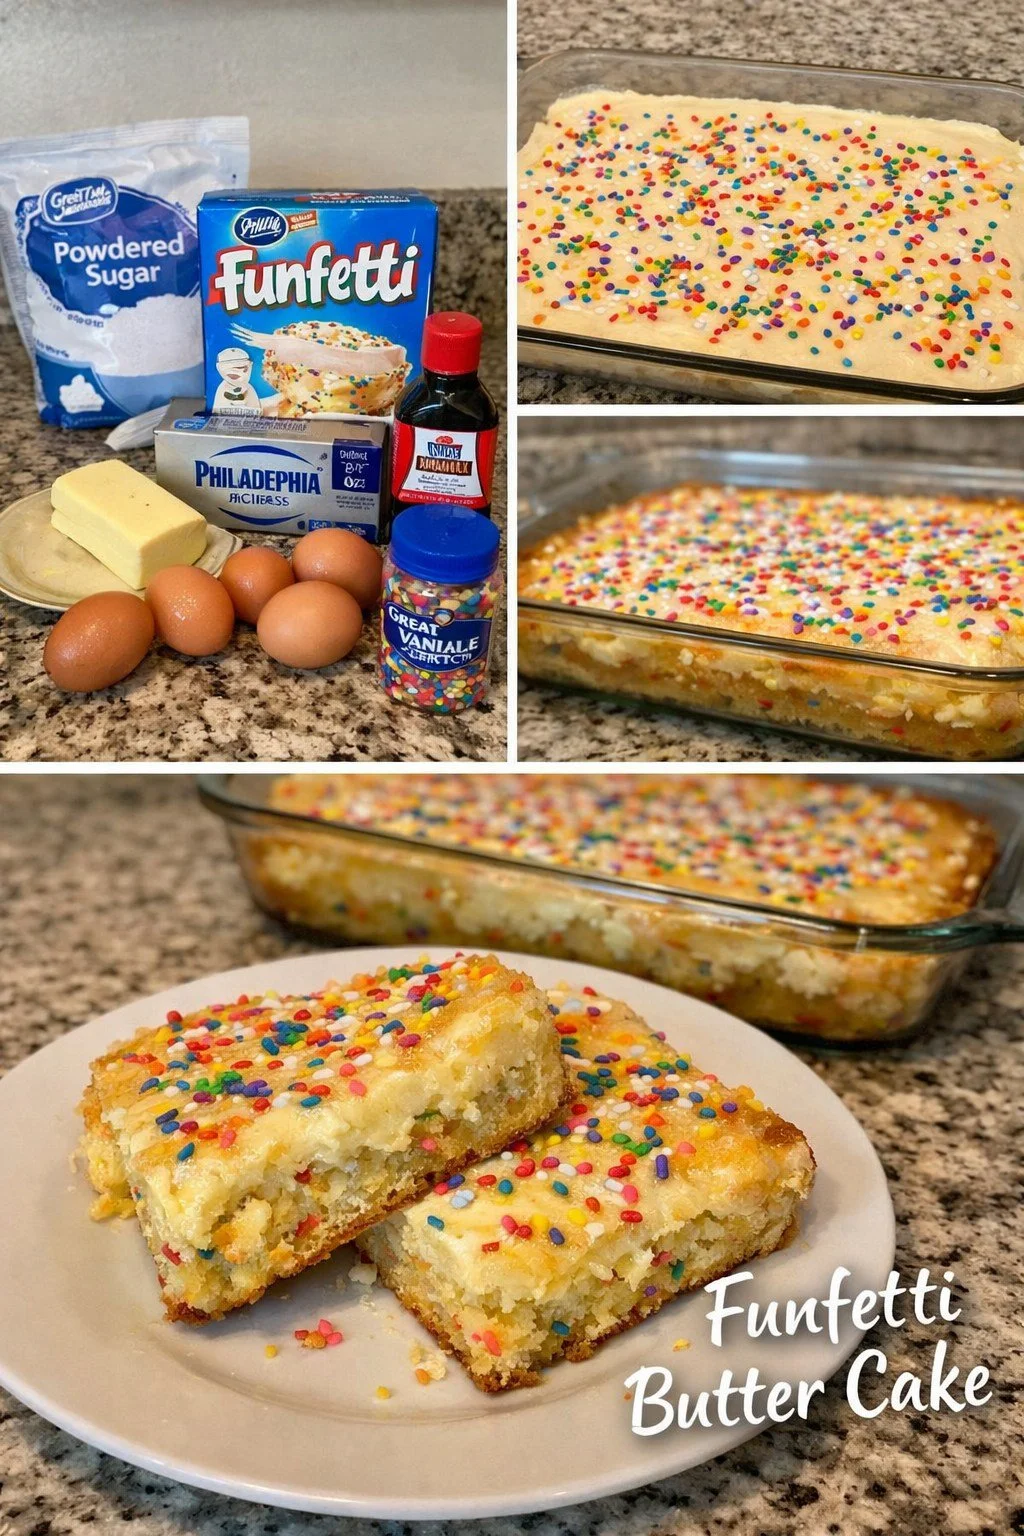
I absolutely adore baking in my kitchen, especially when it comes to creating something fun and vibrant like Funfetti Butter Cake. This cheerful cake, loaded with colorful sprinkles, is the perfect treat for birthdays, celebrations, or simply when you want to brighten up the day. The combination of a buttery base and bursts of sweetness makes it an irresistible delight that evokes all the joyful feelings of childhood.
Why You’ll Love This Recipe
This recipe is not just about making a delicious cake; it’s about creating memories in your kitchen filled with laughter and joy. The rich, buttery flavor combined with the vibrant sprinkles makes it a cake that both kids and adults will love. Plus, it’s straightforward to whip up, making it a great choice for both novice and experienced bakers alike. I guarantee you’ll find yourself making this cake over and over again! (See the ingredients in the next page below…)
Ingredients
– 1 cup unsalted butter, softened
– 2 cups granulated sugar
– 4 large eggs
– 1 teaspoon vanilla extract
– 3 cups all-purpose flour
– 1 tablespoon baking powder
– ½ teaspoon salt
– 1 cup whole milk
– 1 cup rainbow sprinkles
Equipment Needed
– 9×13 inch baking pan
– Mixing bowls
– Electric mixer or whisk
– Rubber spatula
– Measuring cups and spoons
– Cooling rack
Step-by-Step Instructions
Let’s get right into making this delightful Funfetti Butter Cake! First, preheat your oven to 350°F (175°C) and grease your baking pan with butter or non-stick spray. Then, in a large mixing bowl, cream together the softened butter and granulated sugar until it’s light and fluffy. This step is so rewarding! You can almost smell the sweet aroma wafting through the kitchen. Next, beat in the eggs one at a time, ensuring each egg is well incorporated before adding the next. Mix in the vanilla extract for that lovely hint of flavor! (See the next page below to continue steps…)
Now, in another bowl, whisk together the flour, baking powder, and salt. Gradually add the dry ingredients to the wet mixture, alternating with the whole milk. Start and end with the flour mixture. I often take a moment to enjoy the texture and smell of the batter as it comes together; it’s such a soothing experience. Once everything is mixed well, gently fold in the rainbow sprinkles. I always use the best quality sprinkles to enhance the cake’s look!
Pour the batter into your prepared baking pan and spread it out evenly with a spatula. Bake for about 30 to 35 minutes or until a toothpick inserted in the center comes out clean. As the cake bakes, my kitchen fills with the most delightful smells that make everyone curious about what I’m up to. Allow the cake to cool in the pan for about 15 minutes before transferring it to a cooling rack to cool completely.
Once your cake is cooled, you can serve it as is, or go ahead and frost it with your favorite buttercream. I love to add more sprinkles on top for that extra pop of color and playfulness. Trust me, the joy on everyone’s faces when they take a bite is priceless!
Pro Tips for Best Results
I’ve experimented with this recipe quite a bit, and one important tip I’ve learned is to ensure your butter is truly softened at room temperature before mixing. It makes for a creamier texture in the batter! If you forget to take your butter out ahead of time, you can cut it into small pieces or microwave it for just a few seconds, but be careful not to melt it.
Another pro tip is to use high-quality sprinkles. I’ve found that the more vibrant the sprinkles, the more visually appealing and delicious the cake turns out to be. Plus, it helps them to hold their color during baking rather than blending into the batter. You really want those pops of color to shine!
Finally, don’t skip the cooling time. While it’s tempting to dive right in, letting the cake cool completely before frosting ensures that the frosting doesn’t melt off and creates a beautiful finish. This patience pays off in a stunning and delicious presentation.
Common Mistakes to Avoid
One mistake I made the first time I baked this cake was not measuring the flour correctly. I scooped the flour straight from the bag into my measuring cup, and the cake ended up dry. I learned that spooning the flour into the measuring cup and leveling it off is the best way to get an accurate measurement.
Another pitfall is overmixing the batter after adding the flour. It’s easy to get carried away, but I’ve found that gently folding in the dry ingredients keeps the cake light and fluffy. Overmixing creates a denser texture that doesn’t have the same tender crumb we’re looking for.
Also, baking the cake for too long can lead to a dry texture. Every oven is different! I recommend checking for doneness a few minutes before the lowest baking time to avoid any overbaking. That golden crust is what we want without sacrificing moistness.
Lastly, neglecting to let the cake cool before frosting can ruin all your hard work. Allowing the cake to cool completely will help the frosting stay intact and give you a beautiful final product! (See the next page below to continue…)
Serving Suggestions
I love to serve my Funfetti Butter Cake with a simple vanilla buttercream frosting, but you can also get creative! A drizzle of chocolate ganache or a sprinkle of powdered sugar can add a delightful touch. You might even try serving it with a scoop of vanilla ice cream for that classic cake-and-ice-cream experience—nothing quite matches that!
If you’re hosting a party, slice it into fun shapes using cookie cutters to add a whimsical touch. This works especially well if you’re using a round cake! You can even engage the kids by letting them help decorate with extra sprinkles an hour before serving.
Finally, I like to pair my cake with fresh fruit, such as strawberries or raspberries. The tartness from the berries beautifully balances the sweetness of the cake and adds a fresh burst of flavor that everyone enjoys.
Variations & Customizations
The beauty of Funfetti Butter Cake is that it’s super versatile! You can switch up the sprinkles to match different themes, like holiday colors for Christmas or pastel shades for Easter. Just think how festive a red, white, and blue version would be for the Fourth of July!
Another fun variation is to include different flavored extracts or zests. I once made a citrus version by adding lemon or orange zest to the batter, and it added a delightful tanginess that paired wonderfully with the sweetness of the sprinkles.
If you want to make it a bit more decadent, try adding chocolate chips or crushed cookies into the batter along with the sprinkles. This creates an exciting surprise in each bite and makes the cake even more appealing for chocolate lovers.
How to Store, Freeze & Reheat
If you find yourself with leftover cake (which is a rare occurrence in my house), store it in an airtight container at room temperature for up to three days. If you live in a particularly humid environment, I suggest keeping it in the fridge to avoid any spoilage.
To freeze the Funfetti Butter Cake, slice it into portions and wrap each piece tightly in plastic wrap before placing it in a freezer bag. It can last for up to three months. When you’re ready to enjoy it again, simply thaw it in the fridge overnight.
For reheating, if you prefer a warm cake experience, pop a slice in the microwave for about 10-15 seconds until it’s just warmed through, then top it with a dollop of whipped cream or your favorite frosting right before serving. This brings back that freshly-baked aroma and flavor!
Conclusion
Baking Funfetti Butter Cake in my kitchen brings me so much joy! It’s more than just a dessert; it’s a nostalgic reminder of celebrations and sweet moments. With its buttery texture and joyful sprinkles, this cake creates happiness in every bite. I hope you’ll try this recipe and enjoy the heartwarming experience of baking and sharing it with those you love. Happy baking!