
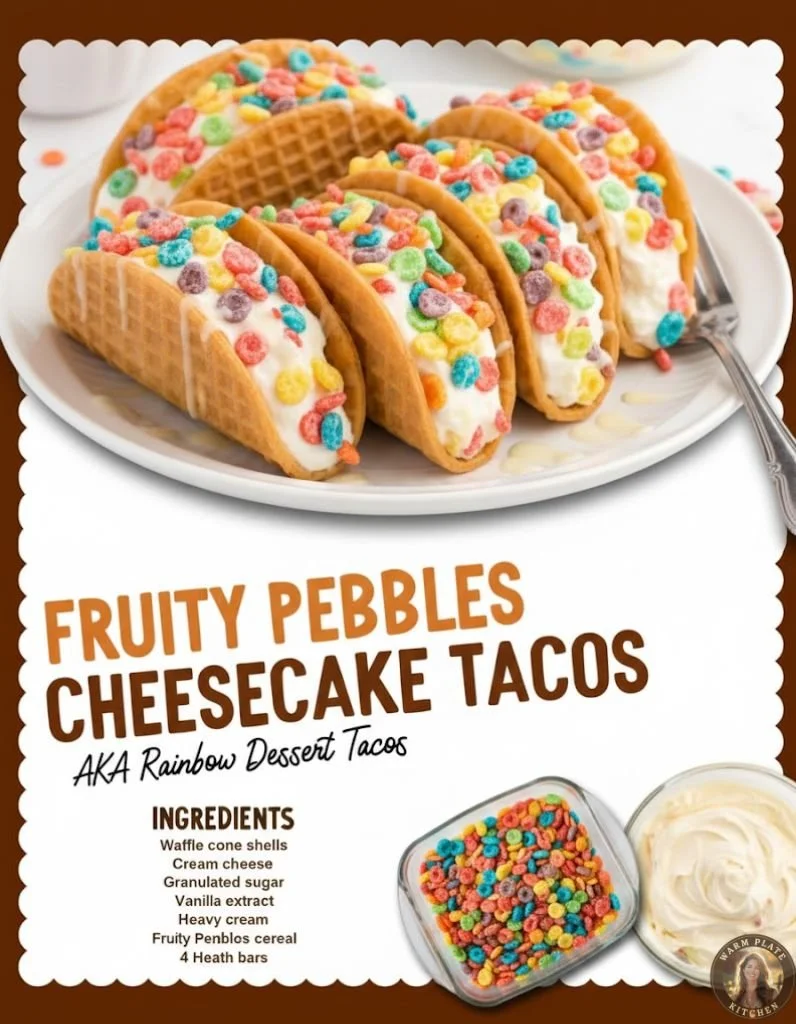
Hello there! Today, I’m excited to share a delightful little concoction that I whipped up in my cozy kitchen: Fruity Pebbles Cheesecake Tacos. If you’ve ever anticipated the joy of breakfast cereal combined with the indulgence of cheesecake, then you’re in for a treat. This recipe marries the playful crunch of Fruity Pebbles with a creamy cheesecake filling, all wrapped up in a sweet taco shell. It’s perfect for parties or just a fun dessert at home!
Why You’ll Love This Recipe
I promise you, once you take a bite, you’ll be hooked! The bright colors and flavors will bring a smile to your face, and it’s such a unique twist on traditional cheesecake that it’ll be a hit at any gathering. Plus, the presentation is as fun as the taste; who doesn’t love dessert tacos? Trust me, each bite is a delightful experience, melding crunch with smoothness. This recipe really isn’t just a treat for your taste buds, but for your eyes too! (See the ingredients in the next page below…)
Ingredients
- 1 cup of crushed graham crackers
- 1/4 cup of melted butter
- 2 tablespoons of granulated sugar
- 1 package (8 oz) of cream cheese, softened
- 1/2 cup of powdered sugar
- 1 cup of whipped cream
- 1 cup of Fruity Pebbles cereal
- Taco shell molds (or alternative shaped taco holders)
Equipment Needed
- Mixing bowls
- Electric mixer (or whisk)
- Taco shell molds
- Baking tray
- Spoon for scooping filling
Step-by-Step Instructions
Let’s get cooking! First, I begin by preparing the taco shells. In a mixing bowl, I combine the crushed graham crackers, melted butter, and granulated sugar until it resembles wet sand. I press this mixture tightly into my taco shell molds and bake them at 350°F (175°C) for about 10 minutes or until they’re golden and fragrant. The smell wafting through my kitchen is so inviting! (See the next page below to continue steps…)
Next, I let the taco shells cool as I whip up the creamy filling. In another bowl, I mix the softened cream cheese and powdered sugar together until smooth. The luscious texture of this mixture is heavenly! Then, I gently fold in the whipped cream and a handful of Fruity Pebbles for that pop of color and flavor. Once the shells are cooled, I carefully fill each taco shell with this bright, fluffy cheesecake mixture.
After that, the fun continues! I like to sprinkle more Fruity Pebbles on top of each filled taco for that extra crunch and a burst of color. The sight of those vibrant colors peeking out against the creamy filling makes my heart skip a beat! Finally, I pop them into the fridge for about 30 minutes to set. This allows the flavors to meld beautifully, creating a rich, satisfying dessert that’s hard to resist.
Oh, and don’t forget to serve them with a side of whipped cream or even a drizzle of fruit sauce if you’re feeling fancy! The contrast of textures between the crunchy shell and the smooth filling is simply divine, and it’s the perfect way to celebrate any occasion.
Pro Tips for Best Results
I’ve made these Fruity Pebbles Cheesecake Tacos a few times, and I’ve learned a couple of things along the way. For a firmer filling, make sure your cream cheese is fully softened—this will make mixing a breeze and yield a smooth texture. One time I rushed it, and let’s just say the lumps were not charming!
Also, if you have any leftover taco shells, they make a great base for ice cream! Just fill them with a scoop of your favorite flavor and top with chocolate or caramel sauce. My family absolutely loved the unexpected dessert surprise!
And, when it comes to Fruity Pebbles, I advise going for the classic version! The original cereal has that unmistakable flavor that truly enhances the cheesecake, whereas off-brand alternatives just don’t quite deliver that same sweetness we all adore.
Common Mistakes to Avoid
One mistake I made early on was not letting the taco shells cool completely before adding the filling. They can get a bit soggy if you’re impatient like I was, and that’s the last thing you want with such a crunchy concept! Make sure they are cool and crisp to hold all that creamy goodness.(See the next page below to continue…)
Another pitfall is overmixing the cheese and sugar. It’s so tempting to keep blending, but over mixing can lead to a too-aerated mixture that might crack as it sets. I found this out the hard way on my first attempt, and it was a bit of a letdown!
Also, be cautious with the amount of Fruity Pebbles you add into the filling. While I adore the cereal’s crunch, too much can overshadow the creamy goodness of the cheesecake filling. A balanced mix is key to keeping the flavors harmonious.
Lastly, try to keep the taco shells from sitting too long after filling; they can get soggy if left for extended periods. So, serve them immediately for the best experience!
Serving Suggestions
These Fruity Pebbles Cheesecake Tacos are a hit at parties! I love to arrange them on a platter and watch as my friends gather around, each taking turns trying to snap the perfect Instagram shot. They are vibrant and fun, truly adding a festive touch.
Another serving suggestion is to personalize each taco. Set up a little station with various toppings like chocolate sauce, sprinkles, or even fresh fruit. Let everyone make their own creation—it’s especially fun for kids! They can enjoy the creative process and dive into a dessert that they crafted themselves.
Lastly, if you’re in a more laid-back mood, these tacos are perfect for family movie night! I love snuggling up with a plate of these sweet treats and a good film. Each bite is a burst of nostalgia and joy, making them a perfect companion for any casual evening in.
Variations & Customizations
You can easily tailor these cheesecake tacos to suit your taste. One of my favorite variations is to swap out the Fruity Pebbles for chocolate cereal if I’m craving something more decadent. It’s astonishing how switching just one ingredient can yield such a different vibe!
Additionally, feel free to play around with different toppings. Crushed cookies or a sprinkle of mini chocolate chips can elevate the dessert further. I once drizzled some melted white chocolate over the top, and wow—that added a whole new layer of deliciousness!
If you prefer a slightly healthier option, you can use Greek yogurt in place of cream cheese for the filling. It’ll give you the creaminess with a bit more tang and fewer calories. I haven’t tried it yet, but I’m eager to see how it holds up!
How to Store, Freeze & Reheat
If by some miracle you have leftovers (which seldom happens in my house), you can keep these tacos in an airtight container in the fridge for up to two days. Just remember that the longer they sit, the crunchier the shells become!
Freezing is also an option! I like to wrap them individually in plastic wrap and then store them in a freezer bag. They freeze quite well, and when you’re ready for a treat, just let them thaw in the fridge overnight. The filling remains creamy, and it’s a nice surprise to have them prepped and ready to go.
As for reheating, I would recommend enjoying them cold—there’s something wonderfully refreshing about cheesecake tacos straight from the fridge. However, if you prefer them warm, you can give the shells a quick blast in the oven to re-crisp them, but be cautious to avoid melting the filling!
Conclusion
I hope you’re as excited to try this Fruity Pebbles Cheesecake Taco recipe as I was to create it! It’s such a delightful blend of textures and flavors that brings joy to any dessert table or family gathering. Plus, the smiles on everyone’s faces when they take that first bite are truly priceless. Enjoy the process, get creative with the toppings, and have fun in the kitchen!