
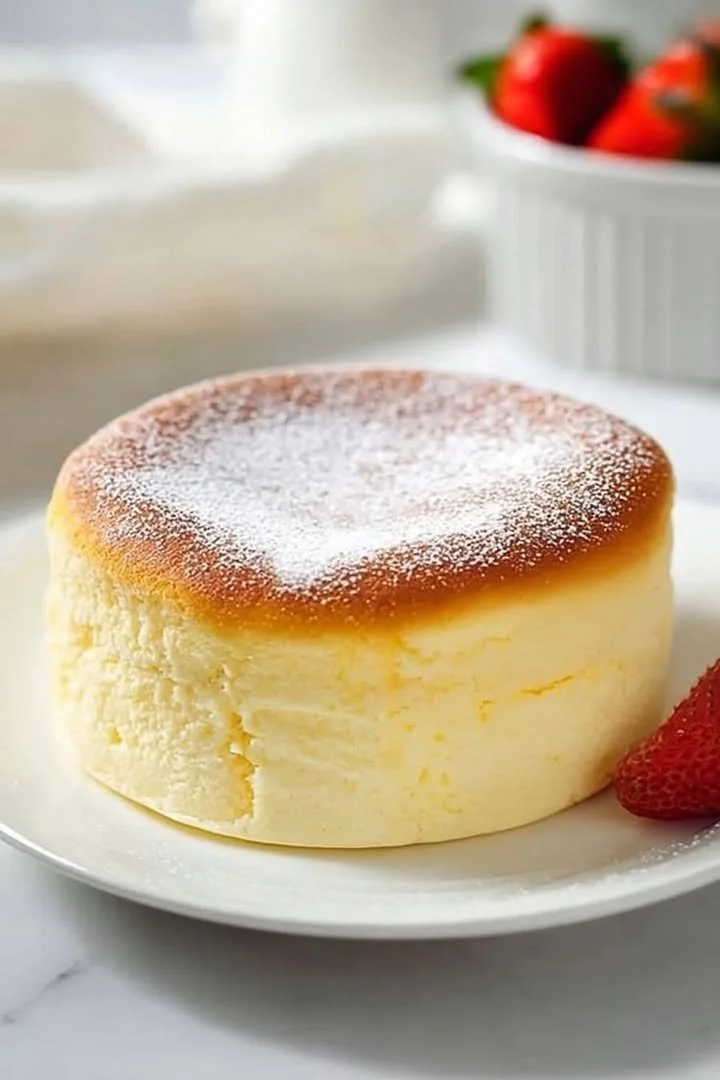
If you’ve ever taken a bite of a Fluffy Japanese Cheesecake, you know how light and airy this dessert can be. It’s like a cloud of cream cheese goodness that melts in your mouth. I remember the first time I tried it at a cozy little café, and I was instantly enchanted. That experience ignited my quest to recreate this delightful treat in my own kitchen, and I’m excited to share my journey with you!
Why You’ll Love This Recipe
This Fluffy Japanese Cheesecake is not just a showstopper; it’s a delightful balance of sweetness and creaminess. It’s incredibly light and has a unique texture that leaves you wanting more. Plus, it’s a fun baking project that requires just a handful of ingredients, making it accessible even for beginner bakers. The aroma that fills your kitchen while it’s baking is guaranteed to bring smiles all around! Enjoying this airy dessert with friends or family will create cherished memories. (See the ingredients in the next page below…)
Ingredients
– 8 oz (225 g) cream cheese, softened
– 1/2 cup (100 g) granulated sugar
– 1/4 cup (60 ml) milk
– 3 large eggs, separated
– 1/2 cup (65 g) cake flour
– 1/4 teaspoon salt
– 1 tablespoon lemon juice
– 1/4 teaspoon cream of tartar
Equipment Needed
– Mixing bowls
– Electric mixer
– Rubber spatula
– 8-inch round cake pan
– Parchment paper
– Roasting pan (for water bath)
– Oven
Step-by-Step Instructions
First, I like to preheat my oven to 320°F (160°C) while I prepare my ingredients; this helps the cheesecake rise beautifully. In a large mixing bowl, I cream together the softened cream cheese, granulated sugar, and milk until the mixture is smooth and free of lumps. I usually use an electric mixer on low speed to prevent splattering, and trust me, this makes a big difference! (See the next page below to continue steps…)
Next, I add the egg yolks one at a time, ensuring each one is incorporated thoroughly before adding the next. Then, I sift in the cake flour and salt, folding it gently until just combined. The batter will be thick, so don’t worry if it doesn’t look smooth at this point; it will all come together in the end. In a separate bowl, I whip the egg whites with cream of tartar until soft peaks form, and this is where the magic happens.
Once the egg whites are ready, I gently fold them into the cream cheese mixture in three additions. The goal is to keep as much air in the batter as possible so that the cake rises proudly in the oven! I pour the batter into my prepared cake pan lined with parchment paper and then place it in a larger roasting pan filled with hot water, which creates a steamy environment—this is key for that lovely fluffy texture I crave.
With everything set, I pop my cheesecake into the preheated oven. The very first time I made it, I was so anxious, but watching it rise through the oven window was pure joy. After about 60 minutes, I turn off the oven and leave the cheesecake inside for an additional 30 minutes to prevent it from cracking. It’s essential to let it cool down gradually; this step ensures the perfect texture!
Pro Tips for Best Results
I tested this cheesecake three ways: with regular sugar, with less sugar, and with a sugar substitute. What I found is that the original amount gives it the balance of sweetness that complements the cream cheese without overwhelming it. Remember, baking is all about precision, so stick with the original measurements when you’re starting!
Another tip: let your eggs come to room temperature before using them. I usually take my eggs out of the fridge about an hour before I start baking. This small step helps them whisk up to fluffy perfection and ensures a more even batter.
Finally, I highly recommend using a digital scale for measuring the cake flour and sugar. It takes out the guesswork and makes a considerable difference in the texture. If you don’t have one, consider investing in one—it’s a game changer for baking!
Common Mistakes to Avoid
One mistake I’ve made in the past was overmixing the batter after adding the egg whites. This can cause your cake to deflate or result in a denser texture that may not rise as beautifully. I learned the hard way that gentle folding is key to maintaining that lightness we all adore. (See the next page below to continue…)
Another common mishap is not prepping the pan correctly. I’ve had instances where cakes would stick to the pan, and you can imagine the heartbreak when I tried to flip it out! Always line the bottom with parchment paper and grease the sides to ensure a clean release.
Lastly, I underestimated the importance of the water bath. At first, I omitted this step thinking it might not make much difference; however, I noticed that using a water bath helps the cheesecake cook evenly and prevents the top from browning too quickly. So, don’t skip that—trust me!
Serving Suggestions
When it comes to serving this cheesecake, I love to keep it simple. Fresh fruit, like strawberries or blueberries, drizzled over the top provides a beautiful color contrast and adds a refreshing tartness. If I’m feeling a bit indulgent, a dollop of whipped cream can take it to the next level of decadence.
For a lovely presentation, I often dust the top with powdered sugar before serving. It adds a touch of elegance and makes it look like I spent hours crafting it (when in reality, it’s quite simple!).
I also enjoy serving slices with a warm cup of tea or coffee. The combination of flavors is delightful and truly makes for a cozy afternoon treat.
Variations & Customizations
As much as I adore the classic version, I can’t resist experimenting with flavors! For a matcha twist, I add a couple of teaspoons of matcha powder to the batter for a gorgeous green hue and a subtle earthy flavor. It’s such a fun way to customize this recipe while still holding onto that signature fluffiness.
Sometimes, I like to mix in a few drops of vanilla bean paste for an aromatic flair. It adds an extra layer of depth to the flavor without overpowering the cheesecake’s lightness. You could also explore using different flavors of extracts, such as almond or coconut, for a unique take.
For chocolate lovers, I’ve found that folding in mini chocolate chips does wonders. Just be sure not to overdo it; a handful is all you need to add that delightful chocolatey surprise without losing the airy texture.
How to Store, Freeze & Reheat
Once I’ve indulged in my Fluffy Japanese Cheesecake, I generally wrap any leftovers in plastic wrap and store them in the refrigerator for up to three days. Simply bring it to room temperature before serving for the best experience.
If you want to store it longer, freezing is absolutely an option! I cut slices and wrap them individually in plastic wrap before placing them in an airtight container. They hold up beautifully in the freezer for about a month. When I’m ready to enjoy them again, I let a slice thaw in the fridge overnight, and it comes out just as good as fresh!
Reheating isn’t usually necessary, but if you prefer warm cheesecake, I recommend a quick 10-15 seconds in the microwave. Just keep an eye on it to ensure it doesn’t get too hot.
Conclusion
I hope this recipe for Fluffy Japanese Cheesecake brings as much joy to your kitchen as it has to mine! There’s something genuinely satisfying about creating this light, scrumptious dessert that feels fancy yet approachable. Whether for a family gathering or just a treat for yourself (because you deserve it!), I know this cheesecake will win hearts and taste buds alike. Happy baking!