
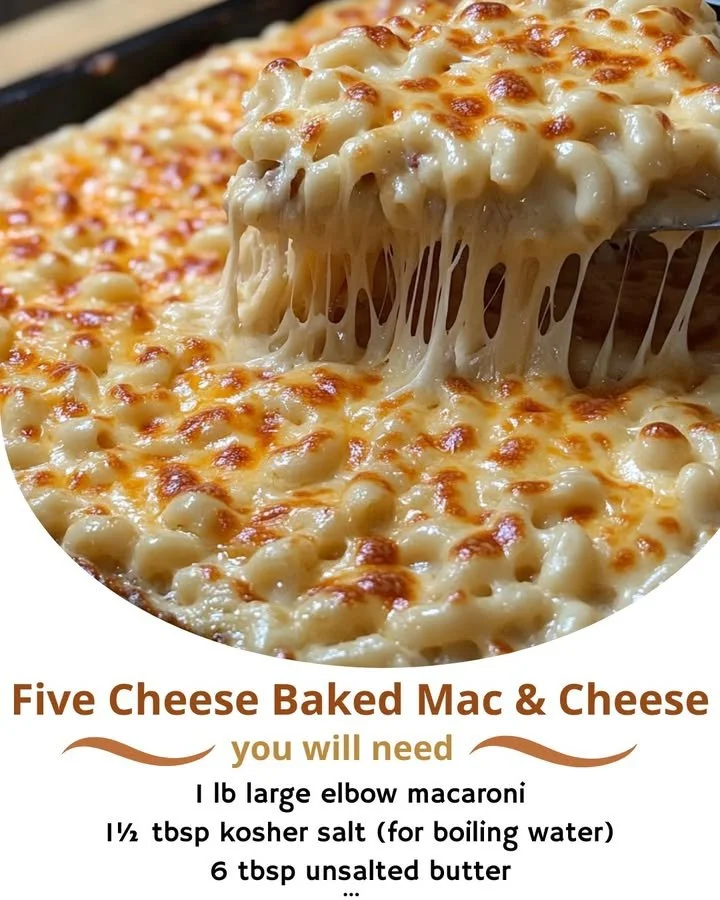
There’s something wonderfully nostalgic about mac and cheese, isn’t there? It reminds me of family gatherings, cozy nights in, and always seems to find its way into my heart (and belly!). Today, I’m excited to share my recipe for Five Cheese Baked Mac & Cheese, a delicious twist on the classic dish that elevates it to a new level of creamy, cheesy perfection. Once you try it, I’m pretty sure it’ll become a cherished favorite in your kitchen as it has in mine.
Why You’ll Love This Recipe
What sets this Five Cheese Baked Mac & Cheese apart is not just the sheer number of cheeses involved, but the way each one plays its part to create a rich, gooey, and oh-so-satisfying dish. The flavors blend beautifully, creating a comforting experience with every bite. Plus, it’s perfect for gatherings or a cozy night in! I’ve made it multiple times, and each time, I find myself loving it a little more. (See the ingredients in the next page below…)
Ingredients
– 1 lb elbow macaroni
– 2 cups sharp cheddar cheese, shredded
– 1 cup mozzarella cheese, shredded
– 1 cup gouda cheese, shredded
– 1 cup cream cheese, softened
– 1 cup parmesan cheese, grated
– 4 cups whole milk
– 1/2 cup unsalted butter
– 1/2 cup all-purpose flour
– 1 teaspoon garlic powder
– 1 teaspoon onion powder
– 1 teaspoon mustard powder
– Salt and pepper, to taste
– 1 cup breadcrumbs for topping
– Fresh parsley for garnish (optional)
Equipment Needed
– Large pot for boiling pasta
– Colander for draining pasta
– Large saucepan for the cheese sauce
– Whisk and wooden spoon for mixing
– Baking dish (9×13 inches works well)
– Oven mitts for baking
Step-by-Step Instructions
First, let’s get that pasta cooking! In a large pot, boil salted water and add your elbow macaroni. Cook according to package instructions until al dente. This usually means cooking for about 7-8 minutes. Once it’s done, drain the macaroni and set it aside while we whip up the cheesy sauce. I love the smell of macaroni cooking; it really gets me in the mood for comfort food! (See the next page below to continue steps…)
Now, in a large saucepan, melt the butter over medium heat. Once it’s melted, sprinkle the flour over it to create a roux. Stir continuously for about 1 to 2 minutes until it turns a light golden color. Slowly add in the milk, whisking constantly to avoid lumps. Bring this mixture to a simmer until it thickens up, and boy, does it get creamy! Once it’s thickened, reduce the heat and start adding your shredded cheeses, stirring until they’re melted and the mixture is smooth. The combination of smells hitting my nose at this point is simply heavenly.
Next, stir in the garlic powder, onion powder, mustard powder, and season with salt and pepper. Once everything is combined perfectly, pour in your drained macaroni and give it a good mix—make sure those noodles are well-coated in cheesy goodness! Transfer everything into the baking dish, spreading it out evenly. Now comes the fun part: topping it! Sprinkle the breadcrumbs over the top for that perfect crunchy finish, and if you’re feeling fancy, add a bit more cheese for an even cheesier outcome.
Finally, preheat your oven to 350°F (175°C) and bake the mac and cheese for about 25-30 minutes or until the top is golden brown and bubbly. When my kitchen fills with that irresistible aroma, I can hardly wait for it to come out! Let it cool for a few minutes before serving, and get ready for some cheesy smiles all around.
Pro Tips for Best Results
I tested this recipe three different ways, and I found that the best cheeses are the ones that melt beautifully. Sharp cheddar and mozzarella are classic, but gouda adds that extra kick of flavor that I simply love. If you want it really creamy, consider using a blend of different cheese textures.
Another tip is to cook the pasta al dente. It sounds simple, but if you overcook it, it can become mushy during baking, which is a definite no-no in my book. Trust me, the slight bite of the pasta holds up better against the creamy sauce after it bakes!
Lastly, don’t skip the breadcrumb topping! I’ve tried it without, and it wasn’t the same. The crunch on top balances the creaminess of the dish and adds that wonderful texture contrast that you just can’t resist. You can even mix in some herbs or spices into the breadcrumbs for an extra flavor pop!
Common Mistakes to Avoid
One of the most common mistakes I’ve made in the past is not seasoning the sauce enough. Cheese is great on its own, but without adding proper seasoning, the whole dish can end up a bit bland. It’s essential to taste as you go, and trust me, it makes a world of difference! (See the next page below to continue…)
Another mistake is not allowing the mac and cheese to cool a bit before serving. I know, it’s tempting to dig right in, but letting it sit for a few minutes helps set the cheesy goodness, making it easier to scoop out perfect portions without a cheesy avalanche.
Also, be cautious about the cheese you choose. Low-fat or non-dairy cheeses can significantly alter the texture and flavor of your dish. I tried this once, and let’s just say that experience is best left behind! For a richer flavor, always go for full-fat and quality cheeses.
Serving Suggestions
When it comes to serving this Five Cheese Baked Mac & Cheese, the options are endless! My favorite way is to pair it with a simple side salad dressed in a light vinaigrette to balance the richness of the dish. The freshness of the greens complements the creamy mac and cheese beautifully.
I also love to serve it alongside grilled chicken or roasted veggies. The contrast of flavors and textures is delightful! You can even turn this into a hearty main dish by adding some sautéed mushrooms or spinach right into the mixture before baking. It’s a great way to sneak in some veggies!
For a fun twist, I sometimes serve this mac and cheese in individual ramekins for special occasions or family gatherings. It adds a charming touch and makes everyone feel a little more festive, plus everyone loves their own personal serving!
Variations & Customizations
One of the things I adore about this recipe is its versatility. If you’re feeling adventurous, throw in some cooked bacon or pancetta for that extra layer of flavor and crunch. The smoky flavor pairs beautifully with the five cheeses and adds a delicious twist.
For a healthier option, you can swap out half or even all of the pasta with cauliflower or zucchini noodles. This keeps the flavor and creamy texture while lightening things up. I’ve tried it, and it’s a surprisingly good alternative that still satisfies those cheesy cravings.
You can also experiment with the spices! Adding a pinch of cayenne pepper or smoked paprika can give your mac and cheese a little kick that’s absolutely delightful. Play around with different cheeses too—each blend can lead to a unique and fun take on the classic recipe.
How to Store, Freeze & Reheat
If you somehow have leftovers (though I doubt it!), you can store the mac and cheese in an airtight container in the fridge for up to 3 days. Just make sure to let it cool before sealing it up. I love having leftovers as they actually taste even better the next day when all the flavors have time to meld together!
For longer storage, you can freeze the mac and cheese. I recommend portioning it out into individual servings so you can thaw only what you need. Make sure to wrap it tightly in foil or place it in freezer-safe containers. It will keep well in the freezer for about 2 months. Just allow it to thaw in the fridge before reheating.
To reheat, simply pop it back in the oven at 350°F (175°C) for about 20-25 minutes, or until heated through. I like to add a splash of milk to keep it creamy during reheating—just trust me on this one, it works wonders!
Conclusion
So there you have it—my beloved recipe for Five Cheese Baked Mac & Cheese! I can’t wait for you to try it out in your own kitchen. Whether it’s for a cozy night at home or a gathering with friends, it’s bound to be a hit. Thank you for joining me on this cheesy adventure; I hope it brings as much warmth and joy to your table as it has to mine! Happy cooking!