
Another mistake is not pressing the dough firmly enough into the pan. If you just dollop it in and try to spread it, you’ll get uneven thickness and baking. Some spots will be thin and crispy, others thick and underbaked. I take the time to press it down firmly and evenly with my fingers or a flat-bottomed cup. This ensures every single bite has that ideal, uniform chewy texture.
Don’t skip the parchment paper liner. I thought I could get away with a well-greased pan one time, and while the bars tasted fine, getting them out was a nightmare. They stuck in the corners, and my first few “bars” were more like sad cookie crumbles. The parchment paper sling is a foolproof trick for perfect, intact bars you can proudly present on a platter.
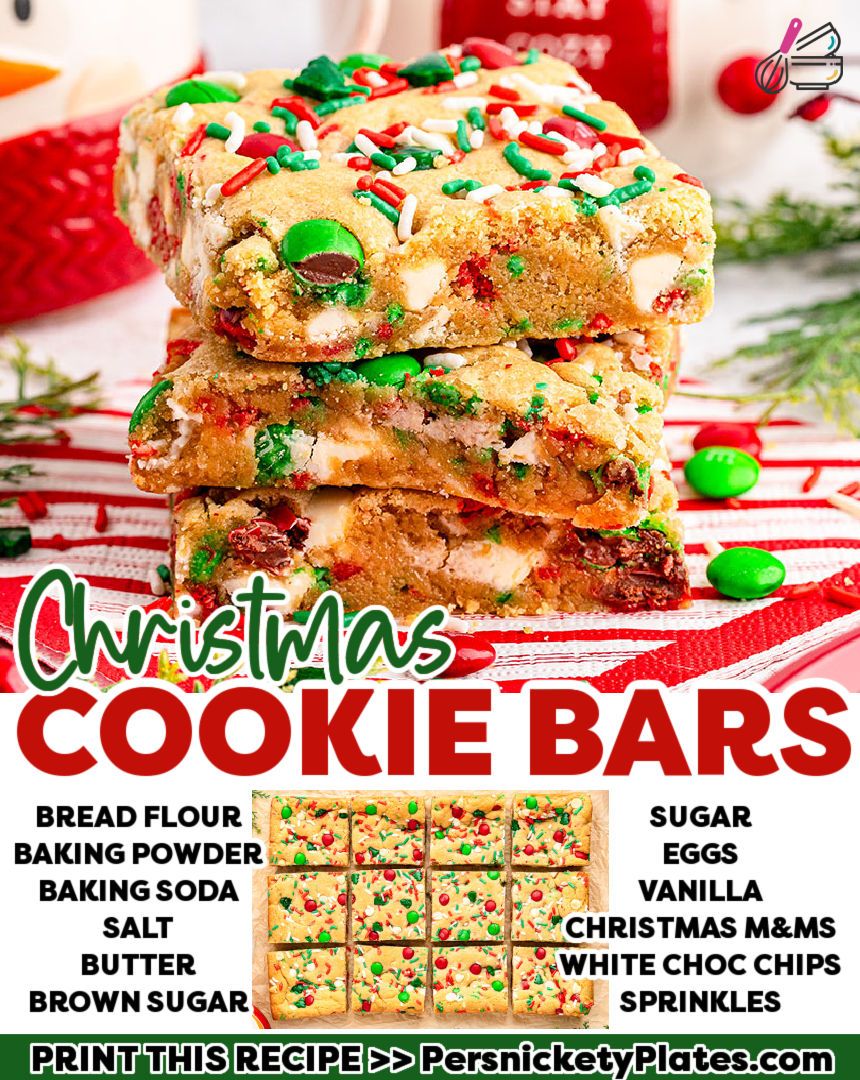
Finally, be mindful of your mix-in ratios. It’s tempting to dump in an entire bag of M&Ms, but too many add-ins can weigh down the dough and prevent it from holding together properly. I stick to the measured amounts. Also, if you’re using holiday sprinkles, make sure they are the “jimmies” or rod-shaped kind, not nonpareils (the tiny round balls). Nonpareils tend to bleed their color dramatically, turning your entire dough a strange, murky green or red.
Serving Suggestions
I love serving these bars cut into generous squares and piled high on a festive platter. They are stunning all on their own with their rainbow of colors. For a truly decadent touch, I sometimes drizzle them with a little melted white chocolate or a simple vanilla glaze after they’ve cooled, which makes them feel extra special for a holiday party.
For a cozy family dessert, I like pairing a warm bar (gently reheated for 10 seconds in the microwave) with a cold glass of milk or a scoop of vanilla bean ice cream. The contrast of the warm, chewy bar and the cold, creamy ice cream is absolutely divine and turns a simple treat into a memorable dessert moment.
These bars are also my go-to for holiday gifting. Once completely cool, I place individual squares in clear cellophane bags, tie them with a ribbon, and add them to cookie boxes or deliver them to neighbors. They travel much better than delicate iced cookies and always, always earn rave reviews. They’re the edible equivalent of a holiday hug.
Variations & Customizations
The beauty of this recipe is its adaptability. For a different flavor profile, I’ve swapped the white chocolate chips for semi-sweet or dark chocolate chips, and used regular M&Ms. It creates a more classic chocolate chip cookie bar that’s always a hit. You could also add a cup of chopped toasted pecans or walnuts for a lovely crunch.
To match different holidays, simply change the color of your mix-ins. I make these for Valentine’s Day with pink and red M&Ms and heart sprinkles, for Easter with pastel candies, and for the Fourth of July with red, white, and blue. The base dough is a perfect, neutral canvas for any celebration. I’ve even made a birthday version with rainbow sprinkles throughout the dough.
If you’re a fan of other candy combinations, feel free to experiment! I’ve successfully made these with a mix of chopped peppermint bark and dark chocolate chips for a cool, minty version. A friend of mine used peanut butter M&Ms and peanut butter chips for a delicious peanut butter lover’s twist. Let your pantry and your cravings guide you.
How to Store, Freeze & Reheat
Storing these bars is simple. Once cooled, I keep them in an airtight container at room temperature for up to 5 days. I place a sheet of parchment paper between layers if I’m stacking them to protect the tops. They stay wonderfully soft and chewy. I don’t recommend refrigerating them, as it can dry them out and make them harder.
For freezing, they are a fantastic make-ahead treat. I wrap the entire uncut block (or individual squares) tightly in plastic wrap, then in a layer of foil, and place them in a freezer bag. They’ll keep for up to 3 months. This is perfect for getting a head start on holiday baking or always having a treat on hand for unexpected guests.
To revive frozen bars, I simply let them thaw overnight at room temperature in their wrapping to prevent condensation. If I want to serve one warm, I’ll unwrap a frozen square and microwave it for about 15-20 seconds. For a larger frozen block, I thaw it slightly and then reheat it, covered, in a 300°F oven for 10-15 minutes until warmed through. They taste just as fresh-baked as the day they were made.
Conclusion
These Festive Christmas Cookie Bars are more than just a recipe; they’re a little piece of holiday happiness you can bake and share. They embody the joy, color, and sweetness of the season with none of the stress. I hope this recipe finds its way into your kitchen and becomes a cherished tradition, filling your home with wonderful smells and your family with even more wonderful memories. Happy baking, and Merry Christmas!