
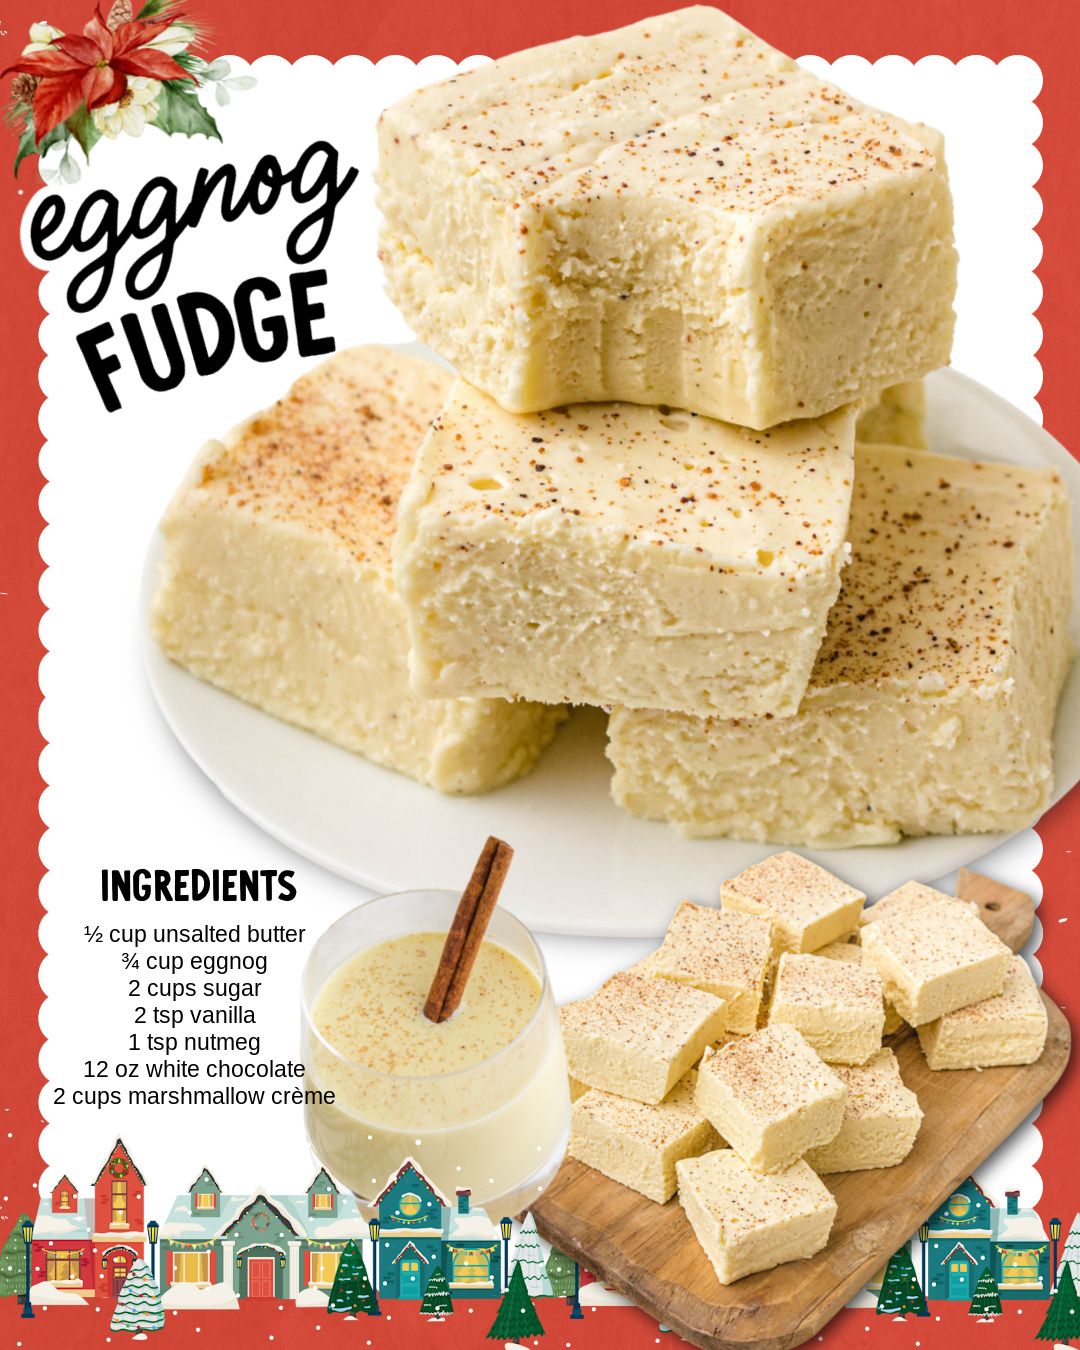
The first time I stirred real eggnog into a pot of melting butter and sugar, my kitchen filled with a scent so perfectly festive it felt like magic. This Eggnog Fudge was born from a deep love of the holiday season and a desire to capture its essence in a rich, sliceable treat. As the white chocolate melted into the warm, spiced mixture, I knew I had something special. The final set fudge, creamy and studded with the warmth of nutmeg, tastes like Christmas in a perfect, decadent square. It’s become my most requested holiday gift, a little piece of edible cheer that never fails to delight.
Why You’ll Love This Recipe
You’ll love this recipe because it turns the beloved, seasonal flavor of eggnog into an incredibly smooth and luxurious fudge that’s surprisingly simple to make. It’s the ultimate homemade holiday gift, impressive on any cookie tray, and solves the eternal question of what to bring to a party. Even if you’re new to candy-making, this forgiving, no-thermometer method delivers professional results. From my holiday kitchen to yours, I promise this fudge will become a treasured new tradition.
Ingredients
- 1 ½ cups (3 sticks) unsalted butter
- ¾ cup high-quality, full-fat eggnog
- 2 cups granulated sugar
- 2 teaspoons pure vanilla extract
- 1 teaspoon freshly grated nutmeg (plus more for dusting)
- 12 oz high-quality white chocolate, chopped (or white chocolate chips)
- 2 cups (one 13 oz jar) marshmallow crème (like Fluff)
Let’s talk ingredients, because quality matters here. For the eggnog, use the best full-fat, cream-based nog you can find from the dairy case, not the shelf-stable cartons. The richer the nog, the richer the fudge flavor. I made the mistake once of using a “light” version and the fudge lacked that signature custardy depth. The white chocolate is also critical—use a good baking bar (like Ghirardelli or Baker’s) and chop it yourself; cheap chips or candy melts often contain stabilizers that can seize or create a waxy texture. Freshly grated nutmeg is non-negotiable; its bright, aromatic flavor is miles beyond the pre-ground dust.(See the next page below to continue…)
Equipment Needed
- Heavy-bottomed, 4-quart saucepan
- 9×13 inch baking pan
- Parchment paper
- Wooden spoon or heatproof spatula
- Large heatproof mixing bowl
- Measuring cups and spoons
Step-by-Step Instructions
My process always begins with meticulous preparation, which I’ve learned is the secret to stress-free fudge making. I line my 9×13 pan with parchment paper, letting the edges overhang for easy removal later. I chop the white chocolate and place it in my large heatproof bowl with the marshmallow crème and vanilla extract—having this “finishing station” ready is crucial. Then, in my heavy-bottomed saucepan, I combine the butter, eggnog, and sugar. I turn the heat to medium and start stirring constantly with my wooden spoon. The mixture will look separated and grainy at first, which is perfectly normal.
This is where patience is your greatest ingredient. I keep stirring as the butter melts and the mixture comes to a full, rolling boil. The first time I made this, I got nervous and turned the heat down too soon. You need to let it boil steadily for a full 5 minutes, stirring the entire time to prevent scorching. I set a timer. As it boils, the smell transforms from sweet butter to a deeply caramelized, almost custardy aroma as the eggnog cooks. The mixture will thicken slightly and become a beautiful pale golden color. This cooking time is non-negotiable for the proper fudge texture.
The moment the timer goes off, I immediately remove the pot from the heat. Without a second’s delay, I pour the hot, bubbling mixture directly over the waiting white chocolate and marshmallow crème in the heatproof bowl. The heat from the syrup will melt everything. Now, I stir—and I mean really stir—with vigor until every last piece of chocolate is melted and the marshmallow crème is fully incorporated into a smooth, glossy, homogeneous batter. This can take a solid 2-3 minutes of stirring. If you stop too soon, you risk unmelted chocolate bits or streaks of marshmallow.(See the next page below to continue…)
Once the mixture is completely smooth and silky, I quickly stir in the teaspoon of freshly grated nutmeg. Then, I pour the luxurious batter into my prepared pan, using a spatula to spread it into an even layer. I resist the urge to jiggle or tap the pan excessively, as this can create air bubbles. Finally, I grate just a whisper more nutmeg over the top for a beautiful finish. Now, the hardest part: I walk away and let it set at room temperature for at least 4 hours, though I prefer leaving it overnight. Cutting into it too early is a tragedy of gooey proportions.
Pro Tips for Best Results
I tested the cooking time three different ways: 3 minutes, 5 minutes, and 7 minutes. Five minutes of a steady, rolling boil is the absolute sweet spot. At 3 minutes, the fudge was too soft and never fully set. At 7 minutes, it started to develop a slightly grainy texture as the sugar began to crystallize. Use a timer and trust the process. The mixture should be bubbling actively across the entire surface for the full duration.
Here’s what I learned the hard way about the marshmallow crème: grease your spoon and spatula. Before you scoop the sticky marshmallow crème, lightly coat your spoon and your final stirring spatula with butter or cooking spray. That sticky substance is like culinary glue, and this simple trick saves you from losing half of it to your utensils and makes cleanup a dream. It’s a tiny step with a massive payoff in ease and efficiency.
Don’t substitute the marshmallow crème. I once tried to use mini marshmallows, thinking they’d melt the same. They don’t. They created a strange, stretchy texture and didn’t provide the same stabilizing creaminess. The marshmallow crème (Fluff) is essential for the signature smooth, soft, and non-grainy texture of this fudge. It’s a key structural ingredient, not just a flavoring. Use the real thing.
Common Mistakes to Avoid
My biggest first-time mistake was using a thin, cheap saucepan. The sugar and dairy mixture scorched on the bottom before it even came to a boil, giving the entire batch a faint burnt taste. A heavy-bottomed pot distributes heat evenly and is your best defense against burning. If you don’t have one, consider this recipe your excuse to invest in a good Dutch oven—it’s a game-changer for all stovetop candy.(See the next page below to continue…)
Another pitfall is not stirring constantly during the boil. It’s tedious, but you must keep the spoon moving. The eggnog contains dairy that can easily scorch on the bottom of the pan if left unattended. I learned this the hard way when I answered the phone for one minute and came back to a dark brown film on the bottom of my pot. That one minute of distraction cost me a whole batch of ingredients. Stay present and stir.
Don’t attempt to speed up the setting process by putting the warm fudge in the refrigerator. I did this, hoping to get clean slices in just an hour. The rapid, uneven cooling caused the top to set hard while the middle stayed soft, and it also encouraged sugar crystals to form, making the texture slightly gritty. The slow, gradual set at room temperature is what gives you that perfect, creamy, melt-in-your-mouth consistency.
Finally, avoid using imitation vanilla or pre-ground nutmeg. The vanilla is a top note you can actually taste in the finished fudge, and the pure extract has a warm, complex flavor that imitation simply can’t match. As for the nutmeg, the essential oils in a freshly grated seed are incomparable to the dull powder in a jar. The flavor difference is dramatic and absolutely worth the 30 seconds it takes to grate it fresh.
Serving Suggestions
I like serving this fudge cut into small, elegant squares and arranged on a festive platter, perhaps dusted with a final, delicate shower of nutmeg or even edible gold dust for a truly glamorous touch. It pairs beautifully with a cup of strong black coffee or a glass of cold milk, which helps balance its incredible richness. On a holiday dessert table, it’s the creamy, white counterpoint to darker chocolates and spiced cookies.
For gifting, I place the squares in petite paper candy cups and stack them in small decorative tins or clear cellophane bags tied with a ribbon. I always include a little note specifying that it contains eggnog and dairy, as it makes such a thoughtful, personal gift that shows you’ve put in real effort. It’s always met with exclamations of delight and usually a request for the recipe.
During a cozy holiday movie night, I’ll simply set the whole pan on the coffee table with a stack of napkins and let everyone cut their own piece. There’s something wonderfully communal and indulgent about it. Sometimes, I’ll even offer a small bowl of rum-spiked whipped cream or a bourbon caramel sauce for dipping for the adults, taking the decadence to another level.
Variations & Customizations
This recipe is a wonderful canvas. My favorite variation is a “Spiked Eggnog Fudge.” When I stir in the vanilla extract, I also add 1-2 tablespoons of bourbon, rum, or brandy. The alcohol cooks off slightly but leaves a wonderful warm note. Just be sure to adjust the nutmeg slightly if your spirit is already spiced, like a spiced rum.
For a textural contrast, I’ll sometimes stir in ½ cup of finely chopped toasted pecans or walnuts right before pouring the fudge into the pan. The nuts add a lovely crunch and cut through the sweetness beautifully. You could also press a few whole pecan halves or festive sprinkles into the top of the fudge after pouring for a decorative touch.
If you love a chocolate-eggnog combo, try a marbled version. Prepare the fudge batter as directed, but pour only half into the pan. Quickly stir 1 cup of semi-sweet chocolate chips into the remaining batter until melted, then dollop it over the white layer and swirl with a knife. You get a stunning and delicious two-tone fudge that’s always a showstopper.
How to Store, Freeze & Reheat
This fudge stores beautifully due to its high sugar and butter content. Once fully set, I cut it into squares and store them in a single layer in an airtight container at room temperature. I place sheets of parchment between layers if I must stack them. It will keep perfectly for up to 2 weeks. Do not refrigerate it, as this can dry it out and cause condensation that makes it sticky.
It freezes exceptionally well, making it perfect for holiday prep. I wrap individual squares tightly in plastic wrap, then place them in a freezer-safe bag or container. They will keep for 2-3 months. The texture remains wonderfully creamy upon thawing. This is my secret for getting a head start on holiday baking without stress.
To serve frozen fudge, I simply transfer the wrapped squares to the counter and let them thaw at room temperature for about an hour. There is no need to reheat fudge. If it ever seems too soft after storage, simply pop the whole container into the fridge for 30 minutes to firm up before serving, but return it to room temperature for the best flavor and texture.
Conclusion
This Eggnog Fudge is more than just a candy; it’s a vessel for holiday spirit, a little square of creamy, spiced joy that captures the season perfectly. I hope it brings as much warmth to your kitchen and happiness to your loved ones as it has to mine. Give it a try this holiday, and share the gift of homemade magic. Happy cooking, and Merry Everything