
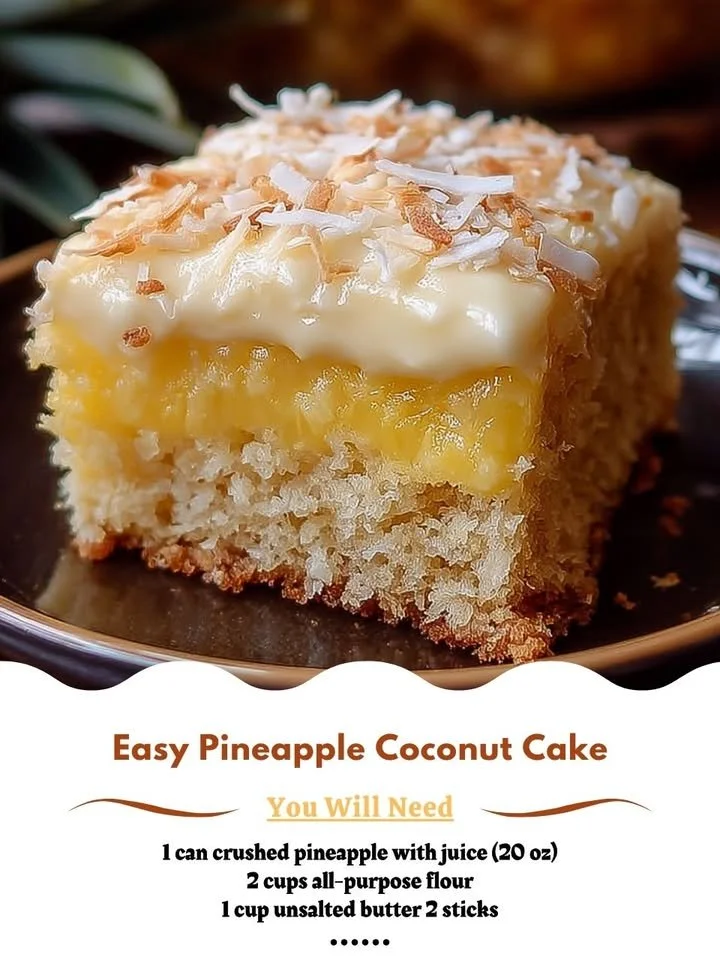
Hello, fellow baking enthusiasts! Today, I’m so excited to share with you one of my favorite recipes from my kitchen: Easy Pineapple Coconut Cake. This delightful cake is a perfect blend of tropical flavors that can whisk you away to a sunny beach, even if you’re just sitting at your kitchen table. With its moist texture, fruity sweetness, and a hint of coconut, it’s become a go-to dessert for gatherings, family dinners, or just a sweet treat on a regular day.
Why You’ll Love This Recipe
Believe me when I say this cake is not only delicious but super simple to whip up! It’s a crowd-pleaser that requires minimal effort, making it perfect for both seasoned bakers and novices. The tropical notes of pineapple and coconut bring a refreshing twist that contrasts beautifully with the soft, fluffy cake. One bite, and you’ll find yourself daydreaming of sandy beaches and palm trees. My kitchen fills with the most amazing aroma when it’s baking, and I can guarantee that you’ll end up making this recipe over and over! (See the ingredients in the next page below…)
Ingredients
– 2 cups all-purpose flour
– 1 ½ cups granulated sugar
– 1 tablespoon baking powder
– ½ teaspoon salt
– ½ cup unsalted butter, softened
– 1 cup coconut milk
– 1 cup crushed pineapple, drained
– 2 large eggs
– 1 teaspoon vanilla extract
– ½ cup shredded coconut (sweetened or unsweetened, your choice)
Equipment Needed
– Mixing bowls
– Electric mixer or whisk
– Measuring cups and spoons
– Rubber spatula
– 9×13 inch baking pan
– Parchment paper (optional for easy removal)
– Cooling rack
Step-by-Step Instructions
First things first, preheat your oven to 350°F (175°C). While that’s warming up, I start by preparing my baking pan. I usually like to line the bottom of my 9×13 inch pan with parchment paper, which makes it a breeze to remove the cake after baking. In a large mixing bowl, I combine the flour, sugar, baking powder, and salt. Using an electric mixer, I mix these dry ingredients until they’re well combined. Next, I add the softened butter and continue mixing until it’s crumbly. At this point, the texture starts to resemble damp sand, and it smells absolutely delightful! (See the next page below to continue steps…)
Once that’s done, I pour in the coconut milk, crushed pineapple, eggs, and vanilla extract. Mixing this all together is like creating a tropical pool of goodness in my bowl. It’s so satisfying to see the ingredients blend together until it’s smooth and creamy. After that, I fold in the shredded coconut using a rubber spatula, which gives the cake additional texture and that fabulous coconut flavor. Then, I transfer the batter to my prepared baking pan, smoothing the top with the spatula.
Now it’s time to pop that lovely creation into the oven. I bake it for about 30-35 minutes, but I like to start checking it around the 25-minute mark. The key is to do the toothpick test: if a toothpick inserted into the center comes out clean, it’s ready! Once it’s golden brown and absolutely fragrant, I take it out of the oven and let it cool in the pan for about 10 minutes before transferring it to a cooling rack. The anticipation while it cools only makes the eating that much sweeter!
Pro Tips for Best Results
When I first tested this recipe, I made a couple of adjustments to get it just right. The first thing I noticed was that using room temperature butter makes a world of difference. It incorporates better with the other ingredients and helps create a fluffier texture. I also played around with the type of coconut milk. For a richer flavor, I recommend using full-fat coconut milk, but if you’re looking for a lighter version, the low-fat option works just fine as well.
Another tip I have is to ensure that you drain the crushed pineapple thoroughly. Too much liquid can make the cake dense, so aim for it to be as dry as possible. I always gently press the pineapple with a paper towel to remove extra moisture before adding it to the batter. It may seem tedious, but trust me, it prevents the sogginess!
Finally, if you’re a coconut lover like me, consider adding a bit more shredded coconut than the recipe calls for. I’ve experimented with this and find that an extra half cup really amplifies that tropical flavor, giving a bit of extra texture.
Common Mistakes to Avoid
One common mistake I made early on was not properly measuring the flour. I realized that scooping flour directly from the bag can lead to packed flour, which results in a denser cake. Now, I always spoon the flour into the measuring cup and level it off for consistent results. It’s a game changer, trust me!
Don’t forget to preheat your oven! I once got a little eager and mixed everything before remembering to turn on the heat. The cake ended up baking unevenly, and I had to toss it out. A little patience goes a long way when baking, and preheating ensures that the cake rises beautifully.
Also, be cautious about opening the oven door too soon. I know it’s tempting to peek, but every time you open that door, you let out heat, and your cake might collapse before it’s done. So, resist the urge until it’s been at least 25 minutes!
(See the next page below to continue…)
Serving Suggestions
Once the cake has completely cooled, it’s time for the fun part—serving it! I love to dust the top with powdered sugar for a touch of sweetness and a lovely presentation. You can also add some whipped cream or serve it alongside a scoop of vanilla ice cream. The contrast of the cold against the warm cake is just divine!
For extra flair, consider topping each slice with a dollop of fresh whipped cream and a sprinkle of toasted coconut. This adds a little crunch and enhances that coconut flavor. When friends come over, they often ask for seconds, so don’t be surprised if it disappears quickly!
If I’m feeling extra fancy, I’ll drizzle a simple glaze made from powdered sugar and pineapple juice over the top. Not only does it look professional, but it also adds a bit more moisture and flavor. Plus, it gives me an excuse to add more pineapple flavor, which is always a win in my book!
Variations & Customizations
While the classic Easy Pineapple Coconut Cake is fantastic as is, there are so many ways you can customize it! If you’re looking to add some crunch, consider mixing in some chopped nuts like walnuts or macadamia nuts. They add a wonderful texture and a nutty flavor that complements the sweetness of the cake.
You could also swap out the crushed pineapple for other fruits. For instance, mango or peach could bring a nice twist, depending on the season. Just make sure to drain any excess juice from the fruit you choose, similar to the pineapple, to maintain the cake’s lovely texture.
Another fun idea is to incorporate an extra layer of flavor with spices. A teaspoon of cinnamon or nutmeg can add a warm complexity that pairs wonderfully with the tropical flavors. Just adjust the sugar accordingly if you want a more balanced sweetness. The options are almost endless!
How to Store, Freeze & Reheat
If you happen to have any leftovers (which, let’s be honest, is unlikely!), you can store the cake in an airtight container at room temperature for up to three days. I find that it stays fresh and delicious, but if you want to keep it longer, the fridge is also an option for up to a week. Just remember to cover it well, as that can help prevent it from drying out.
Now, if you want to store it for longer, freezing is a great way to go. I can’t tell you how many times I’ve frozen individual slices of this cake for later! Just wrap each slice tightly in plastic wrap and place them in a freezer-safe container. They can stay frozen for up to three months, allowing you to treat yourself whenever the craving strikes.
Reheating frozen slices is super simple, too! Just take a slice out and let it thaw on the counter for about 30 minutes. Then, you can pop it in the microwave for a few seconds or place it in a warm oven until it’s cozy and ready to enjoy again.
Conclusion
I truly hope you give this Easy Pineapple Coconut Cake a try in your kitchen! It’s a delightful dessert that is perfect for any occasion, and I can guarantee it will leave everyone asking for the recipe. Each bite is a little slice of sunshine, and there’s something so comforting about baking and sharing it with loved ones. Happy baking, and enjoy every delicious forkful!