
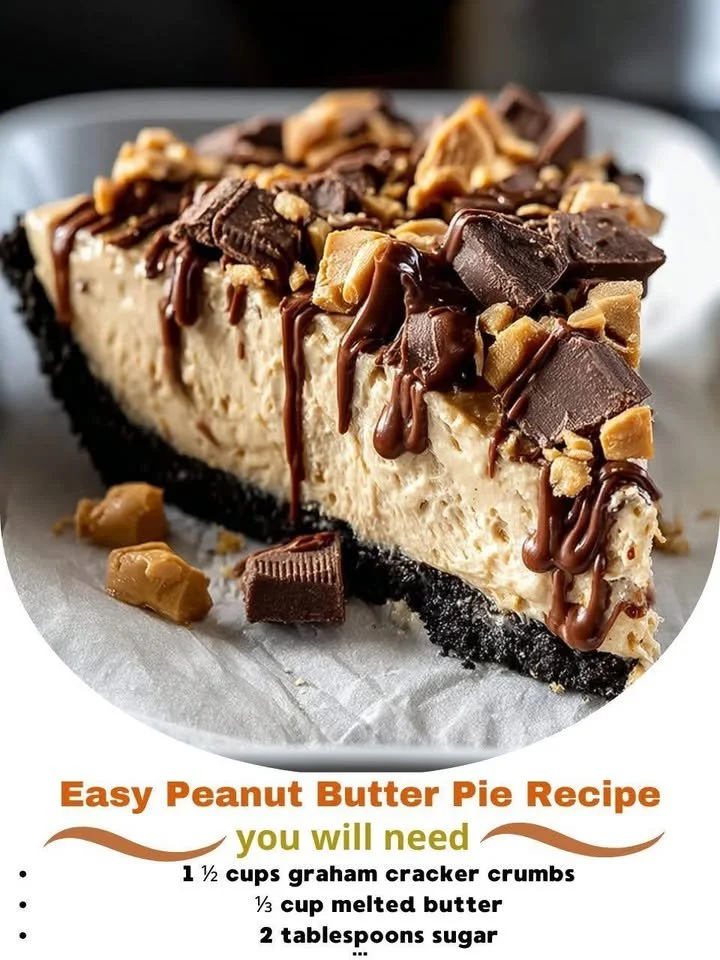
Welcome to my kitchen! Today, I’m excited to share one of my all-time favorite desserts: Easy Peanut Butter Pie. This creamy, dreamy delight is perfect for any occasion—whether it’s a family gathering, a potluck, or simply indulging on a cozy weekend at home. The rich flavor of peanut butter paired with a light, fluffy filling is enough to make anyone’s taste buds dance. Let’s dive into making this scrumptious treat!
Why You’ll Love This Recipe
What I love most about this Easy Peanut Butter Pie is how quick and simple it is to prepare, yet the taste is absolutely divine! With no baking involved, it’s a hassle-free option that’s sure to impress friends and family alike. Plus, the combination of rich peanut butter and sweet whipped cream makes it a crowd-pleaser that everyone will love, including the kids! Trust me, once you try this pie, you’ll be thinking about it long after the last piece is gone. (See the ingredients in the next page below…)
Ingredients
– 1 pre-made graham cracker pie crust
– 1 cup creamy peanut butter
– 1 cup powdered sugar
– 1 cup heavy whipping cream
– 1 teaspoon vanilla extract
– ½ cup chocolate syrup (optional, for drizzling)
Equipment Needed
– Mixing bowls
– Electric mixer or whisk
– Rubber spatula
– Measuring cups and spoons
– Pie dish (for serving, if not using a store-bought pie crust)
Step-by-Step Instructions
To start, I gather all my ingredients and equipment to make things smooth and easy. First up, in a mixing bowl, I blend the creamy peanut butter and powdered sugar until well combined. It should come together into a thick, luscious mixture. Once that’s done, I set that bowl aside and whip up the heavy cream in a separate bowl until it forms soft peaks. The smell of the whipped cream—sweet and inviting—is one of my favorite parts of the process! (See the next page below to continue steps…)
Next, I gently fold the whipped cream into the peanut butter mixture. This step is crucial, as it adds that light, airy texture to the filling. I take my time to mix, using a rubber spatula to carefully incorporate the cream without deflating it. Once combined, I pour this delightful filling into my pre-made graham cracker crust, smoothed out evenly.
Now, the hardest part—waiting! I pop the pie in the refrigerator to chill for at least four hours. This allows all those beautiful flavors to meld together, and the pie to set to a perfect slice-able consistency. I often find myself peeking into the fridge, the anticipation building as the aroma of peanut butter wafts through my kitchen.
When it’s finally time to serve, I like to drizzle a bit of chocolate syrup on top for an extra layer of indulgence. You can also add some chopped peanuts or a sprinkle of sea salt to enhance the flavor. Slice, serve, and watch as everyone dives into this peanut butter paradise—trust me, it’ll be gone in a flash!
Pro Tips for Best Results
One of my best tips is to make sure your heavy cream is super cold before whipping it. I’ve tested it a few ways and found that starting with cold cream results in fluffier, more stable whipped cream. Sometimes I even chill my mixing bowl; it’s a little extra effort that pays off!
Another thing I discovered during my pie-making adventures is to fold gently but thoroughly. It can be tempting to rush through this step, but taking your time will ensure that the mixture stays light and fluffy, making every bite of your pie a delight.
Lastly, if you want to enhance the peanut butter flavor even more, consider adding a pinch of salt to your peanut butter mixture. It really makes the sweetness pop and balances the richness of the pie perfectly!
Common Mistakes to Avoid
One mistake I’ve made in the past is using natural peanut butter instead of creamy peanut butter. While I adore natural peanut butter for spreading on toast, its oily texture can create a different consistency in the pie filling. Stick to classic creamy peanut butter for the best results! (See the next page below to continue…)
Another common issue is over-whipping the heavy cream. It’s easy to do, especially if you step away for just a minute. If you whip it too much, you’ll end up with butter instead of the fluffy cream you want. I always keep an eye on it and stop as soon as I see soft peaks form.
You should also avoid skipping the chilling step. I know the excitement can lead to impatience, but if you don’t let it chill, the pie won’t set correctly, and you’ll end up with a runny filling. Patience is key to achieving that perfect slice!
Lastly, not smoothing the filling out in the pie crust can make for a messy serving experience. Take the time to gently smooth it out to the edges; this little detail makes a big difference when serving.
Serving Suggestions
When it comes to enjoying this Easy Peanut Butter Pie, I find that a simple presentation goes a long way. A sprinkle of crushed peanuts or a dollop of extra whipped cream on top can take it to the next level! I like to serve it alongside fresh berries to add a burst of color and a contrasting tartness that complements the rich flavors.
For a more indulgent treat, I often recommend pairing each slice with a scoop of vanilla ice cream. The creaminess of the ice cream contrasts beautifully with the dense peanut butter filling. Honestly, there’s no such thing as too much peanut butter in my world!
Finally, don’t be shy about storing leftovers (if there are any!). This pie tastes just as delightful the next day, so I always encourage my friends to take a slice home with them. It’s an excellent make-ahead dessert that keeps well in the fridge!
Variations & Customizations
This Easy Peanut Butter Pie is such a versatile recipe. If you want to switch things up, you could try using crunchy peanut butter instead of creamy for added texture. I did this once, and the delightful crunch added a fun twist to each bite!
Another idea is to switch out the graham cracker crust. I’ve experimented with Oreo and chocolate cookie crusts, and they add an amazing chocolatey flavor that pairs beautifully with the peanut butter filling. There’s something about chocolate and peanut butter that’s simply irresistible!
If you’re looking to lighten things up a bit, I’ve had success utilizing Greek yogurt instead of some of the heavy cream. It substitutes well without sacrificing too much flavor, adding a touch of tang that works beautifully with the sweetness of the pie.
How to Store, Freeze & Reheat
Storing your Easy Peanut Butter Pie is super simple! Just cover it with plastic wrap and pop it in the refrigerator. It’ll stay fresh for up to a week, but it’s so good, I doubt it’ll last that long in your house!
If you want to prepare it ahead of time, you can freeze it as well. Just ensure it’s wrapped tightly in plastic wrap or aluminum foil. When I do this, I let it thaw in the fridge overnight before serving to keep that creamy texture intact.
Reheating? Not necessary for this pie! It’s best enjoyed chilled. If you happen to have leftovers, they make for a fabulous grab-and-go treat right from the fridge.
Conclusion
And there you have it! A delicious, Easy Peanut Butter Pie that’s bound to be a hit every time. Whether you’re sharing it with family and friends or keeping it all to yourself (I won’t judge!), I hope this recipe brings as much joy to your kitchen as it has to mine. Happy baking, and enjoy each creamy, peanut buttery bite!