
I also learned not to skip chilling the crust before adding the filling. A chilled base prevents the layers from mixing together.
Finally, avoid rushing the chilling time at the end. Cheesecake needs time to set properly so it slices neatly.
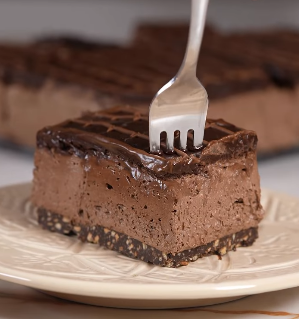
Serving Suggestions
When I serve this chocolate cheesecake, I like slicing it into neat squares or wedges so the layers are clearly visible.
Sometimes I add a sprinkle of cocoa powder or chocolate shavings on top for a simple decorative finish.
For a more indulgent presentation, I also like serving it with whipped cream or fresh berries on the side.
Variations & Customizations
One variation I enjoy is adding crushed hazelnuts to the biscuit base. The nutty flavor pairs beautifully with the chocolate layers.
I’ve also experimented with adding espresso powder to the filling. It enhances the chocolate flavor without making the cheesecake taste like coffee.
Another version I like is topping the ganache with chocolate chips or grated dark chocolate for extra texture.
How to Store, Freeze & Reheat
Whenever I make this cheesecake, I store it in the refrigerator in an airtight container. It stays fresh for about four days.
If I want to keep it longer, I freeze individual slices wrapped tightly in plastic wrap and stored in a freezer-safe container.
To serve frozen cheesecake, I simply let it thaw in the refrigerator for a few hours before eating.
Conclusion
Every time I make this Easy Chocolate Cheesecake, I’m reminded how satisfying simple homemade desserts can be. The chocolate biscuit base, creamy cheesecake filling, and glossy ganache topping come together to create a dessert that feels rich and indulgent. I love how easy it is to prepare while still looking impressive on the table. Once you try it, this chocolate cheesecake might become one of your favorite no-fuss desserts too.