
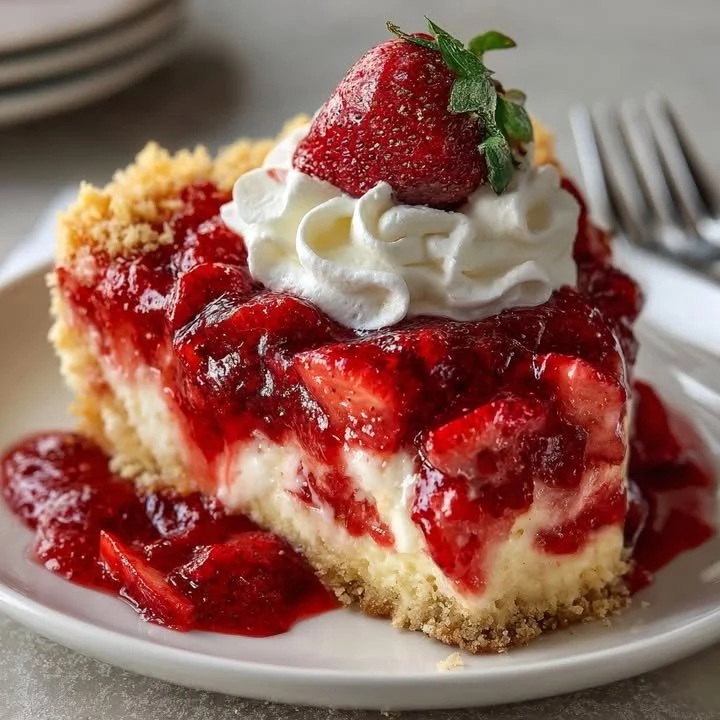
I can hardly contain my excitement as I share my favorite dessert recipe with you: Donna Wood’s Strawberry Cheesecake Dump Cake! This delightful creation has stolen the show at many family gatherings and potlucks in my kitchen. Not only is it a breeze to prepare, but its delightful layers of sweetness, creaminess, and fresh strawberry flavors truly make this dessert unforgettable. Grab your apron and join me in making this scrumptious treat!
Why You’ll Love This Recipe
I love this dessert so much because it’s incredibly easy to put together, making it a perfect choice for beginners and busy bakers alike. You really can’t go wrong with just dumping ingredients in a pan and letting the magic happen in the oven. The way the ingredients meld together creates a deliciously rich dessert that feels both homemade and special without any fuss. Plus, who can resist the sight of beautiful, glistening strawberries nestled in a creamy cheesecake layer? It’s practically a party on a plate! (See the ingredients in the next page below…)
Ingredients
- 1 box of yellow cake mix
- 1 cup of unsalted butter, melted
- 8 oz cream cheese, softened
- 1 cup powdered sugar
- 2 cups fresh strawberries, hulled and sliced
- 1 teaspoon vanilla extract
- 1/4 cup granulated sugar
- 1/4 teaspoon salt
- 1 cup sliced strawberries for garnish (optional)
Equipment Needed
- 9×13 inch baking dish
- Mixing bowls
- Hand mixer or whisk
- Rubber spatula
- Measuring cups and spoons
Step-by-Step Instructions
To start, preheat your oven to 350°F (175°C) and grease your 9×13 inch baking dish. In a large bowl, mix the softened cream cheese with the powdered sugar and the vanilla extract until smooth and creamy. This is where the magic begins! You’ll want to achieve a fluffy consistency so that it beautifully swirls with the strawberries later on. Then, in another bowl, combine the yellow cake mix and melted butter until crumbly. This will create a deliciously rich topping for your cheesecake layer. (See the next page below to continue steps…)
Next, spread the cream cheese mixture evenly across the bottom of your greased baking dish. I like to use a rubber spatula to ensure it’s all smooth and well-distributed. Now, sprinkle the sliced strawberries over this creamy layer, ensuring every bite gets a taste of that fresh fruit. Finally, take your crumbly cake mix and sprinkle it generously over the strawberries. It might be tempting to pack it down, but trust me, just let it sit lightly on top.
Now comes the best part—bake in the preheated oven for about 30-35 minutes or until the top is golden brown and the edges are bubbling. The smells that waft through my kitchen while this bakes are utterly delightful, making it hard to resist peeking in! Once it’s ready, allow it to cool for at least 15 minutes to set before digging in. Trust me; the wait will be worth it!
Pro Tips for Best Results
I’ve made this dump cake a few times, and I’ve learned that using fresh strawberries really elevates the flavor. Frozen strawberries can release too much moisture and may make your cake soggy, so fresh is best! I also recommend setting your cream cheese out ahead of time to make mixing easier; nobody wants to wrestle with cold cream cheese in a bowl!
Another tip I’ve figured out is to play around with the amount of sugar in the cheesecake mixture. Depending on your sweet tooth, you might want to reduce or increase it slightly. I usually find that just a tad less powdered sugar complements the strawberries perfectly, allowing their flavor to really shine through.
Lastly, don’t skip letting the cake cool before serving. I know it’s tough to wait, but letting it sit not only allows the layers to meld beautifully, it also makes serving a whole lot easier. A warm slice may fall apart, while a cooled slice will cut perfectly!
Common Mistakes to Avoid
One common mistake that I’ve made in the past is using too much butter when mixing it with the cake mix. While it might seem harmless, too much butter can lead to a greasy texture that overpowers the other flavors. Stick to the one cup mentioned in the recipe for the best results! (See the next page below to continue…)
Another error I learned to avoid is not spreading the filling evenly. It can be tempting to just plop it in and call it a day, but taking the time to smooth it out ensures every bite gets that creamy, cheesecake goodness. I recommend using a rubber spatula for this task; it works wonders!
Lastly, be mindful of your baking time. While it might be easy to lose track of time chatting with friends in the kitchen, keep a close eye on your cake in the last few minutes of baking. You want that golden-brown top, but you don’t want to overbake it. A perfectly baked dump cake is everything!
Serving Suggestions
When it comes to serving this delightful dump cake, a dollop of whipped cream on top is always a crowd-pleaser in my house. The light, fluffy cream balances the richness of the cake and adds a lovely touch to each bite. Sometimes, I drizzle a little chocolate syrup or even caramel for an extra indulgence—because why not?
For presentations, I love to add fresh mint leaves alongside a slice on each plate. It not only looks beautiful but also gives a lovely fresh aroma that enhances the entire dessert experience.
And, let’s be honest: this cake is also perfect for breakfast! Don’t judge; if you can have pancakes, why not a slice of strawberry cheesecake dump cake? It pairs perfectly with a steaming cup of coffee or tea, making an indulgent start to your day!
Variations & Customizations
If you’re looking to switch it up, you can easily substitute the strawberries with other fruits! I’ve had great results with blueberries and raspberries, creating a different flavor profile that’s just as delicious. If you enjoy a blend of flavors, you could even mix a combination of fruits to create a berry dump cake that your guests will adore!
For those who love a hint of spice, consider adding a teaspoon of cinnamon to the cake mix. This subtle enhancement brings a wonderful warmth that really complements the sweet fruity layers. I’ve made this with cinnamon, and it turned out deliciously cozy!
Lastly, if you’re feeling adventurous, swap out the yellow cake mix for a chocolate cake mix. Yes, chocolate and strawberries make a fantastic pairing! This twist turns the dessert into a whole new experience while still being easy to prepare.
How to Store, Freeze & Reheat
Storing leftover strawberry cheesecake dump cake is super easy. Just cover it tightly with plastic wrap or foil and pop it in the fridge, where it can last for about 3-4 days. I love to pull it out in the afternoon for a sweet treat!
If you want to freeze some slices for later, I recommend cutting the cake into individual portions and wrapping each slice tightly in plastic wrap before placing them in a freezer-safe container. This way, you can enjoy a piece whenever that sweet tooth hits! It should last in the freezer for up to 3 months, although I can guarantee it won’t stick around that long.
When you’re ready to enjoy it again, you can reheat a slice in the microwave for about 20-30 seconds, or until warmed to your liking. Just be careful not to overheat it, as it can quickly become too soft. Enjoying it slightly warm brings back those cozy feelings from when you first baked it!
Conclusion
I hope you’re as excited to try Donna Wood’s Strawberry Cheesecake Dump Cake as I was when I first dove into this recipe! It’s a delightful treat that is sure to bring smiles to your family and friends. Whether you’re making it for a special occasion or just because, this cake will always warm your heart. Happy baking!