
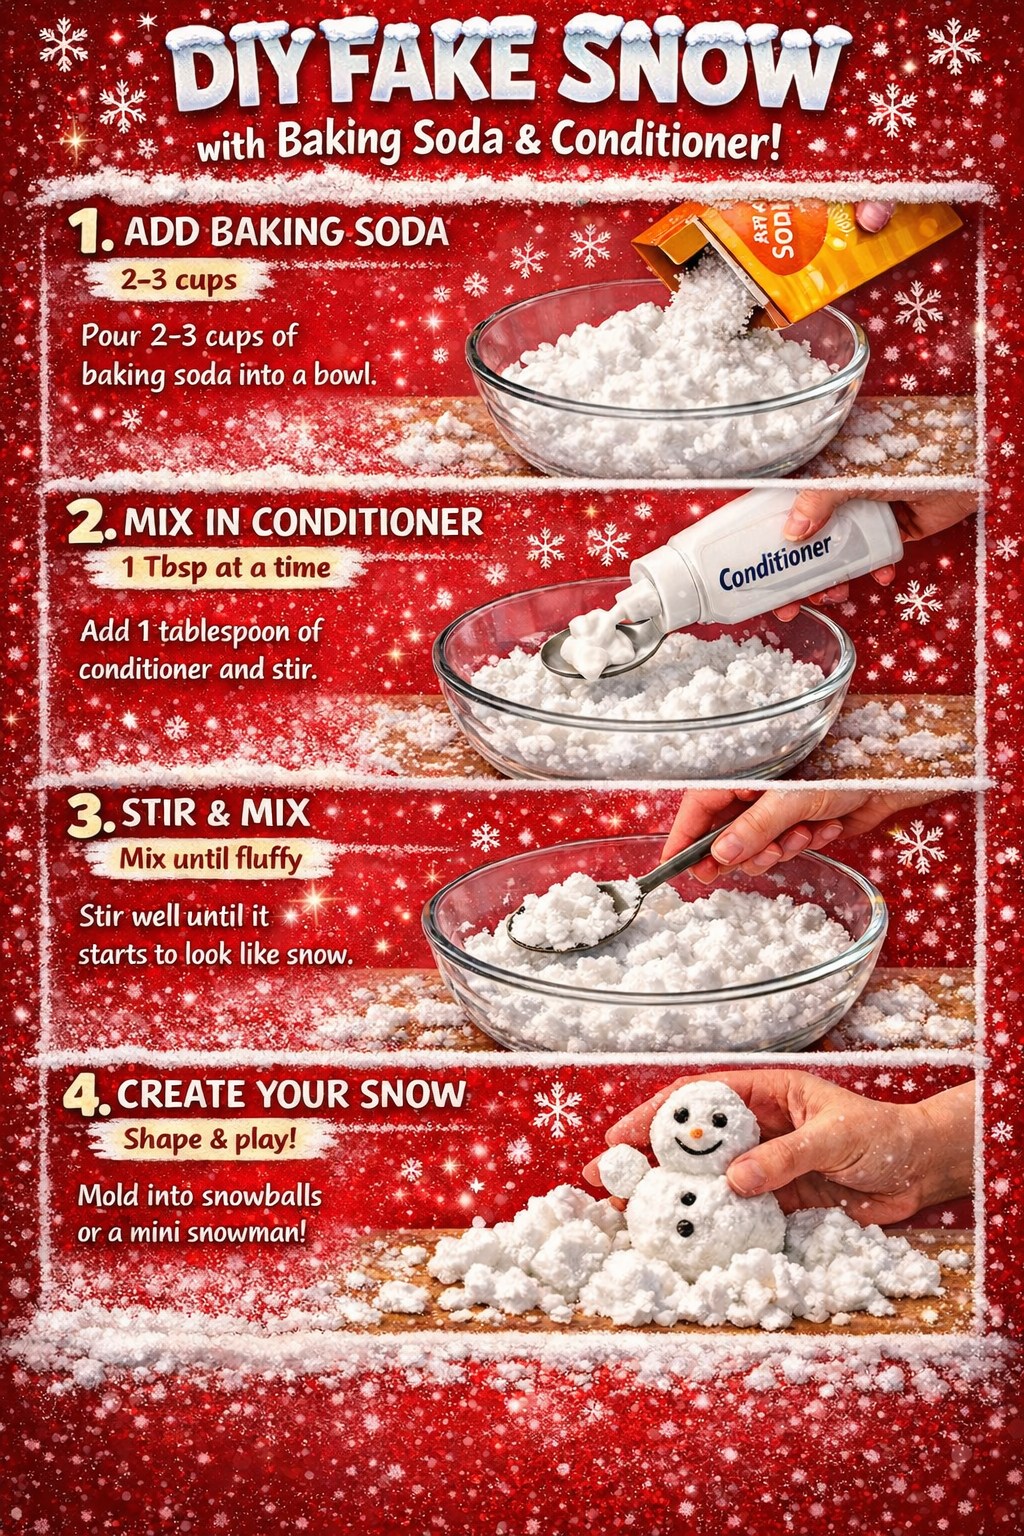
Once you’ve hit that perfect consistency, the play begins! Dump your “snow” onto a tray or mat. We love to pack it into little cups to make snowy towers, roll it into a family of snowmen (using toothpicks for arms and beads for eyes), or just run our hands through it. It has this beautifully calming, cool temperature and a silky feel that’s incredibly relaxing. I often find myself playing with it long after the kids have moved on, shaping little snowy landscapes on the tray.
Pro Tips for Best Results
The type of conditioner matters more than you think. I’ve tested this with thick, creamy conditioners and runny, watery ones. A thick, white conditioner (I always grab a cheap bottle of coconut-scented stuff) gives you the best texture and the most realistic bright white color. A thin, clear conditioner can make the snow feel wetter and look a bit greyish. The scent is a bonus—it makes the whole experience smell clean and fresh.
For an even more authentic chilly feel, pop your baking soda in the freezer for 30 minutes before you start. This little trick was a game-changer. The snow will come out of the bowl noticeably cool, just like the real thing. It adds a whole other layer of sensory magic, especially for little ones who are fascinated by temperature. It’s a simple step that elevates the entire experience from cute craft to memorable winter simulation.
If you’re planning this for a group or party, mix your base batches in advance, but keep them on the drier side. You can set up a “snow station” with bowls of the dry mix, a bottle of conditioner, and spoons, and let each child customize their own snow texture. It becomes an interactive science experiment and keeps the snow from becoming one giant, over-mixed, soggy blob before everyone gets a turn.
Common Mistakes to Avoid
The biggest mistake is adding the conditioner too quickly. I made this error during my first attempt, thinking it would speed things up. What I got was a clumpy, paste-like substance that stuck to everything and required a lot of extra baking soda and patience to fix. The slow, tablespoon-by-tablespoon integration is crucial. It allows you to control the texture at every stage and stop right at that perfect “packable powder” moment. (See the next page below to continue…)